1.安裝 uwsgi
pip3 install uwsgi2.第一個wsgi程序,首先創建個foobar.py文件
def application(env, start_response):
    start_response('200 OK', [('Content-Type','text/html')])
    return [b"Hello World"]
3.在8000端口上面部署(前一章已經把8000端口對外開放了)
在foobar.py所在目錄運行下面的語句
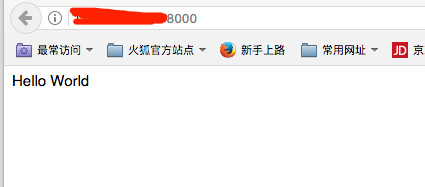
uwsgi --http :8000 --wsgi-file foobar.py然后通過瀏覽器訪問服務器的8000端口:
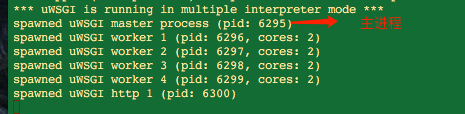
4.多進程,線程配置
可以通過--processes 和 --threads 來配置多個進程和線程
uwsgi --http :9090 --wsgi-file foobar.py --master --processes 4 --threads 2
這個會創建4個進程,每個進程有2個線程,還有一個主進程(在其他進程掛掉后,會重新啟動掛掉的進程)
和一個http的router
5.鏡像--暫時沒用到
One important task is monitoring. Understanding what is going on is vital in production deployment. The stats subsystem allows you to export uWSGI’s internal statistics as JSON:
uwsgi --http :9090 --wsgi-file foobar.py --master --processes 4 --threads 2 --stats 127.0.0.1:9191
Make some request to your app and then telnet to the port 9191, you’ll get lots of fun information. You may want to use “uwsgitop” (just pip install it), which is a top-like tool for monitoring instances.
6.部署在Django上面
django的應用,前一章已經創建過了,在那個應用的基礎上來進行部署
在manger.py所在目錄
uwsgi --http ***.***.***.***:8000 --chdir /home/aslan/myblog/ --wsgi-file myblog/wsgi.py --master --processes 4 --threads 2 --stats 127.0.0.1:8080通過瀏覽器訪問8000端口可以正常訪問:

uwsgi --socket ***.***.***.***:8000 --chdir /home/aslan/myblog/ --wsgi-file myblog/wsgi.py --master --processes 4 --threads 2 --stats 127.0.0.1:8080
--socket和 --http的區別是:
???
命令行太長了,官方也給出了一個簡單的方式就是使用配置文件:
創建一個user.ini文件
[uwsgi]
http = ***.***.***.***:8000
chdir = /home/aslan/myblog/
wsgi-file = myblog/wsgi.py  #這個文件是django創建應用時自動創建的
processes = 4
threads = 2
stats = 127.0.0.1:9001
然后通過下面的命令運行:
uwsgi user.ini可以實現和上面命令行一樣的效果
/home/aslan/myblog/myblog/wsgi.py是Django創建應用時創建的,如果你的應用里面沒有,說明你的Django的版本比較低了 < 1.4。現在我使用的是django 1.10