【Hexo搭建個人博客】:yilia主題配置(二) - 背景圖片
本文主要講述 Hexo-yilia 主題中,關于背景和圖片的相關配置。與前面一樣,使用主題: hexo-theme-yilia-plus
1.頭像與網站圖標
1.1.添加頭像和網站圖標
打開主題配置文件 _config.yml, 添加:
# 網站圖標
favicon: /img/favicon.ico
# 你的頭像url
avatar: /images/avatar.jpg
頭像地址可以分兩種:
- 本地
- 根目錄中的
source目錄:可以在source目錄下建立images文件夾,存放圖片 - 主題目錄的
source目錄:建立img文件夾,存放圖片
- 根目錄中的
- 網絡
- 配置后寫鏈接地址
1.2.頭像旋轉
修改 yilia-plus\source\main.b8fa34.css 文件 (原ylia主題是 main.0cf68a.css 文件)
文本編輯器 Ctrl+F , 搜索 .left-col #header .profilepic img ,修改為:
.left-col #header .profilepic img {
    width: 100%;
    height: 100%;
    background: #88acdb;
    border-radius: 50%;
    border: 0;
    -webkit-transition: -webkit-transform 1s ease-out;
    -moz-transition: -moz-transform 1s ease-out;
    -o-transition: -o-transform 1s ease-out;
    -ms-transition: -ms-transform 1s ease-out
}

.left-col #header .profilepic img.show {
    width: 100%;
    height: 100%;
    opacity: 1
}

.left-col #header .profilepic img:hover {
    transform: rotate(1turn)
}
2.左側邊欄配置
同上,可以在css文件中設置,這里
yilia-plus做了靈活的配置。
2.1.頭像上方動圖
- 打開主題配置文件
themes\yilia-plus\_config.yml,找到style配置項,作如下修改:
style:
# 左側頭像板塊動態圖效果
  gif:
    # 是否啟用
    enable: true
    # 自定義背景圖路徑(默認可以不設置,提供默認背景圖biubiubiu.gif)
    path: 這里是gif圖片地址
- 打開left-col.ejs文件,修改配置:
<% var defaultBg = '#4d4d4d'; %>
<% var defaultBgImg = '/img/biubiubiu.gif'; %>
<% var overlayBgImg= theme.style.gif && theme.style.gif.enable && theme.style.gif.path ? theme.style.gif.path : defaultBgImg; %>

<div class="overlay" style="background: <%= theme.style && theme.style.header ? theme.style.header : defaultBg %>;<% if (theme.style.gif && theme.style.gif.enable){ %>background: url('<%- url_for(overlayBgImg) %>') no-repeat ;<%}%> z-index:-1"></div>
2.2.左側邊欄背景
- 打開主題配置文件
themes\yilia-plus\_config.yml,找到style配置項,作如下修改:
style:
  # 頭像上面的背景顏色 e.g. linear-gradient(rgba(255, 255, 255, 0.5), rgba(255, 255, 255, 0.5))
  # header: '#D3D1DC'
  header: 'rgba(0,0,0,0.5)' #設置背景透明度,不然頭像上方是默認色
  #左側頭像板塊的背景顏色(IE兼容設置:filter:alpha(opacity=80);)
  left_ground:
    enable: true
    default: 'rgba(0,0,0,0.5)'
    url: 'url(這里是圖片鏈接) no-repeat 100%;background-size:cover;opacity:0.8;filter:alpha(opacity=80);'
- 打開布局文件
themes\yilia-plus\layout\layout.ejs,找到<div class="left-col" ... </div>,改成:
<div class="left-col" q-class="show:isShow"  style="background: <%= theme.style && theme.style.left_ground.enable && theme.style.left_ground.url ? theme.style.left_ground.url : theme.style.left_ground.default %>">
      <%- partial('_partial/left-col', null, {cache: !config.relative_link}) %>
    </div>
- 打開樣式文件
yilia-plus\source\main.b8fa34.css,搜索.left-col,修改背景顏色如下:
.left-col {
    /*background: #fff;*/
    background-color: linear-gradient(rgba(255, 255, 255, 0.5), rgba(255, 255, 255, 0.5));
    width: 300px;
    position: fixed;
    opacity: 1;
    transition: all .2s ease-in;
    height: 100%;
    z-index: 999;
    overflow: hidden;
    overflow-y: auto;
    margin-bottom: 15px
}
2.3.右滑板塊背景
打開主題配置文件 themes\yilia-plus\_config.yml,找到 style 配置項修改 slider:
style:
  # 右滑板塊背景
  slider: 'linear-gradient(200deg,#ccc,#000)'
可以根據自己喜好調整
2.4.背景音樂插件
插入音樂視頻前,先安裝插件:
npm install hexo-tag-dplayer --save
npm install hexo-tag-aplayer --save
-
這里用網易云插件,打開一首歌,下方有
生成外鏈提示,如:
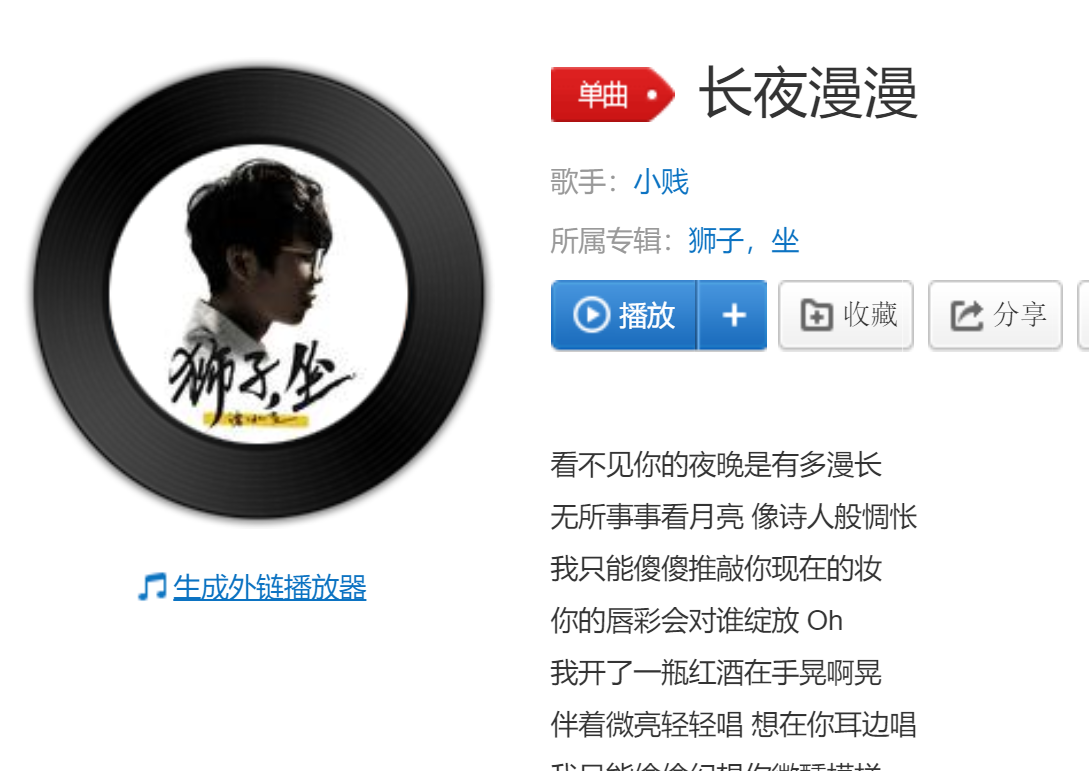
-
點擊該鏈接,然后復制生成的HTML代碼,配置時用。:
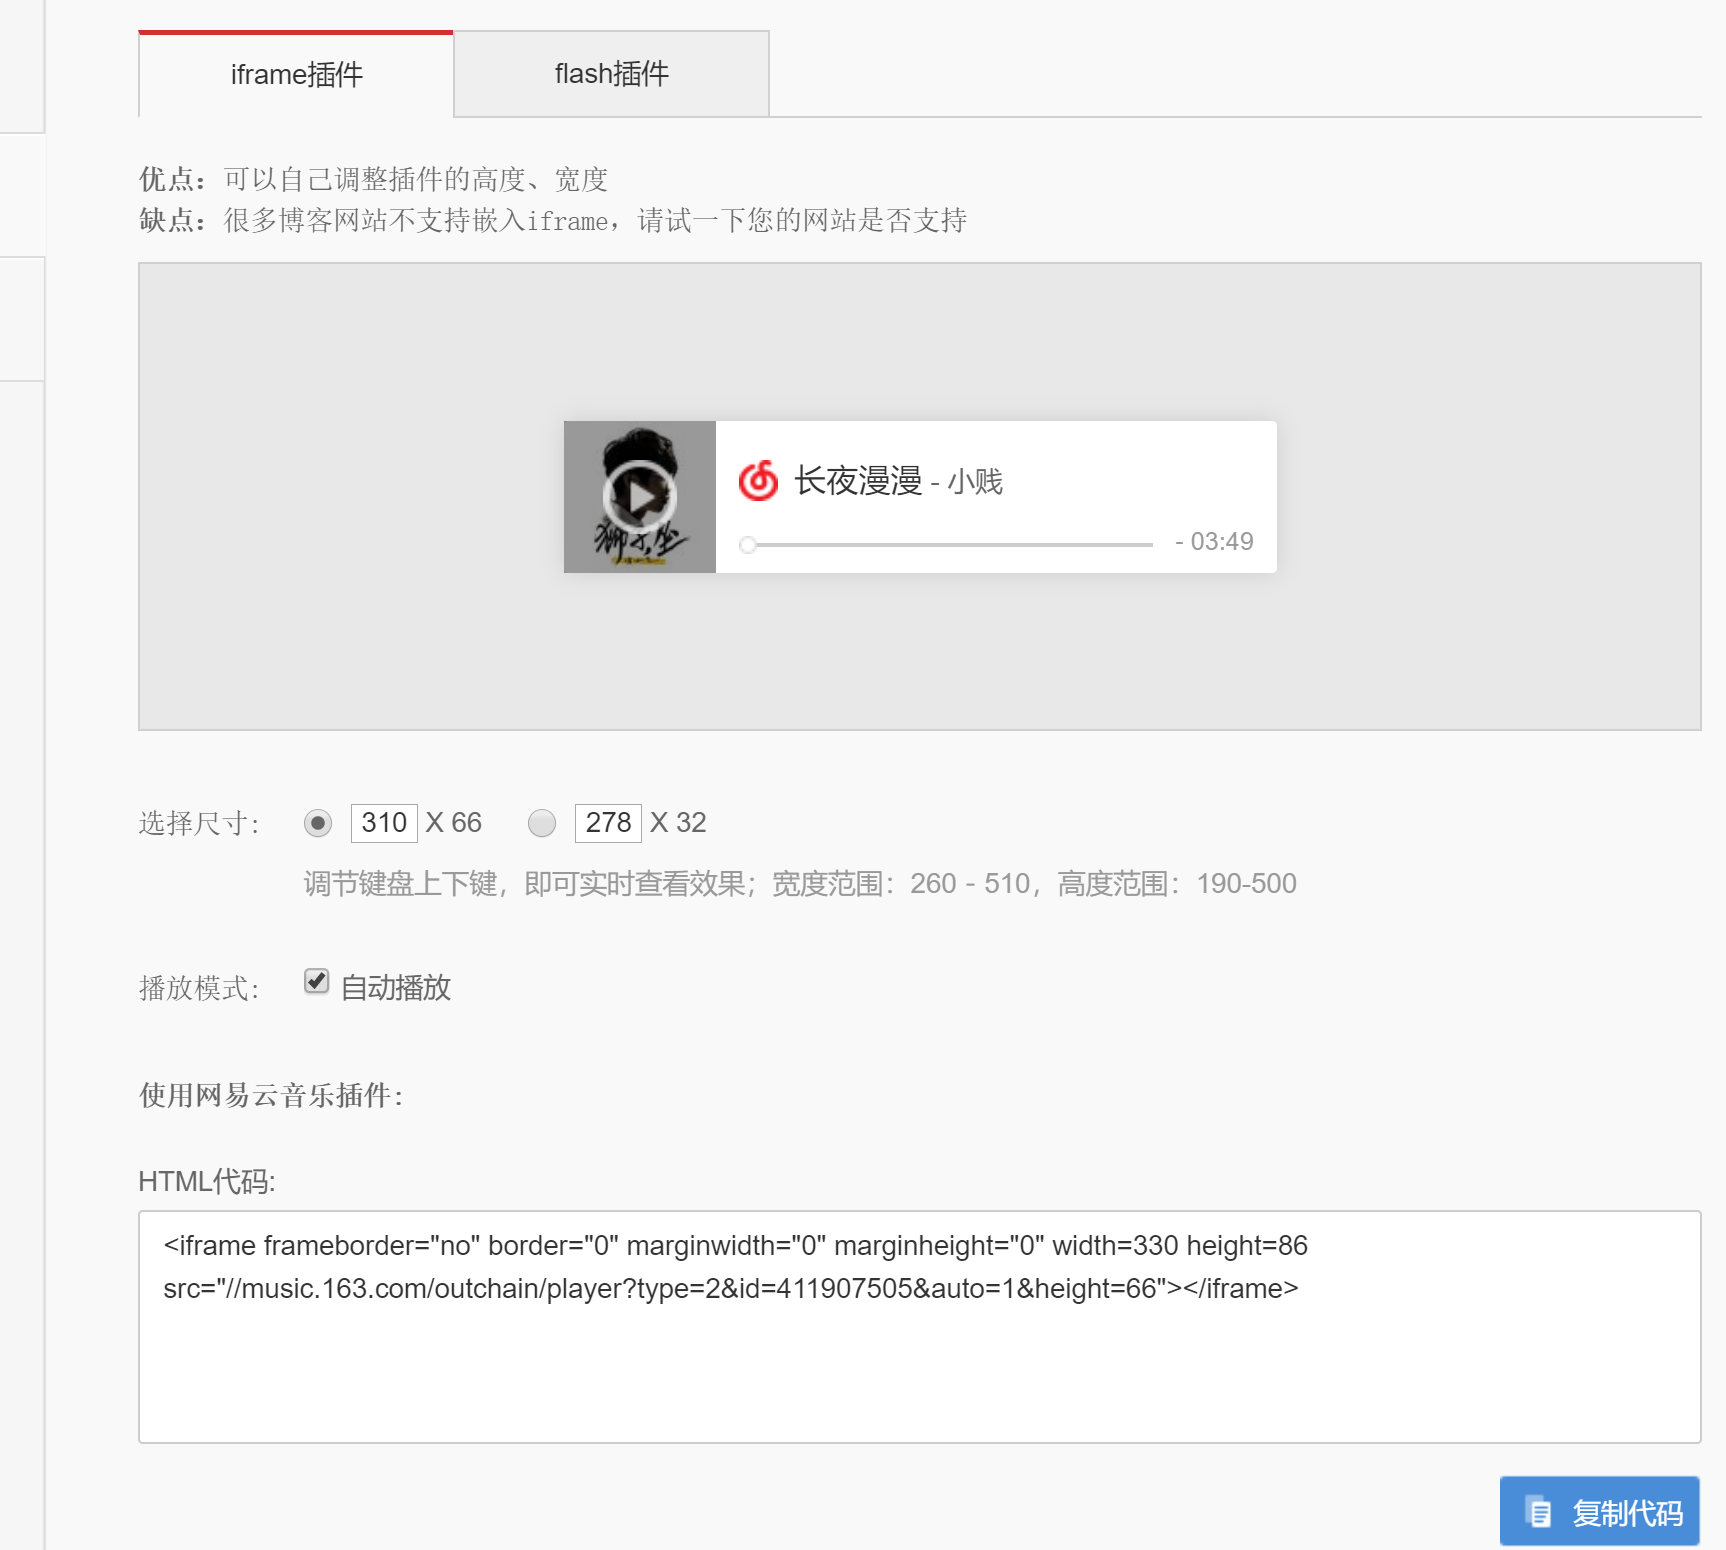
- 在主題配置文件
_config.yml找到
# 網易云音樂插件
music:
  enable: true
  # 播放器尺寸類型(1:短尺寸、2:長尺寸)
  type: 2
  id: 411907505  # 網易云分享的音樂ID(更換音樂請更改此配置項)
  autoPlay: true  # 是否開啟自動播放
  # 提示文本(關閉請設置為false)
  text: '寫一段說明文字'
- 在left-col.ejs文件中,添加配置:
<% if (theme.music && theme.music.enable){ %>
            <%# "網易云音樂插件" %>
            <%# "bottom:120px; left:auto;position:absolute;  width:85%" %>
            <% var defaultHeight = theme.music.type == 1 ? '32' : '66'; %>
            <% var defaultIframeHeight = theme.music.type == 1 ? '52' : '86'; %>
            <div style="margin-right:10px;margin-left:0; padding:5px 0">
                <iframe frameborder="no" border="0" marginwidth="0" marginheight="0" width="250" height="<%=defaultIframeHeight%>" src="//music.163.com/outchain/player?type=2&id=<%=theme.music.id||411907505%>&auto=<%=theme.music.autoPlay?1:0%>&height=<%=defaultHeight%>"></iframe>
            </div>
            <% if (theme.music.text || theme.music.text == null){ %>
                <% var musicText = ( theme.music.text == null || theme.music.text == true ) ? "默認說明文字" : theme.music.text; %>
                <p style="font-size: 12px;"><%-musicText%><p>
            <% } %>
        <% } %>
3.右邊正文背景
- 和左側邊欄修改類似,打開文件
themes\yilia-plus\_config.yml,找到style配置項,作如下修改:
style:
  # 正文的背景顏色(IE兼容設置:opacity:0.8;filter:alpha(opacity=80);)
  article_ground:
    enable: true
    default: 'rgba(25, 25, 25, 0)'  #設置背景透明度
    url: 'url(圖片鏈接地址) no-repeat 100%;background-size:cover;opacity:0.7;filter:alpha(opacity=70);'
- 打開布局文件
themes\yilia-plus\layout\layout.ejs,找到<div class="mid-col" ... >,修改:
<div class="mid-col" q-class="show:isShow,hide:isShow|isFalse" style="background: <%= theme.style && theme.style.article_ground.enable && theme.style.article_ground.url ? theme.style.article_ground.url : theme.style.article_ground.default %>">
- 如果想修改正文顯示部分的樣式,可以打開樣式文件
yilia-plus\source\main.b8fa34.css,搜索.article、.article-inner、.archives-wrap、.archives .archive-article-title等,修改字體、背景顏色:
.article {
    margin: 30px;
    position: relative;
    border: 1px solid #ddd;
    border-top: 1px solid #fff;
    border-bottom: 1px solid #fff;
    /*background: #fff;*/
    background: rgba(255,255,255,.5);
    transition: all .2s ease-in;
}
/*主頁*/
.article-inner {
    /*border-color: #d1d1d1;*/
    background-color: rgba(193, 194, 195,0.6);
}
.left-col {
    background-color: linear-gradient(rgba(255, 255, 255, 0.5), rgba(255, 255,255, 0.5));
    width: 300px;
    position: fixed;
    opacity: 1;
    transition: all .2s ease-in;
    height: 100%;
    z-index: 999;
    overflow: hidden;
    overflow-y: auto;
    margin-bottom: 15px
}
/*歸檔*/
.archives-wrap {
    position: relative;
    margin: 0 30px;
    padding-right: 60px;
    border-bottom: 1px solid #eee;
    /*background: #fff;*/
    background-color: rgba(236, 236, 236,0.6);
}
/*字體*/
.archives .archive-article-title {
    font-size: 16px;
    font-weight: bold;
    /*color: #333;*/
    /*transition: color .3s*/
    background: transparent;
    text-decoration: none;
    color: # af9;
}
4.動態線條背景
安裝插件: npm install --save canvas-nest.js,或直接顯式配置
- 主題配置,在文件
themes\yilia-plus\_config.yml中,添加:
# 動態線條效果,會向鼠標集中
canvas_nest:
  enable: true
  color: '206, 187, 95'
  pointColor: '249, 72, 97'
  opacity: '0.9'
  count: '136'
  zIndex: '-1'
- 找到文件
themes\yilia-plus\layout\layout.ejs,添加:
<% if (theme.canvas_nest){ %>
<script type="text/javascript"
color="0,0,255" opacity='0.9' zIndex="-1" count="300" src="<%- url_for('//cdn.bootcss.com/canvas-nest.js/1.0.0/canvas-nest.min.js') %>"></script>
<% } %>
5.雪花特效
- 在主題目錄
source/lib下新建snow.js文件,內容添加:
var snow = {
  info: {
    top: 0,
    left: 0,
    zIndex: 500,
    number: 70
  },
  down: function () {
    var f = window.innerWidth;
    var g = window.innerHeight;
    var d = document.createElement("canvas");
    d.style.position = "fixed";
    d.style.pointerEvents = "none";
    d.style.top = snow.info.top + "px";
    d.style.left = snow.info.left + "px";
    d.style.zIndex = snow.info.zIndex;
    d.width = f;
    d.height = g;
    document.body.appendChild(d);
    var c = [];
    for (var a = 0; a < snow.info.number; a++) {
      c.push({
        x: Math.random() * f,
        y: Math.random() * g,
        r: Math.random() * 4 + 1,
        n: Math.random() * 70
      })
    }
    var b = d.getContext("2d");
    var e = 0;
    setInterval(function () {
        b.clearRect(0, 0, f, g);
        b.fillStyle = "rgba(255, 255, 255, 0.6)";
        b.shadowBlur = 5;
        b.shadowColor = "rgba(255, 255, 255, 0.9)";
        b.beginPath();
        for (var j = 0; j < 70; j++) {
          var h = c[j];
          b.moveTo(h.x, h.y);
          b.arc(h.x, h.y, h.r, 0, Math.PI * 2, 0)
        }
        b.fill();
        e += 0.01;
        for (var j = 0; j < 70; j++) {
          var h = c[j];
          h.y += Math.cos(e + h.n) + h.r / 2;
          h.x += Math.sin(e) * 2;
          if (h.x > f + 5 || h.x < -5 || h.y > g) {
            c[j] = j % 3 > 0 ? {
              x: Math.random() * f,
              y: -10,
              r: h.r,
              n: h.n
            } : Math.sin(e) > 0 ? {
              x: -5,
              y: Math.random() * g,
              r: h.r,
              n: h.n
            } : {
              x: f + 5,
              y: Math.random() * g,
              r: h.r,
              n: h.n
            }
          }
        }
      },
      15)
  }
};
// yilia-plus主題已經集成了,可以直接用
- 布局文件
layout.ejs,添加:
<% if (theme.snow){ %>
  <script type="text/javascript" src="<%- url_for('lib/snow.js') %>"></script>
  <script type="text/javascript" src="<%- url_for('lib/jquery-2.1.4.min.js') %>"></script>
  <script>
    snow.down();
    $(window).resize(function() {
      $("canvas").css("z-index","500").remove();
      snow.down();
    });
  </script>
  <% } %>
- 最后更新一下主題配置文件
_config.yml:
# 飄雪特效
# https://github.com/MlgmXyysd/snow.js
snow: true
可以參考這篇博客: hexo多種特效配置
智能推薦
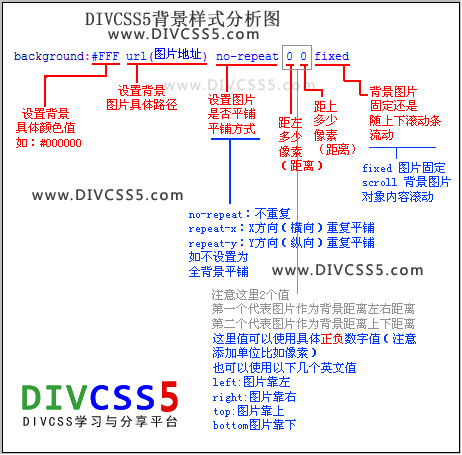
背景圖片
1、背景圖片語法 background-image:url() 引入背景圖片 background-repeat:no-repeat 設置背景圖片是否重復平鋪 background-position:left top 設置圖片的css背景定位,left代表靠左,top代表靠上 簡寫背景圖片語法: 2、背景圖片設置 Body{background:url(http://www.divcss5.com...
Ant Design Pro引入自定義主題及在主題文件中配置背景圖片
文章目錄 前言 分析 修改和引入主題文件 在主題文件中配置背景圖片 前言 開發環境:Ant Design Pro: 2.0 官方文檔:定制主題 Ant Design Pro官方提供了黑色主題和阿里云控制臺主題,可以參考文檔直接使用。 項目需求: 前端主題根據應用場景靈活匹配,在一個主題文件里能修改所有屬性。 背景圖片可以在主題文件中定制。 分析 2.0版本的Ant Design Pro默認主題路徑...


freemarker + ItextRender 根據模板生成PDF文件
1. 制作模板 2. 獲取模板,并將所獲取的數據加載生成html文件 2. 生成PDF文件 其中由兩個地方需要注意,都是關于獲取文件路徑的問題,由于項目部署的時候是打包成jar包形式,所以在開發過程中時直接安照傳統的獲取方法沒有一點文件,但是當打包后部署,總是出錯。于是參考網上文章,先將文件讀出來到項目的臨時目錄下,然后再按正常方式加載該臨時文件; 還有一個問題至今沒有解決,就是關于生成PDF文件...
電腦空間不夠了?教你一個小秒招快速清理 Docker 占用的磁盤空間!
Docker 很占用空間,每當我們運行容器、拉取鏡像、部署應用、構建自己的鏡像時,我們的磁盤空間會被大量占用。 如果你也被這個問題所困擾,咱們就一起看一下 Docker 是如何使用磁盤空間的,以及如何回收。 docker 占用的空間可以通過下面的命令查看: TYPE 列出了docker 使用磁盤的 4 種類型: Images:所有鏡像占用的空間,包括拉取下來的鏡像,和本地構建的。 Con...
猜你喜歡

requests實現全自動PPT模板
http://www.1ppt.com/moban/ 可以免費的下載PPT模板,當然如果要人工一個個下,還是挺麻煩的,我們可以利用requests輕松下載 訪問這個主頁,我們可以看到下面的樣式 點每一個PPT模板的圖片,我們可以進入到詳細的信息頁面,翻到下面,我們可以看到對應的下載地址 點擊這個下載的按鈕,我們便可以下載對應的PPT壓縮包 那我們就開始做吧 首先,查看網頁的源代碼,我們可以看到每一...


Linux C系統編程-線程互斥鎖(四)
互斥鎖 互斥鎖也是屬于線程之間處理同步互斥方式,有上鎖/解鎖兩種狀態。 互斥鎖函數接口 1)初始化互斥鎖 pthread_mutex_init() man 3 pthread_mutex_init (找不到的情況下首先 sudo apt-get install glibc-doc sudo apt-get install manpages-posix-dev) 動態初始化 int pthread_...

統計學習方法 - 樸素貝葉斯
引入問題:一機器在良好狀態生產合格產品幾率是 90%,在故障狀態生產合格產品幾率是 30%,機器良好的概率是 75%。若一日第一件產品是合格品,那么此日機器良好的概率是多少。 貝葉斯模型 生成模型與判別模型 判別模型,即要判斷這個東西到底是哪一類,也就是要求y,那就用給定的x去預測。 生成模型,是要生成一個模型,那就是誰根據什么生成了模型,誰就是類別y,根據的內容就是x 以上述例子,判斷一個生產出...
styled-components —— React 中的 CSS 最佳實踐
https://zhuanlan.zhihu.com/p/29344146 Styled-components 是目前 React 樣式方案中最受關注的一種,它既具備了 css-in-js 的模塊化與參數化優點,又完全使用CSS的書寫習慣,不會引起額外的學習成本。本文是 styled-components 作者之一 Max Stoiber 所寫,首先總結了前端組件化樣式中的最佳實踐原則,然后在此基...