React學習之旅Part8:通過例子和示意圖弄懂React的生命周期
標簽: 前端 react js javascript reactjs jsx
一、概述
什么是生命周期
每個組件的實例從創建到運行再到銷毀 在這個過程中的特定階段會觸發一系列的事件
這些事件就叫做組件的生命周期函數
React的組件生命周期函數
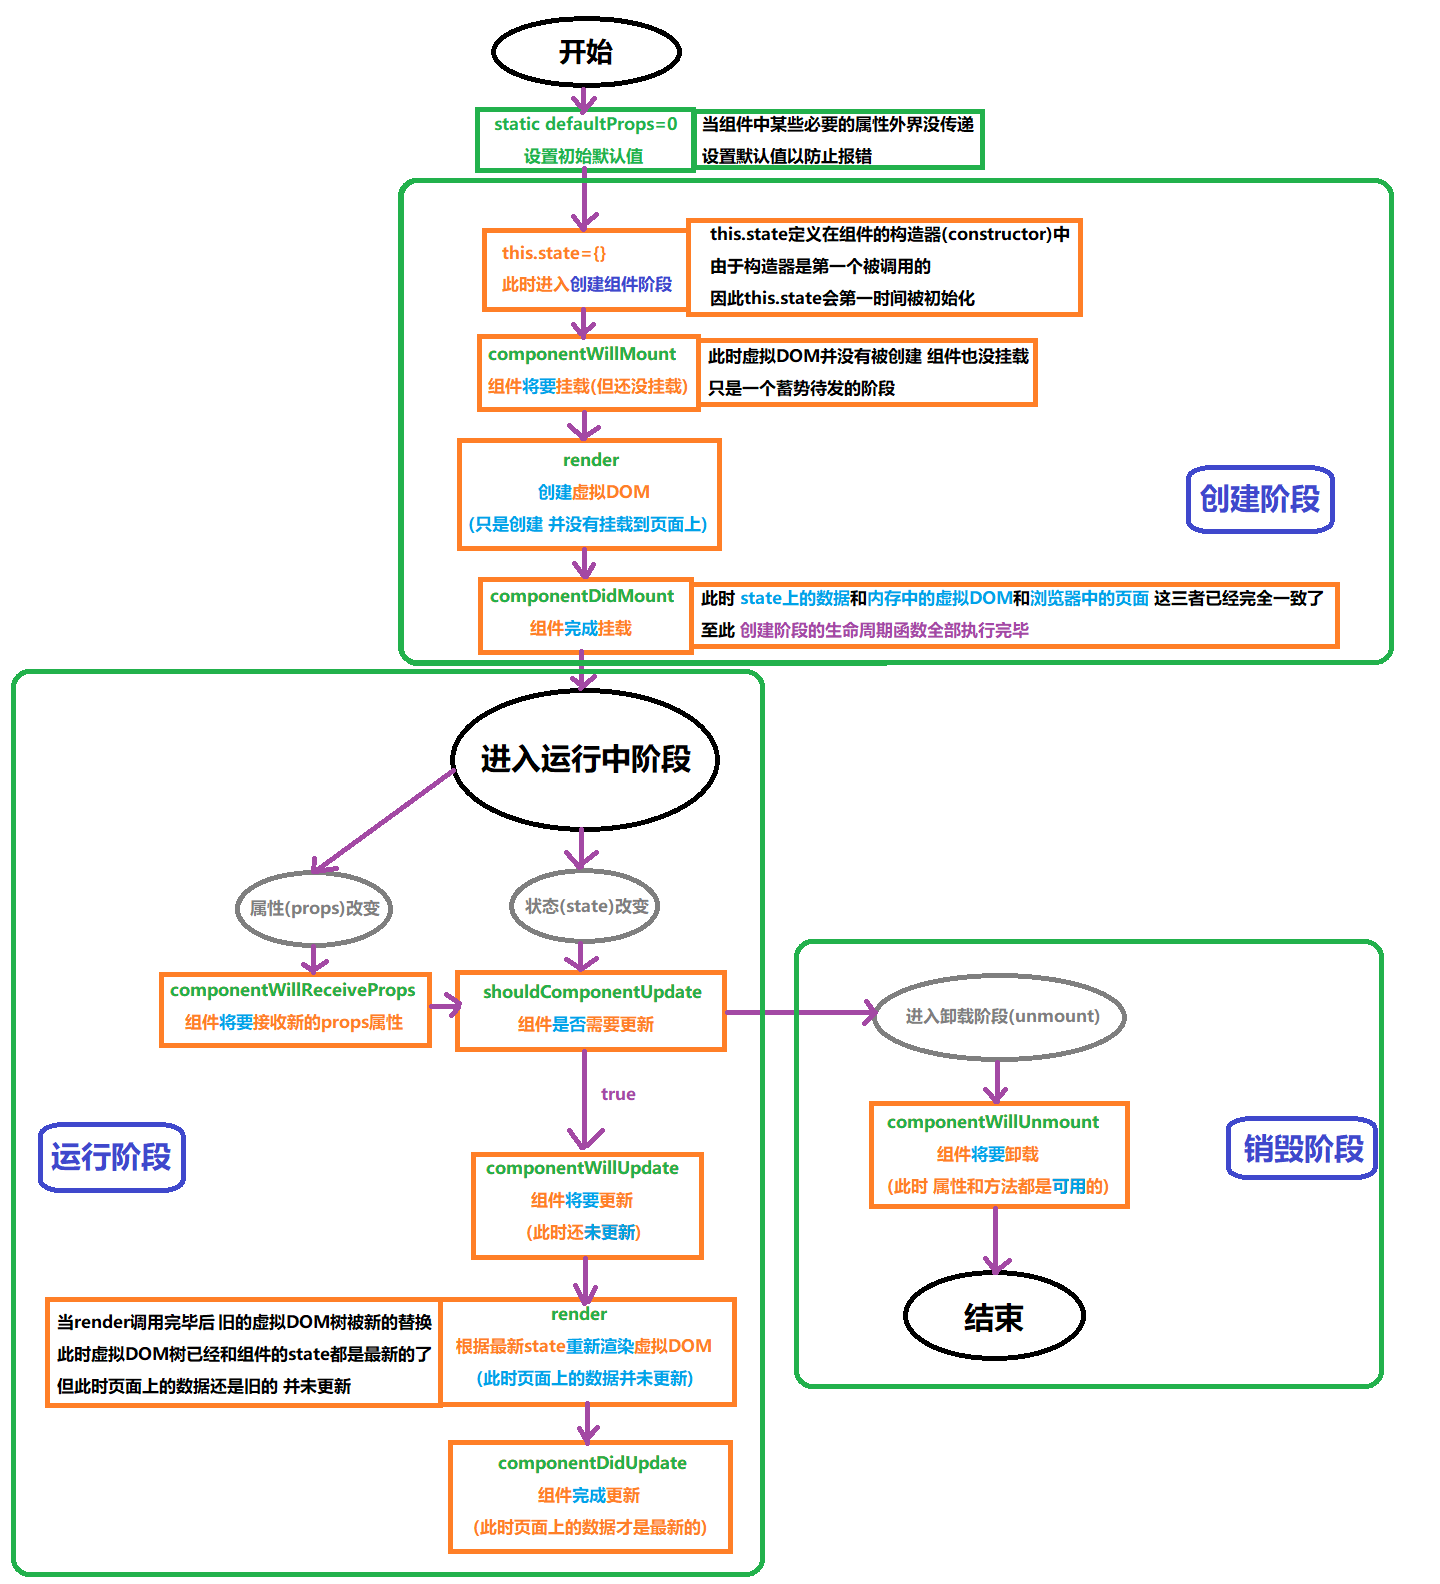
React組件的生命周期分為三部分:創建 運行 銷毀
組件創建階段
(在組件的整個生命周期中只會被執行一次)
- componentWillMount / 組件將要掛載
- render / 渲染虛擬DOM元素
- componentDidMount / 組件已經掛載
組件運行階段
(根據props屬性或state屬性的改變 有選擇性地執行0或多次
若屬性從創建開始從未改變 那就是0次
屬性改變了多少次 就執行多少次)
- componentWillReceiveProps / 組件將要接收屬性
- shouldComponentUpdate / 組件是否需要更新(判斷 返回true則渲染頁面 返回false則不渲染頁面 但數據依舊還是最新的)
- componentWillUpdate / 組件將要更新
- render / 渲染虛擬DOM元素
- componentDidUpdate / 組件完成更新
組件銷毀階段
(在組件的整個生命周期中只會被執行一次)
- componentWillUnmount / 組件將要解除掛載
二、從案例中看生命周期
========== 組件創建階段 ==========
componentWillMount() 和 render() 和 componentDidMount()
import React from 'react';
export default class Hello extends React.Component
{
constructor(props)
{
super(props);
this.state={
msg:"aaa"
}
}
// ★【componentWillMount】在組件即將掛載到頁面之前執行 此時頁面尚未掛載到頁面中 虛擬DOM也尚未創建
componentWillMount() // 相當于Vue的created生命周期
{
// 此時無法獲取到頁面上的任何元素
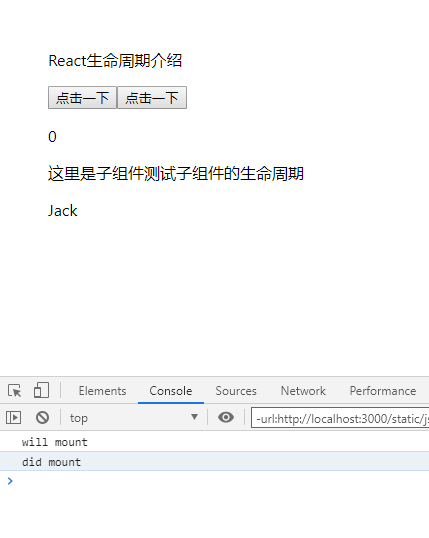
console.log(document.getElementById("myh3")) // 輸出undefined
console.log(this.props.initCount) // 1
console.log(this.state.msg) // aaa
this.testFunction();
}
// 在render的return執行之前 此時虛擬DOM尚未創建 頁面上是空的 無法獲取任何元素
render()
{
console.log(document.getElementById("myh3")) // 輸出undefined
return <div>
<h1>Counter Component</h1>
<input type="button" value="+1"/>
<hr/>
<h3 id="myh3">當前數值為{this.props.initCount}</h3>
</div>
// 在render執行完畢后 內存中就有了虛擬DOM 但頁面上依舊是尚未顯示
}
// ★【componentDidMount】在組件掛載到頁面上之后執行 此時頁面上已經有可見的DOM元素了
// 在該函數中可以放心地去操作頁面上的DOM元素了 且最早能操作DOM元素的生命周期就是這個
// 當執行完畢該函數后 即進入了運行中的狀態 該函數是創建階段的最后一個函數
componentDidMount() // 相當于Vue的mounted生命周期
{
console.log(document.getElementById("myh3")) // 能獲取到DOM 不再是undefined了
}
testFunction()
{
console.log("just test...")
}
}
========== 組件運行階段 ==========
shouldComponentUpdate 和 componentWillUpdate 和 render 和 componentDidUpdate
在這里以一個計數器作為案例:
import React from 'react'
import ReactDOM from 'react-dom'

import Counter from "@/components/Counter"

ReactDOM.render(<div>
    <Counter initCount={1}></Counter>
</div>,document.getElementById("app"))
(為節省篇幅 在此片段只專門列舉組件運行階段的生命周期函數)
import React from 'react';
import ReactPropTypes from "prop-types";// 提供常見的數據類型 用于類型校驗

export default class Counter extends React.Component
{
    constructor(props)
    {
        super(props);
        this.state={
            count:props.initCount
        }
    }

    render()
    {
    	// 在組件運行階段時 調用render函數 頁面上的DOM元素還是舊的
        console.log(this.refs.h3 && this.refs.h3.innerHTML)

        return <div>
            <input type="button" value="增加" onClick={() => {this.increaseCount()}}/>
            <hr/>
            <h3 id="myh3" ref="h3">當前數值為{this.state.count}</h3>
        </div>
    }

    increaseCount = () => {
        this.setState({
            count:this.state.count+1
        })
    }

    // ★【shouldComponentUpdate】判斷組件是否需要更新
    // 注:shouldComponentUpdate里獲取的數值有遲滯性(慢半拍) 通過this獲取的數據會是前一次的
	// 可以在shouldComponentUpdate的入參中定義nextProps和nextState以獲取props和state里的實時數據(入參的名稱可任意取)
    shouldComponentUpdate(nextProps,nextState)
    {
        // shouldComponentUpdate要求必須返回一個布爾值 作為組件更新生命周期是否繼續執行的參考
        // 若返回【true】 則繼續執行后面的生命周期
        // 若返回【false】 則不執行后面的生命周期了 若點擊增加按鈕 state中的值依舊會增加 但是后面的render函數并不會被調用 因此虛擬DOM和頁面上的數據都是舊的
        return true;
    }

    // ★【componentWillUpdate】在組件將要更新時執行 將要更新的意思就是已經確定要更新 但是還沒有實際的更新操作
    // 在進入該生命周期函數的時候 內存中的虛擬DOM和頁面上的DOM元素都還是舊的
    componentWillUpdate()
    {
        // 此時頁面上的DOM節點還是舊的 尚未更新
        console.log(this.refs.h3.innerHTML) // 比如頁面上展示的數值為3 那么此時這里打印的還是2
    }

	// ★【componentDidUpdate】在組件完成更新后執行 此時state中的數據和虛擬DOM和頁面上的DOM都已更新為最新的了
    componentDidUpdate()
    {
        console.log(this.refs.h3.innerHTML)
    }
}
componentWillReceiveProps
這里以一個父子組件作為案例:
import React from 'react';

// 父組件
export default class Parent extends React.Component
{
    constructor(props)
    {
        super(props);

        this.state={
            msg:"Old Parent Msg"
        }
    }

    render()
    {
        return <div>
            <h1>Parent</h1>
            <input type="button" value="修改" onClick={() => {this.changeMsg()}}/>
            <hr/>
            <Son parentMsg={this.state.msg}></Son>
        </div>
    }

    changeMsg = () => {
        this.setState({
            msg:"New Parent Msg"
        })
    }
}

// 子組件
class Son extends React.Component
{
    constructor(props)
    {
        super(props);
        this.state={}
    }

    render()
    {
        return <div>
            <h3>Son : {this.props.parentMsg}</h3>
        </div>
    }

    // ★【componentWillReceiveProps】在組件將要接收外界傳來的props時執行
    // 當組件第一次被渲染到頁面上的時候并不會觸發該生命周期函數
    // 只有 外界通過某些事件重新修改了傳入的props數據 才會觸發該生命周期函數
    componentWillReceiveProps(nextProps)
    {
        // 通過this.props獲得的并不是最新的props數據 而是被觸發后上一次的舊值
        // 若要獲取最新的屬性值 則需要在入參中定義nextProps 然后通過nextProps獲取
        console.log("舊值:"+this.props.parentMsg+" - 新值:"+nextProps.parentMsg)
    }
}
(組件銷毀階段不太方便演示 在此就不演示了)
生命周期函數的入參列表:
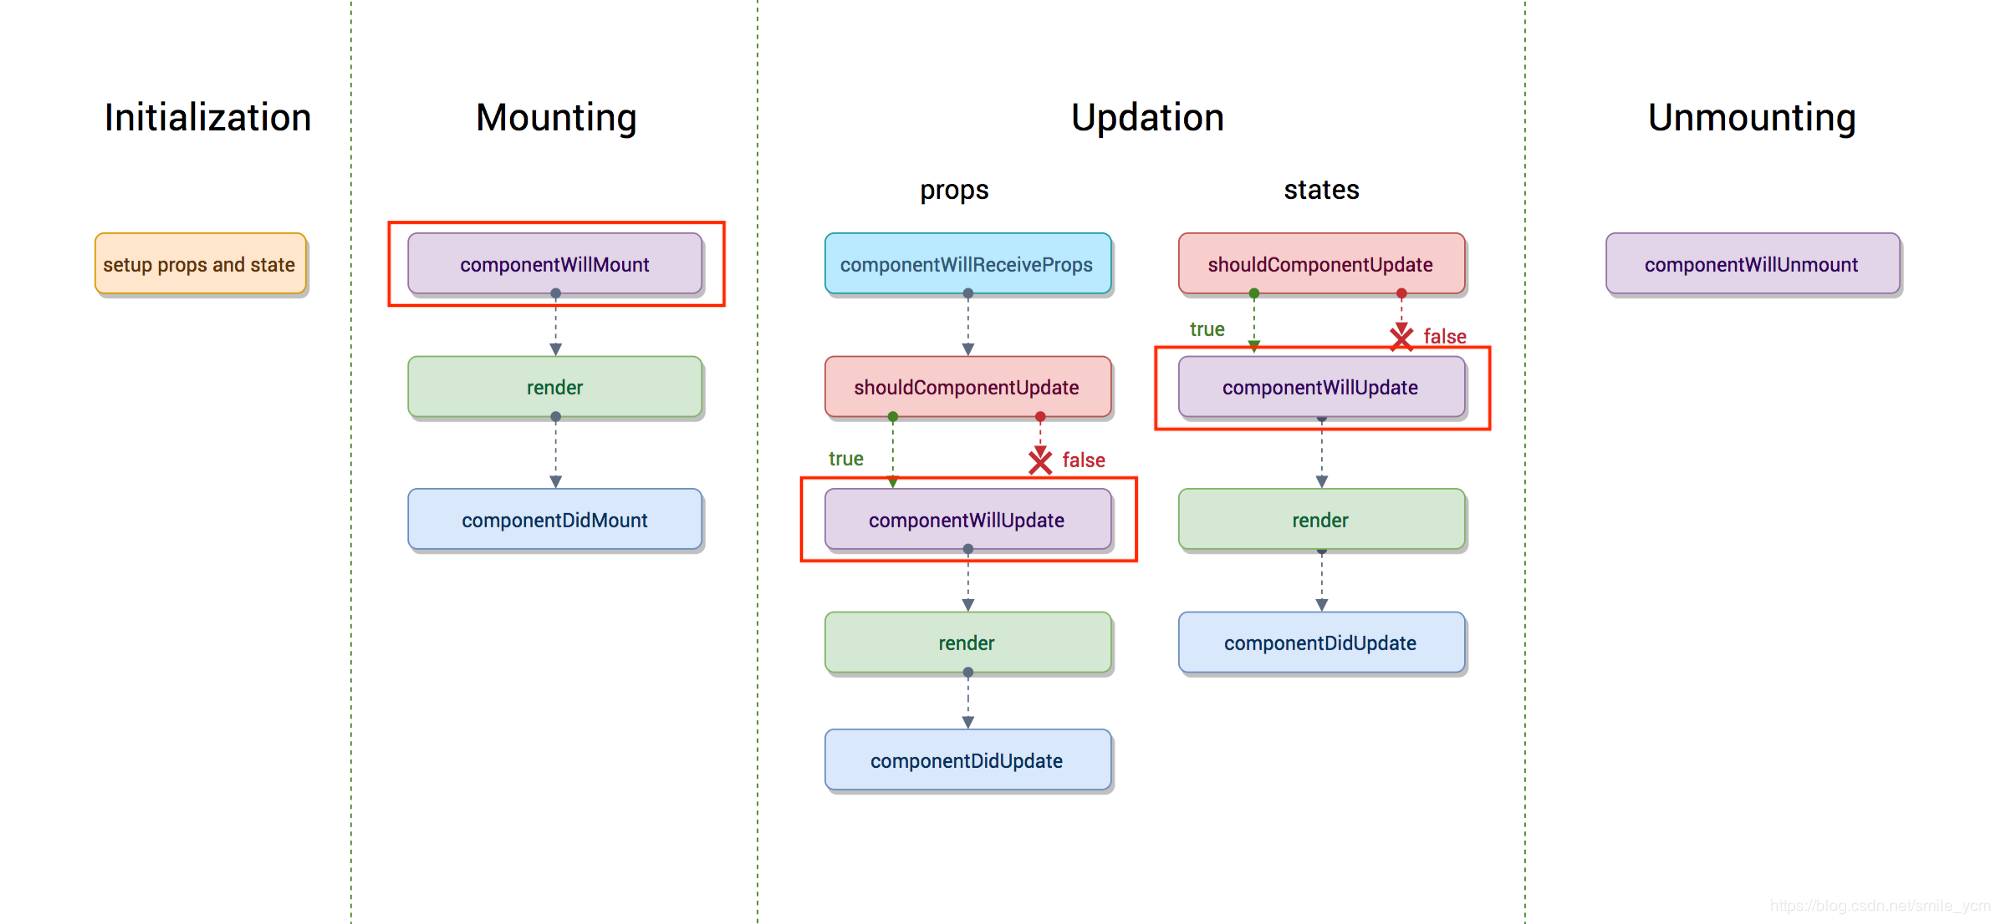
- Mounting創建:
- constructor()
- componentWillMount()
- render()
- componentDidMount()
- Updating更新:
- componentWillReceiveProps(nextProps) // 獲取最新props
- shouldComponentUpdate(nextProps, nextState) // 獲取最新屬性
- componentWillUpdate(nextProps, nextState) // 獲取最新屬性
- render()
- componentDidUpdate(prevProps, prevState) // 在全部更新完畢后 可以獲取舊的屬性(prev)
- Unmounting銷毀:
- componentWillUnmount()
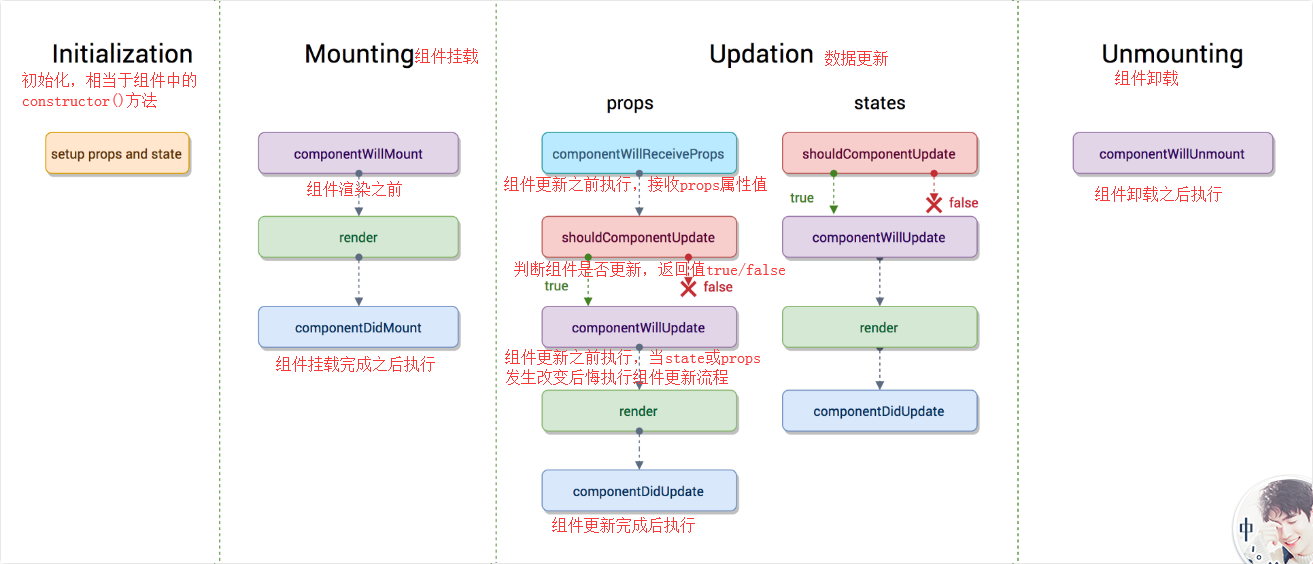
三、從示意圖中看生命周期
(畫了張示意圖 希望能夠幫助理解)
智能推薦
React的生命周期
掛載卸載過程: constructor() componentWillMount() componentDidMount() componentWillUnmount () 更新過程: componentWillReceiveProps (nextProps) shouldComponentUpdate(nextProps,nextState) componentWillUpdate (nextP...
React的生命周期
React16.3版本之前的生命周期圖示如上圖, React的生命周期分為: 1. initialization(初始化階段) constructor鉤子函數,可以設置局部狀態數據state 2. Mounting(掛載階段) componentWillMount(將要掛載) render(渲染) componentDidMount(掛載完成) 3. Updation(更新階段) 通過改變prop...
react 的生命周期
整體上來講,React生命周期分為了 掛載 、 更新 、 卸載 以及 捕錯 四個狀態階段。每種狀態里需要執行若干個生命周期函數,這些函數可能會在不同的階段里重新被調用。 掛載: constructor() constructor方法在組件建立前被調用。 在這個方法里面,應該先調用super(props),否則this....
猜你喜歡
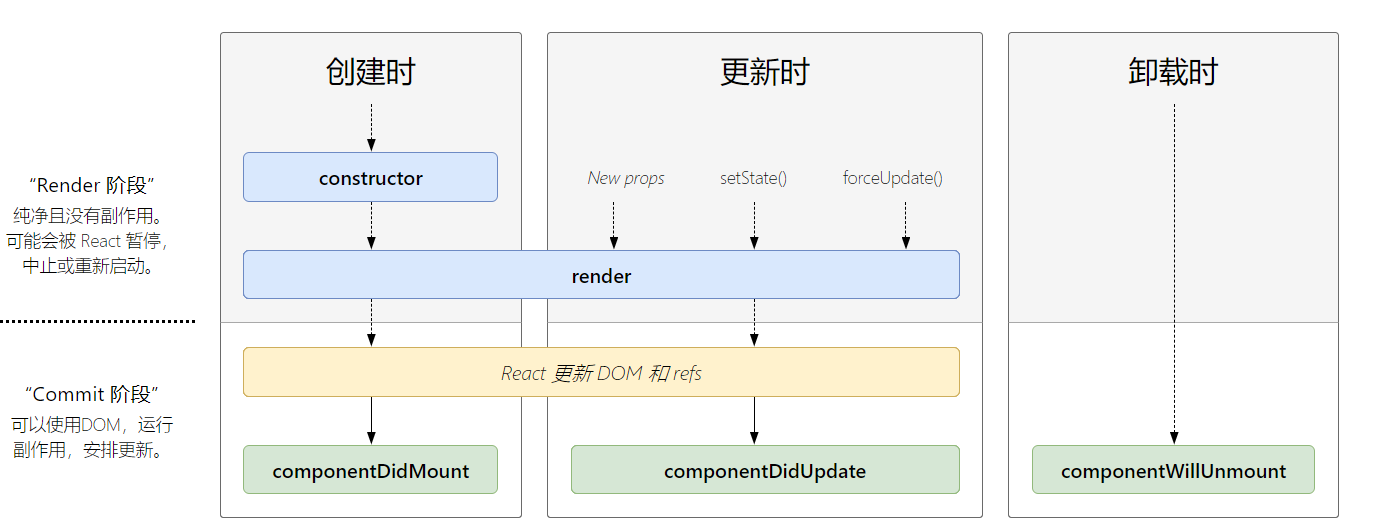
react的生命周期
常用圖示 完整圖示 React組件的生命周期可以分為3種狀態。 創建時 更新時 卸載時 頁面創建時 頁面第一次加載時,會觸發:constructor、getDerivedStateFromProps、Render、componentDidMount 當state改變時 當state改變時,會觸發:getDerivedStateFromProps、Render、componentDidUpdate...


freemarker + ItextRender 根據模板生成PDF文件
1. 制作模板 2. 獲取模板,并將所獲取的數據加載生成html文件 2. 生成PDF文件 其中由兩個地方需要注意,都是關于獲取文件路徑的問題,由于項目部署的時候是打包成jar包形式,所以在開發過程中時直接安照傳統的獲取方法沒有一點文件,但是當打包后部署,總是出錯。于是參考網上文章,先將文件讀出來到項目的臨時目錄下,然后再按正常方式加載該臨時文件; 還有一個問題至今沒有解決,就是關于生成PDF文件...
電腦空間不夠了?教你一個小秒招快速清理 Docker 占用的磁盤空間!
Docker 很占用空間,每當我們運行容器、拉取鏡像、部署應用、構建自己的鏡像時,我們的磁盤空間會被大量占用。 如果你也被這個問題所困擾,咱們就一起看一下 Docker 是如何使用磁盤空間的,以及如何回收。 docker 占用的空間可以通過下面的命令查看: TYPE 列出了docker 使用磁盤的 4 種類型: Images:所有鏡像占用的空間,包括拉取下來的鏡像,和本地構建的。 Con...

requests實現全自動PPT模板
http://www.1ppt.com/moban/ 可以免費的下載PPT模板,當然如果要人工一個個下,還是挺麻煩的,我們可以利用requests輕松下載 訪問這個主頁,我們可以看到下面的樣式 點每一個PPT模板的圖片,我們可以進入到詳細的信息頁面,翻到下面,我們可以看到對應的下載地址 點擊這個下載的按鈕,我們便可以下載對應的PPT壓縮包 那我們就開始做吧 首先,查看網頁的源代碼,我們可以看到每一...