android學習筆記----SQLite數據庫
目錄
目錄一二的增刪改查源碼地址:https://github.com/liuchenyang0515/CreateDB3
目錄三事務介紹的源碼地址:https://github.com/liuchenyang0515/BankTransfer
用SQLite語句執行:
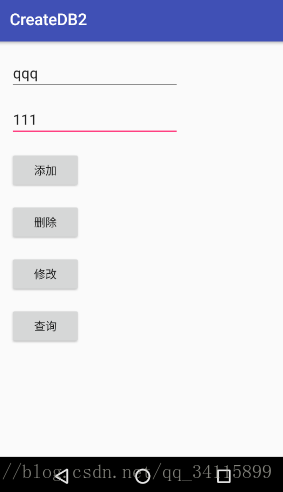
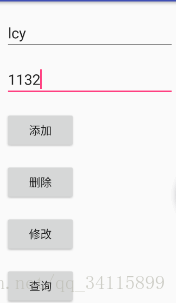
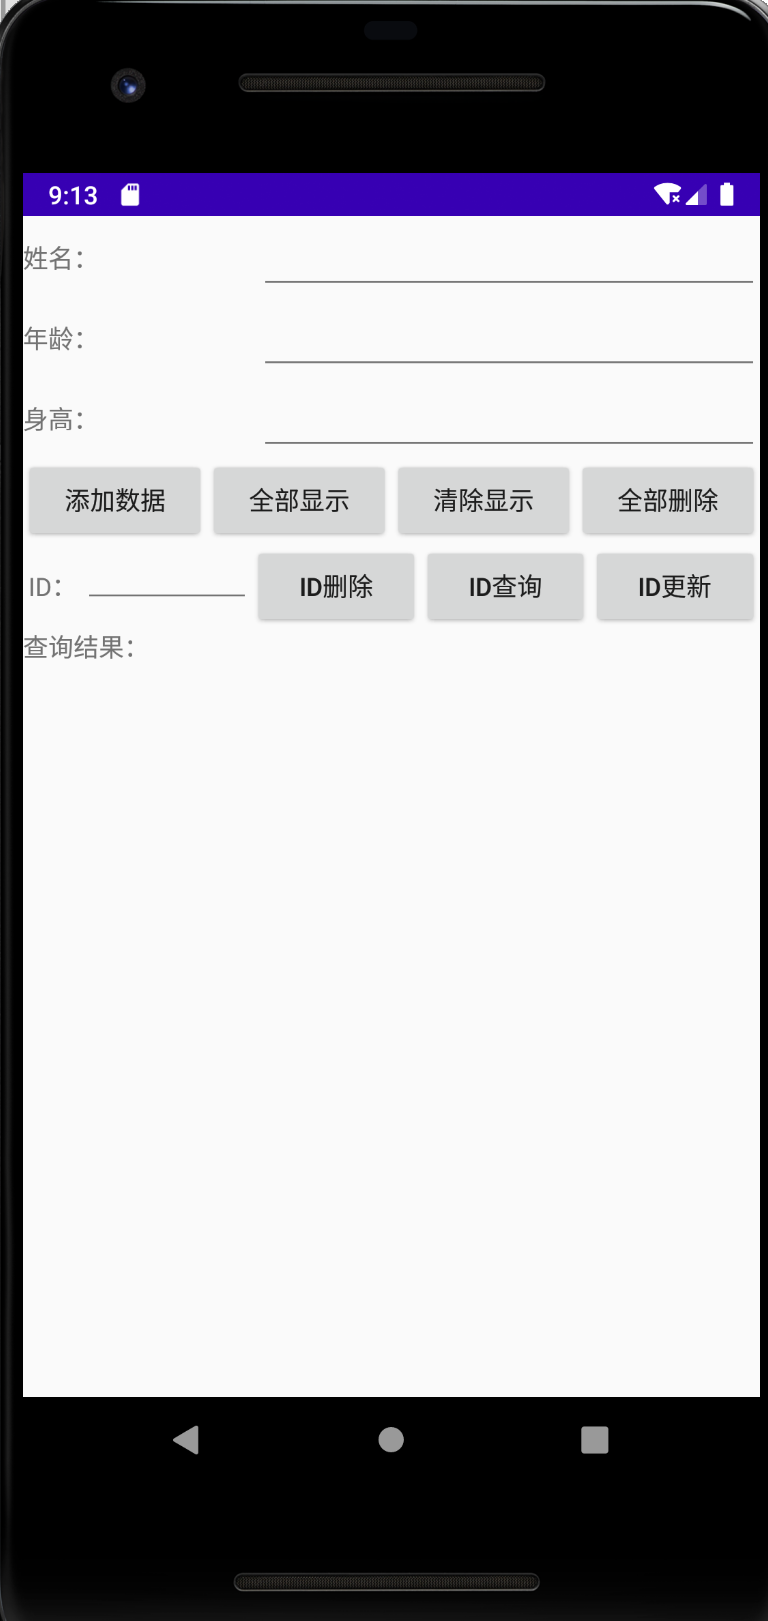
首先看到界面:
代碼如下:
MainActivity.java
import android.support.v7.app.AppCompatActivity;
import android.os.Bundle;
import android.text.TextUtils;
import android.view.View;
import android.widget.EditText;
import android.widget.Toast;

import com.example.createdb2.dao.ContactInfoDao;

public class MainActivity extends AppCompatActivity {

    private EditText et_name;
    private EditText et_phone;
    private ContactInfoDao dao;

    @Override
    protected void onCreate(Bundle savedInstanceState) {
        super.onCreate(savedInstanceState);
        setContentView(R.layout.activity_main);
        // 1.找到需要用到的控件
        et_name = (EditText) findViewById(R.id.et_name);
        et_phone = (EditText) findViewById(R.id.et_phone);
        // 2.new一個Dao出來
        dao = new ContactInfoDao(this, "mydb.db", null, 1);
    }

    /**
     * 添加一條聯系人信息
     *
     * @param view
     */
    public void add(View view) {
        // 做具體的添加操作
        String name = et_name.getText().toString().trim();
        String phone = et_phone.getText().toString().trim();
        if (TextUtils.isEmpty(name) || TextUtils.isEmpty(phone)) {
            Toast.makeText(this, "不能為空", Toast.LENGTH_SHORT).show();
            return;
        } else {
            dao.add(name, phone);
            Toast.makeText(this, "添加成功", Toast.LENGTH_SHORT).show();
        }
    }

    /**
     * 刪除一條聯系人信息
     *
     * @param view
     */
    public void delete(View view) {
        String name = et_name.getText().toString().trim();
        if (TextUtils.isEmpty(name)) {
            Toast.makeText(this, "不能為空", Toast.LENGTH_SHORT).show();
            return;
        } else {
            dao.delete(name);
            Toast.makeText(this, "刪除成功", Toast.LENGTH_SHORT).show();
        }
    }

    /**
     * 修改聯系人號碼
     *
     * @param view
     */
    public void update(View view) {
        String name = et_name.getText().toString().trim();
        String phone = et_phone.getText().toString().trim();
        if (TextUtils.isEmpty(name) || TextUtils.isEmpty(phone)) {
            Toast.makeText(this, "不能為空", Toast.LENGTH_SHORT).show();
            return;
        } else {
            dao.update(phone, name);
            Toast.makeText(this, "修改成功", Toast.LENGTH_SHORT).show();
        }
    }

    /**
     * 查詢聯系人號碼
     *
     * @param view
     */
    public void query(View view) {
        String name = et_name.getText().toString().trim();
        if (TextUtils.isEmpty(name)) {
            Toast.makeText(this, "不能為空", Toast.LENGTH_SHORT).show();
            return;
        } else {
            String phone = dao.query(name);
            if (phone != null) {
                Toast.makeText(this, "查詢到的號碼為:" + phone, Toast.LENGTH_SHORT).show();
            } else {
                Toast.makeText(this, "無此聯系人信息", Toast.LENGTH_SHORT).show();
            }
        }
    }
}
ContactInfoDao.java
import android.content.Context;
import android.database.Cursor;
import android.database.sqlite.SQLiteDatabase;

import com.example.createdb2.MyDBOpenHelper;

public class ContactInfoDao {

    private final MyDBOpenHelper helper;

    public ContactInfoDao(Context context, String name, SQLiteDatabase.CursorFactory factory, int version) {
        helper = new MyDBOpenHelper(context, name, factory, version);
    }

    /**
     * create table aa(id integer primary key autoincrement, name char(20), phone varchar(20));
     * create table temp as select id, name from aa; //
     * temp表沒有了PRIMARY KEY AUTOINCREMENT,查看建表語句CREATE TABLE "temp"(id INT,NAME TEXT);
     * integer變成了int
     * char變成text
     * 新表中沒有舊表中的primary key,Extra,auto_increment等屬性,需要自己手動加,具體參看后面的修改表即字段屬性.
     *
     * @param name  聯系人姓名
     * @param phone 聯系人電話
     */
    public void add(String name, String phone) {
        SQLiteDatabase db = helper.getWritableDatabase(); // 如果數據庫已存在就打開,否則創建一個新數據庫
        db.execSQL("insert into contactinfo (name, phone) values(?, ?)", new Object[]{name, phone});
        // 記得關閉數據庫,釋放資源
        db.close();
    }

    /**
     * 刪除一條記錄
     *
     * @param name 聯系人姓名
     */

    public void delete(String name) {
        SQLiteDatabase db = helper.getWritableDatabase();
        db.execSQL("delete from contactinfo where name = ?", new Object[]{name});
        // 記得關閉數據庫,釋放資源
        db.close();
    }

    /**
     * 更新一條記錄
     *
     * @param name  聯系人姓名
     * @param phone 聯系人電話
     */

    public void update(String phone, String name) {
        SQLiteDatabase db = helper.getWritableDatabase();
        db.execSQL("update contactinfo set phone = ? where name = ?;", new Object[]{phone, name});
        // 記得關閉數據庫,釋放資源
        db.close();
    }

    /**
     * 查詢聯系人的電話號碼
     *
     * @param name 聯系人姓名
     */
    public String query(String name) {
        SQLiteDatabase db = helper.getReadableDatabase();
        Cursor cursor = db.rawQuery("select phone from contactinfo where name = ?", new String[]{name});
        String phone = null;
        if (cursor.moveToNext()) {
            phone = cursor.getString(0);
        }
        // 記得關閉數據庫,釋放資源
        cursor.close();
        db.close();
        return phone;
    }
}
筆記批注:
SQLiteOpenHelper是個抽象類,里面有2個抽象方法onCreate()和onUpdate(),我們必須在自己的幫助類里面重寫這2個方法,然后分別在這兩個方法中實現創建、升級數據庫邏輯。
SQLiteOpenHelper還有2個非常重要的實例方法getReadableDatabase()和getWritableDatabase()。這兩個方法都可以創建或者打開一個現有的數據庫(如果數據庫已存在則直接打開,否則創建一個新的數據庫),并返回一個可對數據庫進行讀寫的對象。
不同的是,當數據庫不可寫入的時候(如磁盤空間已滿),getReadableDatabase()方法返回的對象將以只讀的方式去打開數據庫,而getWritableDatabase()方法將拋出異常。
構建出SQLiteOpenHelper的實例之后,在調用它的getReadableDatabase()和getWritableDatabase()就能夠創建數據庫了。數據庫文件在/data/data/<package name>/databases目錄下。
sqlite中是不支持刪除列操作的,所以網上 alter table [table_name] drop column [col_name] 這個語句在sqlite中是無效的(這不是MySQL),而替代的方法可以如下:
1.根據原表創建一張新表
2.刪除原表
3.將新表重名為舊表的名稱
慎用create table as select,比如想刪除一列phone
create table aa(id integer primary key autoincrement, name char(20), phone varchar(20));
create table temp as select id, name from aa;
新表中沒有舊表中的primary key,Extra,auto_increment等屬性,需要自己手動加,具體參看后面的修改表即字段屬性.
那么新表temp就沒了主鍵,不會自動增長,查看建表語句integer變成了int, char變成text。
只能創建類似于這樣給出明確約束的
CREATE TABLE temp(id INTEGER PRIMARY KEY AUTOINCREMENT, NAME CHAR(20));
MyDBOpenHelper.java
import android.content.Context;
import android.database.sqlite.SQLiteDatabase;
import android.database.sqlite.SQLiteOpenHelper;
import android.util.Log;
import android.widget.Toast;

public class MyDBOpenHelper extends SQLiteOpenHelper {
    private String TAG = "MyDBOpenHelper";
    private Context mContext;

    // 第一個參數是上下文
    // 第二個參數是數據庫名稱
    // 第三個參數null表示使用默認的游標工廠
    // 第四個參數是數據庫的版本號,數據庫只能升級,不能降級,版本號只能變大不能變小
    public MyDBOpenHelper(Context context, String name, SQLiteDatabase.CursorFactory factory, int version) {
        super(context, name, factory, version);
        // 更改一下版本號會調用onUpgrade
        mContext = context;
    }

    // 當數據庫第一次被創建的時候調用的方法,適合在這個方法里面把數據庫的表結構定義出來
    // 當app再次啟動會發現已經存在mydb.db數據庫了,因此不會再創建一次
    @Override
    public void onCreate(SQLiteDatabase db) {
        Log.d(TAG, "數據庫被創建了: ");
        // MySQL是AUTO_INCREMENT, SQLite是AUTOINCREMENT
        db.execSQL("CREATE TABLE contactinfo(id INTEGER PRIMARY KEY AUTOINCREMENT, NAME CHAR(20), phone VARCHAR(20));");
        Toast.makeText(mContext, "Create succeeded", Toast.LENGTH_SHORT).show();
    }

    // 當數據庫更新的時候調用的方法
    @Override
    public void onUpgrade(SQLiteDatabase db, int oldVersion, int newVersion) {
        Log.d(TAG, "數據庫被更新了: ");
        //db.execSQL("ALTER TABLE contactinfo ADD account VARCHAR(20);");
        db.execSQL("drop table if exists contactinfo");
        onCreate(db);
    }
}
筆記批注:
當我們重新運行程序時,數據庫因為已經存在,不會再次創建,所以這個onCreate方法不會再次調用,怎么辦呢?當然卸載程序再次運行也可以,這樣的做法比較極端。這里就可以用到SQLiteOpenHelper的升級功能了。
db.execSQL("drop table if exists contactinfo");
onCreate(db);
如果存在contactinfo表就刪除掉,然后再次調用onCreate方法,如果沒有刪除直接onCreate,那么系統會發現這張表存在,直接報錯。
那么如何讓onUpdate()方法能夠執行呢?我們這里的MyDBOpenHelper構造器第四個參數是當前數據庫的版本號,之前傳入的是1,現在只要傳入一個比1大的數字即可運行onUpdate方法。
activity_main.xml
<?xml version="1.0" encoding="utf-8"?>
<android.support.constraint.ConstraintLayout xmlns:android="http://schemas.android.com/apk/res/android"
    xmlns:app="http://schemas.android.com/apk/res-auto"
    xmlns:tools="http://schemas.android.com/tools"
    android:layout_width="match_parent"
    android:layout_height="match_parent"
    tools:context=".MainActivity">

    <EditText
        android:id="@+id/et_name"
        android:layout_width="wrap_content"
        android:layout_height="wrap_content"
        android:layout_marginLeft="16dp"
        android:layout_marginTop="16dp"
        android:ems="10"
        android:hint="請輸入聯系人的姓名"
        android:inputType="textPersonName"
        app:layout_constraintStart_toStartOf="parent"
        app:layout_constraintTop_toTopOf="parent" />

    <EditText
        android:id="@+id/et_phone"
        android:layout_width="wrap_content"
        android:layout_height="wrap_content"
        android:layout_marginLeft="16dp"
        android:layout_marginTop="12dp"
        android:ems="10"
        android:hint="請輸入聯系人的電話"
        android:inputType="number"
        app:layout_constraintStart_toStartOf="parent"
        app:layout_constraintTop_toBottomOf="@+id/et_name" />

    <Button
        android:id="@+id/button"
        android:layout_width="wrap_content"
        android:layout_height="wrap_content"
        android:layout_marginLeft="16dp"
        android:layout_marginTop="16dp"
        android:onClick="add"
        android:text="添加"
        app:layout_constraintStart_toStartOf="parent"
        app:layout_constraintTop_toBottomOf="@+id/et_phone" />

    <Button
        android:id="@+id/button2"
        android:layout_width="wrap_content"
        android:layout_height="wrap_content"
        android:layout_marginLeft="16dp"
        android:layout_marginTop="16dp"
        android:onClick="delete"
        android:text="刪除"
        app:layout_constraintStart_toStartOf="parent"
        app:layout_constraintTop_toBottomOf="@+id/button" />

    <Button
        android:id="@+id/button3"
        android:layout_width="wrap_content"
        android:layout_height="wrap_content"
        android:layout_marginLeft="16dp"
        android:layout_marginTop="16dp"
        android:onClick="update"
        android:text="修改"
        app:layout_constraintStart_toStartOf="parent"
        app:layout_constraintTop_toBottomOf="@+id/button2" />

    <Button
        android:id="@+id/button4"
        android:layout_width="wrap_content"
        android:layout_height="wrap_content"
        android:layout_marginLeft="16dp"
        android:layout_marginTop="16dp"
        android:onClick="query"
        android:text="查詢"
        app:layout_constraintStart_toStartOf="parent"
        app:layout_constraintTop_toBottomOf="@+id/button3" />
</android.support.constraint.ConstraintLayout>
當輸入數據然后點擊添加的時候數據庫會被創建(如果數據庫還沒被創建),數據會添加成功
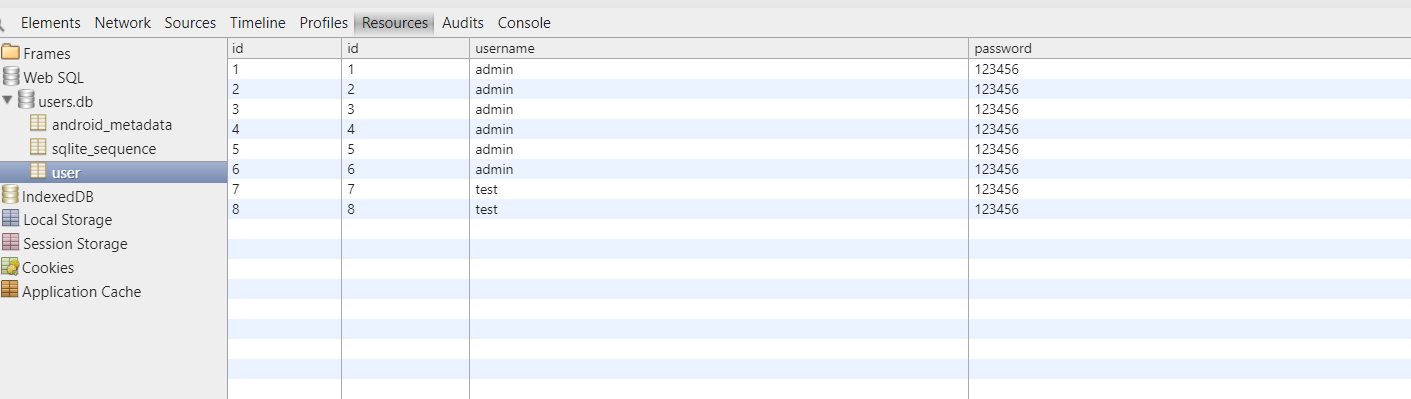
我們可以把數據庫導出到SQLite Expert去查看表內容,也可以直接在控制臺查看一個大概,查看數據庫和表有沒有被創建。
這里只演示在控制臺操作。
在Terminal或者在系統控制臺輸入adb shell
然后進行如下操作:

用cd命令進入到/data/data/com.example.createdb2/databases 目錄
注意:7.0及以上的模擬器無法進入com.xxxxxx.xxxxx,沒有權限,示例只能在6.0及以下,當然,我們是可以直接找到mydb.db導出,然后用SQLite Expert去查看就更好了。在這里只是演示以下控制臺該怎么做。
這個目錄中,mydb.db是我們創建的
另一個是mydb.db-journal,這是為了讓數據庫能夠支持事務而產生的臨時日志文件,通常情況下這個文件的大小是0字節
接下來輸入sqlite3 mydb.db 打開mydb.db數據庫
輸入.table命令查看數據庫中有哪些表,這個android_metadata是每個數據庫中都會自動生成的,不用管。
另一張contactinfo是我們在MyDBOpenHelper中創建的。
接著可以用.schema命令查看它們的建表語句。
最后可以輸入.exit或.quit命令退出數據庫的編輯,再鍵入exit就可以退出設備控制臺了。


也可以直接寫sql語句查詢,如圖
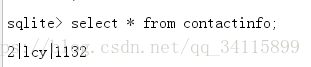
這里數據庫版本是2
補充知識點:改變dos編碼方式:chcp 936 //變成GBK編碼
chcp 65001 //變成UTF-8編碼
利用SQLiteDatabase中自帶的增刪改查操作:
ContactInfoDao.java
import android.content.ContentValues;
import android.content.Context;
import android.database.Cursor;
import android.database.sqlite.SQLiteDatabase;

import com.example.createdb3.MyDBOpenHelper;

public class ContactInfoDao {

    private final MyDBOpenHelper helper;
    private String TAG = "ContactInfoDao";

    public ContactInfoDao(Context context, String name, SQLiteDatabase.CursorFactory factory, int version) {
        helper = new MyDBOpenHelper(context, name, factory, version);
    }

    /**
     * create table aa(id integer primary key autoincrement, name char(20), phone varchar(20));
     * create table temp as select id, name from aa; //
     * temp表沒有了PRIMARY KEY AUTOINCREMENT,查看建表語句CREATE TABLE "temp"(id INT,NAME TEXT);
     * integer變成了int
     * char變成text
     * 新表中沒有舊表中的primary key,Extra,auto_increment等屬性,需要自己手動加,具體參看后面的修改表即字段屬性.
     * 添加一條記錄
     *
     * @param name  聯系人姓名
     * @param phone 聯系人電話
     * @return 返回的是添加在數據庫的行號,-1代表失敗
     */
    public long add(String name, String phone) {
        SQLiteDatabase db = helper.getWritableDatabase(); // 如果數據庫已存在就打開,否則創建一個新數據庫
        // db.execSQL("insert into contactinfo (name, phone) values(?, ?)", new Object[]{name, phone});
        ContentValues values = new ContentValues();
        values.put("name", name);
        values.put("phone", phone);
        long rowId = db.insert("contactinfo", null, values);

        // 記得關閉數據庫,釋放資源
        db.close();
        return rowId;
    }

    /**
     * 根據姓名刪除一條記錄
     *
     * @param name 聯系人姓名
     * @return 返回0代表的是沒有做任何記錄,返回的整數int值代表刪除了幾條數據
     */

    public int delete(String name) {
        SQLiteDatabase db = helper.getWritableDatabase();
        // db.execSQL("delete from contactinfo where name = ?", new Object[]{name});
        int rowId = db.delete("contactinfo", "name=?", new String[]{name});
        // 記得關閉數據庫,釋放資源
        db.close();
        return rowId;
    }

    /**
     * 修改聯系人電話號碼
     *
     * @param name  聯系人姓名
     * @param phone 聯系人新電話
     * @return rowId代表更新了多少行記錄
     */

    public int update(String phone, String name) {
        SQLiteDatabase db = helper.getWritableDatabase();
        // db.execSQL("update contactinfo set phone = ? where name = ?;", new Object[]{phone, name});
        ContentValues values = new ContentValues();
        values.put("phone", phone);
        int rowId = db.update("contactinfo", values, "name = ?", new String[]{name});
        // 記得關閉數據庫,釋放資源
        db.close();
        return rowId;
    }

    /**
     * 查詢聯系人的電話號碼
     *
     * @param name 聯系人姓名
     * @return 電話號碼
     */
    public Cursor query(String name) {
        SQLiteDatabase db = helper.getReadableDatabase();
        // Cursor cursor = db.rawQuery("select phone from contactinfo where name = ?", new String[]{name});
        /*Cursor cursor = db.query("contactinfo", new String[]{"phone"}, "name = ?", new String[]{name}, null, null, null);
        String phone = null;
        if (cursor.moveToNext()) {
            phone = cursor.getString(0);
        }*/
        Cursor cursor = db.query("contactinfo", null, "name = ?", new String[]{name}, null, null, null);
        // 記得關閉數據庫,釋放資源
        // db.close();// 當用ContentProvider返回一個Cursor時,db是不能關閉的
        // 否則拋出java.lang.IllegalStateException: Cannot perform this operation because the connection pool has been closed.
        return cursor;
    }
}
再把MainActivity.java里面的query()方法改掉就行了
/**
     * 查詢聯系人號碼
     *
     * @param view
     */
    public void query(View view) {
        String name = et_name.getText().toString().trim();
        if (TextUtils.isEmpty(name)) {
            Toast.makeText(this, "不能為空", Toast.LENGTH_SHORT).show();
            return;
        } else {
            Cursor cursor = dao.query(name);
            String phone = null;
            StringBuffer str = new StringBuffer();
            if (cursor.moveToFirst()) { // 將光標移動到第一行,如果游標為空,此方法將返回false。
                String str1 = null;
                do {
                    phone = cursor.getString(cursor.getColumnIndex("phone"));
                    str1 = "name:" + name + " phone:" + phone;
                    Log.d(TAG, str1);
                    str.append(str1 + "\n");
                } while (cursor.moveToNext());// 將光標移動到下一行,如果游標已經超過結果集中的最后一個條目,此方法將返回false。
                str.deleteCharAt(str.length() - 1); // StringBuffer沒有trim()
            }
            cursor.close();
            if (phone != null) {
                Toast.makeText(this, "查詢到的聯系人信息為:\n" + str, Toast.LENGTH_SHORT).show();
            } else {
                Toast.makeText(this, "無此聯系人信息", Toast.LENGTH_SHORT).show();
            }
        }
    }
添加同一個人多次時可以一次查出來。
注意:當用ContentProvider返回一個Cursor時,db是不能關閉的,否則拋出異常java.lang.IllegalStateException: Cannot perform this operation because the connection pool has been closed.
筆記批注:
public long insert (String table, String nullColumnHack, ContentValues values)
table:要插入行的表
nullColumnHack:任意性;可能是null。SQL不允許插入一個完全空的行,而不至少命名一個列名。如果你提供values為空,不知道列名,也無法插入空行。如果未將其設置為空,則nullColumnHack參數提供可空列名的名稱,以便在values是空的。
values:此映射包含行的初始列值。鍵應該是列名,值應該是列值。
public int delete (String table, String whereClause, String[] whereArgs)
刪除數據庫中行的方便方法。
table:要從其中刪除的表
whereClause:刪除時要應用的可選WHERE子句。傳遞NULL將刪除所有行。
whereArgs:您可以在WHERE子句中包括?s,該子句將由WHERE Args的值替換。這些值將被綁定為String。
public int update (String table, ContentValues values, String whereClause, String[] whereArgs)
更新數據庫中行的方便方法。
table:要更新的表
values:從列名到新列值的映射。NULL是將被轉換為NULL的有效值。
whereClause:更新時要應用的可選WHERE子句。傳遞NULL將更新所有行。
whereArgs: 您可以在WHERE子句中包括?s,該子句將由WHERE Args的值替換。這些值將被綁定為String。
public Cursor query (String table, String[] columns, String selection, String[] selectionArgs, String groupBy,
String having, String orderBy)
查詢給定的URL,返回Cursor結果集。
table:要編譯查詢的表名。
columns:返回哪些列的列表。傳遞NULL將返回所有列,這是不鼓勵的,以防止從存儲區讀取不被使用的數據。
selection:一個過濾器,聲明要返回的行,格式化為SQLWHERE子句(不包括WHERE本身)。傳遞NULL將返回給定表的所有行。
selectionArgs:您可以在選擇中包括?s,它將被selectionArgs的值替換,以便它們出現在所選內容中。這些值將被綁定為String。
groupBy:一個過濾器,聲明如何分組行,格式化為SQL GROUP BY子句(本身不包括組)。傳遞NULL將導致行不被分組。
having:如果正在使用行分組,則篩選器將聲明要在游標中包含哪些行組,格式為SQL HARING子句(不包括HAVING本身)。傳遞NULL將導致包括所有行組,并且在不使用行分組時是必需的。
orderBy:如何對行進行排序,格式化為SQLOrderBy子句(不包括Order本身)。傳遞NULL將使用默認排序順序,排序順序可能是無序的。
query有4個重載方法,建議查官方api。
SQLite數據庫的事務介紹:
MainActivity.java
import android.content.ContentValues;
import android.database.Cursor;
import android.database.sqlite.SQLiteDatabase;
import android.os.Bundle;
import android.support.v7.app.AppCompatActivity;
import android.util.Log;
import android.view.View;
import android.widget.EditText;
import android.widget.Toast;

public class MainActivity extends AppCompatActivity {
    private String TAG = "MainActivity";
    private MyOpenHelper helper;
    private EditText editText1, editText2, editText3;
    private String table = "info";

    @Override
    protected void onCreate(Bundle savedInstanceState) {
        super.onCreate(savedInstanceState);
        setContentView(R.layout.activity_main);
        helper = new MyOpenHelper(this, table, null, 1);
        editText1 = (EditText) findViewById(R.id.editText1);
        editText2 = (EditText) findViewById(R.id.editText2);
        editText3 = (EditText) findViewById(R.id.editText3);
    }

    public String queryColumn(Cursor cursor, String s) {
        String ss = null;
        if (cursor.moveToFirst()) { // 必須moveToFirst()否則異常
            ss = cursor.getString(cursor.getColumnIndex(s));
        }
        return ss;
    }

    public void onclick(View view) {
        SQLiteDatabase db = helper.getReadableDatabase();
        String name1 = editText1.getText().toString().trim();
        String name2 = editText2.getText().toString().trim();
        String str = editText3.getText().toString().trim();
        // 使用事務進行轉賬
        db.beginTransaction(); // 開啟事務
        try {
            Cursor cursor = db.query(table, new String[]{"money"}, "name = ?",
                    new String[]{name1}, null, null, null);
            int money = Integer.valueOf(queryColumn(cursor, "money"));
            // 實現轉賬的邏輯,實際就是寫sql語句
            //db.execSQL("update info set money = money - ? where name = ?", new Object[]{str, name1});
            ContentValues values = new ContentValues();
            int remain = money - Integer.valueOf(str);
            if (remain < 0) {
                Toast.makeText(this, "您的余額不足,轉賬失敗", Toast.LENGTH_SHORT).show();
                return;
            }
            values.put("money", remain + "");
            db.update(table, values, "name = ?", new String[]{name1});

            // int i = 9 / 0; // 讓事務回滾示例

            // db.execSQL("update info set money = money + ? where name = ?", new Object[]{str, name2});
            cursor = db.query(table, new String[]{"money"}, "name = ?",
                    new String[]{name2}, null, null, null);
            int money1 = Integer.valueOf(queryColumn(cursor, "money"));
            ContentValues values1 = new ContentValues();
            int remain1 = money1 + Integer.valueOf(str);
            if (remain1 < 0) {
                return;
            }
            values1.put("money", remain1 + "");
            db.update(table, values1, "name = ?", new String[]{name2});

            // 轉賬之后的cursor
            cursor = db.query(table, new String[]{"money"}, "name = ?",
                    new String[]{name1}, null, null, null);
            String query1 = queryColumn(cursor, "money");
            cursor = db.query(table, new String[]{"money"}, "name = ?",
                    new String[]{name2}, null, null, null);
            String query2 = queryColumn(cursor, "money");
            cursor.close();
            Log.d(TAG, name1 + "賬戶余額:" + query1 + "\n");
            Log.d(TAG, name2 + "賬戶余額:" + query2 + "\n");
            Toast.makeText(this, name1 + "賬戶余額:" + query1 + "\n" + name2 + "賬戶余額:" + query2, Toast.LENGTH_LONG).show();
            // 給當前事務設置一個成功的標記
            db.setTransactionSuccessful();
        } catch (Exception e) { // 有catch不至于程序崩潰
            Toast.makeText(this, "服務器忙,請稍后再試", Toast.LENGTH_SHORT).show();
        } finally {
            db.endTransaction(); // 關閉事務,如果未執行setTransactionSuccessful,則回滾
        }
    }
}
MyOpenHelper.java
import android.content.Context;
import android.database.sqlite.SQLiteDatabase;
import android.database.sqlite.SQLiteOpenHelper;
import android.util.Log;

public class MyOpenHelper extends SQLiteOpenHelper {
    private String TAG = "MyOpenHelper";
    public MyOpenHelper(Context context, String name, SQLiteDatabase.CursorFactory factory, int version) {
        super(context, name, factory, version);
    }

    /**
     * 當數據庫第一次創建時調用,特別適合用于表的初始化
     * @param db
     */
    @Override
    public void onCreate(SQLiteDatabase db) {
        Log.d(TAG, "數據庫被創建了,onCreate里面開始建表 ");
        db.execSQL("create table info (_id integer primary key autoincrement, name varchar(20), phone varchar(20), money varchar(20))");
        db.execSQL("insert into info ('name', 'phone', 'money') values('zhangsan', '138888', '2000')");
        db.execSQL("insert into info ('name', 'phone', 'money') values('lisi', '139999', '4000')");
    }

    @Override
    public void onUpgrade(SQLiteDatabase db, int oldVersion, int newVersion) {
        db.execSQL("drop table if exists info");
        onCreate(db);
    }
}
activity_mainxml
<?xml version="1.0" encoding="utf-8"?>
<android.support.constraint.ConstraintLayout xmlns:android="http://schemas.android.com/apk/res/android"
    xmlns:app="http://schemas.android.com/apk/res-auto"
    xmlns:tools="http://schemas.android.com/tools"
    android:layout_width="match_parent"
    android:layout_height="match_parent"
    tools:context=".MainActivity">

    <Button
        android:id="@+id/button"
        android:layout_width="wrap_content"
        android:layout_height="wrap_content"
        android:layout_marginBottom="8dp"
        android:layout_marginLeft="8dp"
        android:layout_marginRight="8dp"
        android:layout_marginTop="8dp"
        android:onClick="onclick"
        android:text="轉賬"
        app:layout_constraintBottom_toBottomOf="parent"
        app:layout_constraintEnd_toEndOf="parent"
        app:layout_constraintStart_toStartOf="parent"
        app:layout_constraintTop_toTopOf="parent" />

    <EditText
        android:id="@+id/editText3"
        android:layout_width="match_parent"
        android:layout_height="wrap_content"
        android:layout_marginBottom="8dp"
        android:layout_marginLeft="8dp"
        android:layout_marginRight="8dp"
        android:layout_marginTop="8dp"
        android:hint="請輸入轉賬金額"
        android:inputType="number"
        app:layout_constraintBottom_toTopOf="@+id/button"
        app:layout_constraintEnd_toEndOf="parent"
        app:layout_constraintStart_toStartOf="parent"
        app:layout_constraintTop_toBottomOf="@+id/editText2" />

    <EditText
        android:id="@+id/editText2"
        android:layout_width="match_parent"
        android:layout_height="wrap_content"
        android:layout_marginBottom="8dp"
        android:layout_marginLeft="8dp"
        android:layout_marginRight="8dp"
        android:layout_marginTop="8dp"
        android:ems="10"
        android:hint="請輸入收款人姓名"
        android:inputType="textPersonName"
        app:layout_constraintBottom_toTopOf="@+id/editText1"
        app:layout_constraintEnd_toEndOf="parent"
        app:layout_constraintStart_toStartOf="parent"
        app:layout_constraintTop_toBottomOf="@+id/editText3" />

    <EditText
        android:id="@+id/editText1"
        android:layout_width="match_parent"
        android:layout_height="wrap_content"
        android:layout_marginBottom="8dp"
        android:layout_marginLeft="8dp"
        android:layout_marginRight="8dp"
        android:layout_marginTop="8dp"
        android:ems="10"
        android:hint="請輸入轉賬人姓名"
        android:inputType="textPersonName"
        app:layout_constraintBottom_toTopOf="@+id/editText2"
        app:layout_constraintEnd_toEndOf="parent"
        app:layout_constraintStart_toStartOf="parent"
        app:layout_constraintTop_toTopOf="parent" />
</android.support.constraint.ConstraintLayout>
=========================Talk is cheap, show me the code=========================
智能推薦
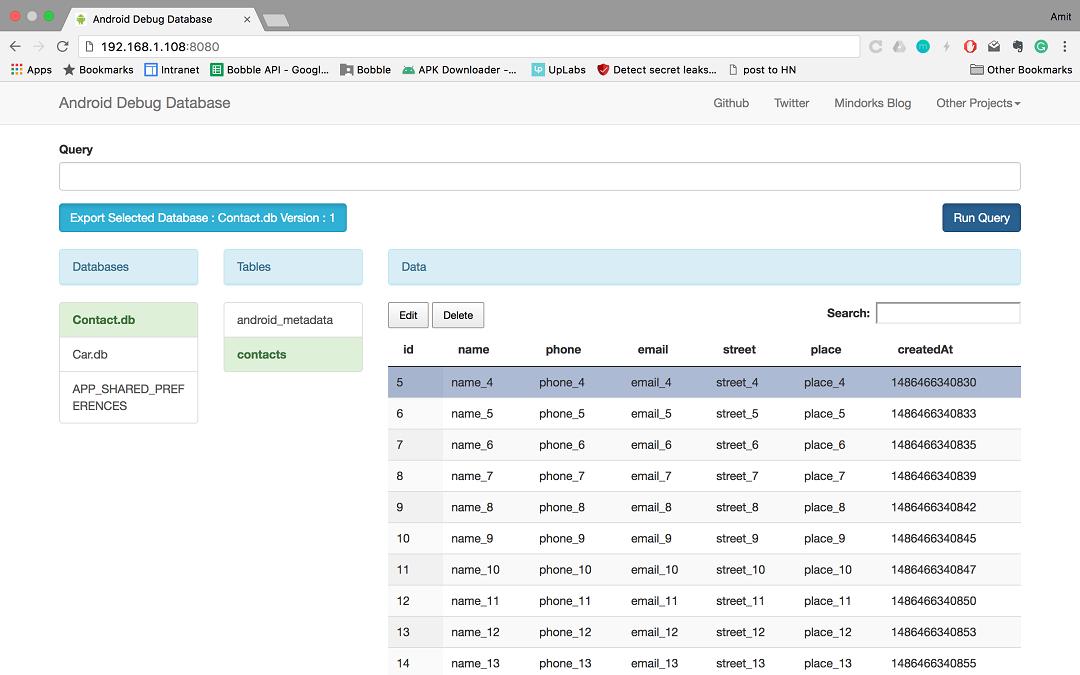
Android Studio查看SQLite數據庫
Android Debug Database 這是一個開源的項目(免費),項目地址在這。 先在 module 的 build.gradle 里面添加: 讓手機和電腦處于一個局域網下,當項目跑起來的時候,在 logcat 里面會打印出這么一行: 把地址復制到瀏覽器,就會看到一個這樣的界面: 很容易理解,里面幾個欄目分別是: Query:寫 SQL 語句的地方 Databases:數據庫 Tables...
Android之SQLite數據庫實例
摘自《Android應用程序開發(第三版)》王向輝、張國印、沈潔編著 1、創建DBAdapter類,用于進行數據庫的操作,具體代碼如下: 2、創建People類,具體代碼如下: 3、在主Activity中(一般是MainActivity,這里是SQLiteDemoActivity),代碼如下: 4、activity_main.xml的具體代碼如下: 5、測試效果: (1)頁面顯示 (2)添加一條數...
Android SQlite數據庫使用詳解
目錄 概述 SQLite使用 SQLite數據庫創建 增加數據 刪除數據 更新數據 查詢數據 完整代碼 概述 SQLite 一個非常流行的嵌入式數據庫,它支持 SQL 語言,并且只利用很少的內存就有很好的性能。此外它還是開源的,任何人都可以使用它。 查看模擬器數據庫傳送門:Android Studio查看SQLite數據庫方法大全 SQLite使用 SQLite數據庫創建 Android提供了一個...
Android——SQLite數據庫(簡單操作)
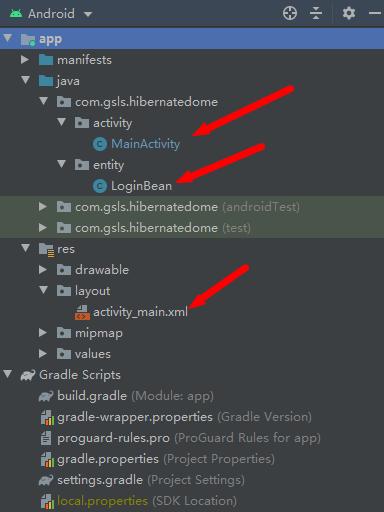
本篇文章源碼:https://github.com/1079374315/HibernateDome 超級簡單的SQLite使用如:(不需要寫任何SQL語句完成以下操作) 1.創建數據庫 1 行代碼 2.添加數據 1 行代碼 3.刪除數據 1 行代碼 4.修改數據 1 行代碼 5.查詢數據 1 行代碼 從創建數據庫到數據庫的增刪查改總共 5 行代碼。 先看效果圖: 如果有興趣咋們跟著小...

猜你喜歡

freemarker + ItextRender 根據模板生成PDF文件
1. 制作模板 2. 獲取模板,并將所獲取的數據加載生成html文件 2. 生成PDF文件 其中由兩個地方需要注意,都是關于獲取文件路徑的問題,由于項目部署的時候是打包成jar包形式,所以在開發過程中時直接安照傳統的獲取方法沒有一點文件,但是當打包后部署,總是出錯。于是參考網上文章,先將文件讀出來到項目的臨時目錄下,然后再按正常方式加載該臨時文件; 還有一個問題至今沒有解決,就是關于生成PDF文件...
電腦空間不夠了?教你一個小秒招快速清理 Docker 占用的磁盤空間!
Docker 很占用空間,每當我們運行容器、拉取鏡像、部署應用、構建自己的鏡像時,我們的磁盤空間會被大量占用。 如果你也被這個問題所困擾,咱們就一起看一下 Docker 是如何使用磁盤空間的,以及如何回收。 docker 占用的空間可以通過下面的命令查看: TYPE 列出了docker 使用磁盤的 4 種類型: Images:所有鏡像占用的空間,包括拉取下來的鏡像,和本地構建的。 Con...

requests實現全自動PPT模板
http://www.1ppt.com/moban/ 可以免費的下載PPT模板,當然如果要人工一個個下,還是挺麻煩的,我們可以利用requests輕松下載 訪問這個主頁,我們可以看到下面的樣式 點每一個PPT模板的圖片,我們可以進入到詳細的信息頁面,翻到下面,我們可以看到對應的下載地址 點擊這個下載的按鈕,我們便可以下載對應的PPT壓縮包 那我們就開始做吧 首先,查看網頁的源代碼,我們可以看到每一...


Linux C系統編程-線程互斥鎖(四)
互斥鎖 互斥鎖也是屬于線程之間處理同步互斥方式,有上鎖/解鎖兩種狀態。 互斥鎖函數接口 1)初始化互斥鎖 pthread_mutex_init() man 3 pthread_mutex_init (找不到的情況下首先 sudo apt-get install glibc-doc sudo apt-get install manpages-posix-dev) 動態初始化 int pthread_...