Spring核心之事務管理
標簽: Spring Spring事務管理
JdbcTemplate
了解API
POJO類
public class User {

    private Integer id;
    private String username;
    private String password;

    //getters、setters、toString
}
測試類
public class TestApi {

    public static void main(String[] args) {
        //1、創建數據源(連接池) dbcp
        BasicDataSource dataSource = new BasicDataSource();
        // 配置基本4項
        dataSource.setDriverClassName("com.mysql.jdbc.Driver");
        dataSource.setUrl("jdbc:mysql://localhost:3306/test");
        dataSource.setUsername("root");
        dataSource.setPassword("123");


        //2、創建模板
        JdbcTemplate jdbcTemplate = new JdbcTemplate();
        jdbcTemplate.setDataSource(dataSource);


        //3、通過api操作
        String sql = "insert into t_user(username,password) values(?,?)";
        String[] sqlArgs = {"tyshawn", "123456"};
        jdbcTemplate.update(sql, sqlArgs);

    }
}
配置DBCP
UserDao
public class UserDao {

    //jdbc模板將由spring注入
    private JdbcTemplate jdbcTemplate;
    public void setJdbcTemplate(JdbcTemplate jdbcTemplate) {
        this.jdbcTemplate = jdbcTemplate;
    }

    public void update(User user){
        String sql = "update t_user set username=?,password=? where id =?";
        Object[] args = {user.getUsername(), user.getPassword(), user.getId()};
        jdbcTemplate.update(sql, args);
    }
}
beans.xml
<beans>
    <!-- 創建數據源 -->
    <bean id="dataSourceId" class="org.apache.commons.dbcp.BasicDataSource">
        <property name="driverClassName" value="com.mysql.jdbc.Driver"></property>
        <property name="url" value="jdbc:mysql://localhost:3306/test"></property>
        <property name="username" value="root"></property>
        <property name="password" value="123"></property>
    </bean>

    <!-- 創建模板 ,需要注入數據源-->
    <bean id="jdbcTemplateId" class="org.springframework.jdbc.core.JdbcTemplate">
        <property name="dataSource" ref="dataSourceId"></property>
    </bean>

    <!-- 配置dao -->
    <bean id="userDaoId" class="org.dbcp.UserDao">
        <property name="jdbcTemplate" ref="jdbcTemplateId"></property>
    </bean>
</beans>
測試代碼
@Test
public void demo(){
    User user = new User();
    user.setId(1);
    user.setUsername("alice");
    user.setPassword("321");

    String xmlPath = "org/dbcp/beans.xml";
    ApplicationContext applicationContext = new ClassPathXmlApplicationContext(xmlPath);

    //獲得目標類
    UserDao userDao = (UserDao) applicationContext.getBean("userDaoId");
    userDao.update(user);
}
配置C3P0
UserDao
public class UserDao {
    private JdbcTemplate jdbcTemplate;

    public void setJdbcTemplate(JdbcTemplate jdbcTemplate) {
        this.jdbcTemplate = jdbcTemplate;
    }

    public List<User> findAll() {
        return jdbcTemplate.query("select * from t_user", ParameterizedBeanPropertyRowMapper.newInstance(User.class));
    }
}
beans.xml
<beans>
    <!-- 創建數據源 -->
    <bean id="dataSourceId" class="com.mchange.v2.c3p0.ComboPooledDataSource">
        <property name="driverClassName" value="com.mysql.jdbc.Driver"></property>
        <property name="url" value="jdbc:mysql://localhost:3306/test"></property>
        <property name="username" value="root"></property>
        <property name="password" value="123"></property>
    </bean>

    <!-- 創建模板,需要注入數據源-->
    <bean id="jdbcTemplateId" class="org.springframework.jdbc.core.JdbcTemplate">
        <property name="dataSource" ref="dataSourceId"></property>
    </bean>

    <!-- 配置dao -->
    <bean id="userDaoId" class="org.c3p0.UserDao">
        <property name="jdbcTemplate" ref="jdbcTemplateId"></property>
    </bean>
</beans>
測試代碼
@Test
public void demo(){

    String xmlPath = "org/c3p0/beans.xml";
    ApplicationContext applicationContext = new ClassPathXmlApplicationContext(xmlPath);

    //獲得目標類
    UserDao userDao = (UserDao) applicationContext.getBean("userDaoId");
    List<User> allUser = userDao.findAll();

    System.out.println(allUser);
}
使用JdbcDaoSupport
JdbcDaoSupport接口只需要注入數據源,底層將自動創建JdbcTemplate。
UserDao
public class UserDao extends JdbcDaoSupport{

    public List<User> findAll() {
        return this.getJdbcTemplate().query("select * from t_user", ParameterizedBeanPropertyRowMapper.newInstance(User.class));
    }
}
beans.xml
<beans>
    <!-- 創建數據源 -->
    <bean id="dataSourceId" class="org.apache.commons.dbcp.BasicDataSource">
        <property name="driverClassName" value="com.mysql.jdbc.Driver"></property>
        <property name="url" value="jdbc:mysql://localhost:3306/test"></property>
        <property name="username" value="root"></property>
        <property name="password" value="123"></property>
    </bean>

    <!--
        * 配置dao
        * dao 繼承 JdbcDaoSupport,之后只需要注入數據源,底層將自動創建模板
    -->
    <bean id="userDaoId" class="org.jdbcdaosupport.UserDao">
        <property name="dataSource" ref="dataSourceId"></property>
    </bean>
</beans>
測試代碼
@Test
public void demo(){

    String xmlPath = "org/jdbcdaosupport/beans.xml";
    ApplicationContext applicationContext = new ClassPathXmlApplicationContext(xmlPath);

    //獲得目標類
    UserDao userDao = (UserDao) applicationContext.getBean("userDaoId");
    List<User> allUser = userDao.findAll();

    System.out.println(allUser);
}
配置properties
properties文件

beans.xml
<beans>
    <!--
        * 加載配置文件
        * "classpath:"前綴表示 src下
        * 在配置文件之后通過  ${key} 獲得內容
    -->
    <context:property-placeholder location="classpath:jdbcInfo.properties"/>

    <!-- 創建數據源-->
    <bean id="dataSourceId" class="com.mchange.v2.c3p0.ComboPooledDataSource">
        <property name="driverClass" value="${jdbc.driverClass}"></property>
        <property name="jdbcUrl" value="${jdbc.jdbcUrl}"></property>
        <property name="user" value="${jdbc.user}"></property>
        <property name="password"  value="${jdbc.password}"></property>
    </bean>
</beans>
Spring事務管理
事務
指作為單個邏輯工作單元執行的一系列操作,要么完全地執行,要么完全地不執行。事務的存在主要是為了保障業務數據的完整性和準確性。
事務的四大特性
(1)原子性(Atomicity)
指事務包含的所有操作要么全部成功,要么全部失敗回滾。
(2)一致性(Consistency)
一致性是指事務必須使數據庫從一個一致性狀態變換到另一個一致性狀態,也就是說一個事務執行之前和執行之后都必須處于一致性狀態。
拿轉賬來說,假設用戶A和用戶B兩者的錢加起來一共是5000,那么不管A和B之間如何轉賬,轉幾次賬,事務結束后兩個用戶的錢相加起來應該還得是5000,這就是事務的一致性。
(3)隔離性(Isolation)
指并發的事務是相互隔離的。當多個用戶并發訪問數據庫時,比如操作同一張表時,數據庫為每一個用戶開啟的事務,不能被其他事務的操作所干擾,多個并發事務之間要相互隔離。
(4)持久性(Durability)
指一個事務一旦被提交了,那么對數據庫中的數據的改變就是永久性的,即便是在數據庫系統遇到故障的情況下也不會丟失提交事務的操作。
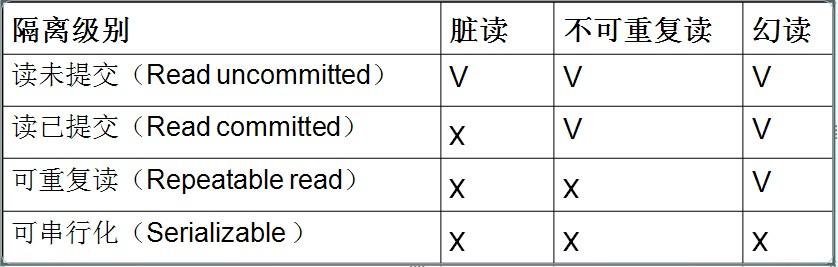
隔離問題
(1)臟讀
指在一個事務處理過程中讀取了另一個未提交的事務中的數據。如果事務T1讀到了事務T2未提交的數據,如果T2提交失敗,那么T1也要回滾(級聯廢棄)。
(2)不可重復讀
指對于數據庫中的某個數據,一個事務范圍內多次查詢卻返回了不同的數據值,這是由于在查詢間隔,被另一個事務修改并提交了。不可重復讀和臟讀的區別是,臟讀是某一事務讀取了另一個事務未提交的臟數據,而不可重復讀則是讀取了前一事務提交的數據。
(3)虛讀(幻讀)
一事務對數據進行了新增操作,另一事務兩次查詢的數據不一致。例如事務T1對一個表中所有的行的某個數據項做了從“1”修改為“2”的操作,這時事務T2又對這個表中插入了一行數據項,而這個數據項的數值還是為“1”并且提交給數據庫。而操作事務T1的用戶如果再查看剛剛修改的數據,會發現還有一行沒有修改,其實這行是從事務T2中添加的,就好像產生幻覺一樣,這就是發生了幻讀。
幻讀和不可重復讀都是讀取了另一條已經提交的事務(這點就臟讀不同),所不同的是不可重復讀查詢的都是同一個數據項,而幻讀針對的是一批數據整體(比如行數的變化)。
隔離級別
- Read Uncommitted (讀未提交):最低級別,任何情況都無法保證。
- Read Committed (讀已提交):可避免臟讀的發生。
- Repeatable Read (可重復讀):可避免臟讀、不可重復讀的發生(MySQL默認隔離級別)。
- Serializable (串行化):可避免臟讀、不可重復讀、幻讀的發生。
MySQL事務操作
(1)簡單情況:一個事務包括ABCD四個操作。
Connection conn = null;
try{
  //1、獲得連接
  conn = ...;
  //2、開啟事務
  conn.setAutoCommit(false);
  A
  B
  C
  D
  //3、提交事務
  conn.commit();
} catche(){
  //4、回滾事務
  conn.rollback();
}
(2)Savepoint:一個事務包括ABCD四個操作,AB必須執行,CD可選擇執行。
Connection conn = null;
Savepoint savepoint = null;  //保存點,記錄操作的當前位置,之后可以回滾到指定的位置。
try{
  //1、獲得連接
  conn = ...;
  //2、開啟事務
  conn.setAutoCommit(false);
  A
  B
  savepoint = conn.setSavepoint();
  C
  D
  //3、提交事務
  conn.commit();
} catche(){
  if(savepoint != null){   //CD異常
     // 回滾到CD之前
     conn.rollback(savepoint);
     // 提交AB
     conn.commit();
  } else{   //AB異常
     // 回滾AB
     conn.rollback();
  }
}
兩個重要的事務屬性
(1)Isolation(隔離性)
- DEFAULT: 使用數據庫設置
- READ_UNCOMMITTED: 會出現臟讀、不可重復讀、幻讀
- READ_COMMITTED: 會出現不可重復讀、幻讀問題
- REPEATABLE_READ: 會出現幻讀
- SERIALIZABLE: 保證所有的情況不會發生
(2)Propagation (傳播性):在兩個業務之間如何共享事務。
- REQUIRED
- 支持當前事務,A如果有事務,B將使用該事務。如果A沒有事務,B將創建一個新的事務。
- SUPPORTS
- 支持當前事務,A如果有事務,B將使用該事務。如果A沒有事務,B將以非事務執行。
- REQUIRES_NEW
- 如果A有事務,將A的事務掛起,B創建一個新的事務。如果A沒有事務,B創建一個新的事務。
- NOT_SUPPORTED
- 如果A有事務,將A的事務掛起,B將以非事務執行。如果A沒有事務,B將以非事務執行。
- MANDATORY
- 支持當前事務,A如果有事務,B將使用該事務。如果A沒有事務,B將拋異常。
- NEVER
- 如果A有事務,B將拋異常。如果A沒有事務,B將以非事務執行。
- NESTED
- A和B底層采用保存點機制,形成嵌套事務。
事務管理案例:轉賬
(1)dao層
public interface AccountDao {
     //匯款
    public void out(String outer , Integer money);

    //收款
    public void in(String inner , Integer money);
}

public class AccountDaoImpl extends JdbcDaoSupport implements AccountDao {

    public void out(String outer, Integer money) {
        this.getJdbcTemplate().update("update account set money = money - ? where username = ?", money,outer);
    }

    public void in(String inner, Integer money) {
        this.getJdbcTemplate().update("update account set money = money + ? where username = ?", money,inner);
    }
}
(2)Service層
public interface AccountService {
//轉賬
public void transfer(String outer ,String inner ,Integer money);
}
public class AccountServiceImpl implements AccountService {
private AccountDao accountDao;
public void setAccountDao(AccountDao accountDao) {
this.accountDao = accountDao;
}
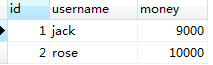
public void transfer(String outer, String inner, Integer money) {
accountDao.out(outer, money);
//模擬故障
int i = 1/0;
accountDao.in(inner, money);
}
}
(3)Spring配置
<beans>
    <!-- 1、datasource -->
    <bean id="dataSource" class="com.mchange.v2.c3p0.ComboPooledDataSource">
        <property name="driverClass" value="com.mysql.jdbc.Driver"></property>
        <property name="jdbcUrl" value="jdbc:mysql://localhost:3306/test"></property>
        <property name="user" value="root"></property>
        <property name="password" value="123"></property>
    </bean>

    <!-- 2、dao  -->
    <bean id="accountDao" class="org.tx.dao.impl.AccountDaoImpl">
        <property name="dataSource" ref="dataSource"></property>
    </bean>

    <!-- 3、service -->
    <bean id="accountService" class="org.tx.service.impl.AccountServiceImpl">
        <property name="accountDao" ref="accountDao"></property>
    </bean>
</beans>
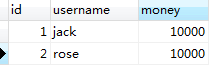
(4)測試代碼
@Test
public void demo(){
    String xmlPath = "applicationContext.xml";
    ApplicationContext applicationContext = new ClassPathXmlApplicationContext(xmlPath);
    AccountService accountService =  (AccountService) applicationContext.getBean("accountService");
    accountService.transfer("jack", "rose", 1000);
}
(5)結果
手動管理事務
Spring底層使用 TransactionTemplate 事務模板進行操作。
(1)修改Service
public class AccountServiceImpl implements AccountService {

    private AccountDao accountDao;
    public void setAccountDao(AccountDao accountDao) {
        this.accountDao = accountDao;
    }

    private TransactionTemplate transactionTemplate;
    public void setTransactionTemplate(TransactionTemplate transactionTemplate) {
        this.transactionTemplate = transactionTemplate;
    }

    public void transfer(final String outer, final String inner, final Integer money) {
        transactionTemplate.execute(new TransactionCallbackWithoutResult() {

            @Override
            protected void doInTransactionWithoutResult(TransactionStatus arg0) {
                accountDao.out(outer, money);
                //模擬故障
                int i = 1/0;
                accountDao.in(inner, money);
            }
        });
    }
}
(2)修改Spring配置
<beans>
    <!-- 1、datasource -->
    <bean id="dataSource" class="com.mchange.v2.c3p0.ComboPooledDataSource">
        <property name="driverClass" value="com.mysql.jdbc.Driver"></property>
        <property name="jdbcUrl" value="jdbc:mysql://localhost:3306/test"></property>
        <property name="user" value="root"></property>
        <property name="password" value="123"></property>
    </bean>

    <!-- 2、dao  -->
    <bean id="accountDao" class="org.tx.dao.impl.AccountDaoImpl">
        <property name="dataSource" ref="dataSource"></property>
    </bean>

    <!-- 3、service -->
    <bean id="accountService" class="org.tx.service.impl.AccountServiceImpl">
        <property name="accountDao" ref="accountDao"></property>
        <property name="transactionTemplate" ref="transactionTemplate"></property>
    </bean>

    <!-- 4、創建事務模板 -->
    <bean id="transactionTemplate" class="org.springframework.transaction.support.TransactionTemplate">
        <property name="transactionManager" ref="txManager"></property>
    </bean>

    <!-- 5、配置事務管理器 ,管理器需要事務,事務從Connection獲得,連接從連接池DataSource獲得 -->
    <bean id="txManager" class="org.springframework.jdbc.datasource.DataSourceTransactionManager">
        <property name="dataSource" ref="dataSource"></property>
    </bean>
</beans>
工廠 bean 生成代理:半自動
(1)Service層
public interface AccountService {
    //轉賬
    public void transfer(String outer ,String inner ,Integer money);
}

public class AccountServiceImpl implements AccountService {

    private AccountDao accountDao;
    public void setAccountDao(AccountDao accountDao) {
        this.accountDao = accountDao;
    }

    public void transfer(String outer, String inner, Integer money) {
        accountDao.out(outer, money);
        //模擬故障
        int i = 1/0;
        accountDao.in(inner, money);
    }
}
(2)Spring配置文件
<beans>
    <!-- 1、datasource -->
    <bean id="dataSource" class="com.mchange.v2.c3p0.ComboPooledDataSource">
        <property name="driverClass" value="com.mysql.jdbc.Driver"></property>
        <property name="jdbcUrl" value="jdbc:mysql://localhost:3306/test"></property>
        <property name="user" value="root"></property>
        <property name="password" value="123"></property>
    </bean>

    <!-- 2、dao  -->
    <bean id="accountDao" class="org.tx.dao.impl.AccountDaoImpl">
        <property name="dataSource" ref="dataSource"></property>
    </bean>

    <!-- 3、service -->
    <bean id="accountService" class="org.tx.service.impl.AccountServiceImpl">
        <property name="accountDao" ref="accountDao"></property>
    </bean>

    <!-- 4、service 代理對象
        4.1 proxyInterfaces 接口
        4.2 target 目標類
        4.3 transactionManager 事務管理器
        4.4 transactionAttributes 事務屬性(事務詳情)
            prop.key :確定哪些方法使用當前事務配置
            prop.text:用于配置事務詳情
                格式:PROPAGATION,ISOLATION,readOnly,-Exception,+Exception
                    傳播行為        隔離級別        是否只讀        異常回滾        異常提交
                例如:
                    <prop key="transfer">PROPAGATION_REQUIRED,ISOLATION_DEFAULT</prop> 默認傳播行為,和隔離級別
                    <prop key="transfer">PROPAGATION_REQUIRED,ISOLATION_DEFAULT,readOnly</prop> 只讀
                    <prop key="transfer">PROPAGATION_REQUIRED,ISOLATION_DEFAULT,+java.lang.ArithmeticException</prop>  有異常扔提交
    -->
    <bean id="proxyAccountService" class="org.springframework.transaction.interceptor.TransactionProxyFactoryBean">
        <property name="proxyInterfaces" value="org.tx.service.AccountService"></property>
        <property name="target" ref="accountService"></property>
        <property name="transactionManager" ref="txManager"></property>
        <property name="transactionAttributes">
            <props>
                <prop key="transfer">PROPAGATION_REQUIRED,ISOLATION_DEFAULT</prop>
            </props>
        </property>
    </bean>

    <!-- 5、配置事務管理器  -->
    <bean id="txManager" class="org.springframework.jdbc.datasource.DataSourceTransactionManager">
        <property name="dataSource" ref="dataSource"></property>
    </bean>
</beans>
(3)測試代碼
@Test
public void demo(){
    String xmlPath = "applicationContext.xml";
    ApplicationContext applicationContext = new ClassPathXmlApplicationContext(xmlPath);
    AccountService accountService =  (AccountService) applicationContext.getBean("proxyAccountService");
    accountService.transfer("jack", "rose", 1000);
}
AOP配置基于xml
(1)Service層
public interface AccountService {
    //轉賬
    public void transfer(String outer ,String inner ,Integer money);
}

public class AccountServiceImpl implements AccountService {

    private AccountDao accountDao;
    public void setAccountDao(AccountDao accountDao) {
        this.accountDao = accountDao;
    }

    public void transfer(String outer, String inner, Integer money) {
        accountDao.out(outer, money);
        //模擬故障
        int i = 1/0;
        accountDao.in(inner, money);
    }
}
(2)Spring配置文件
<beans>
    <!-- 1、datasource -->
    <bean id="dataSource" class="com.mchange.v2.c3p0.ComboPooledDataSource">
        <property name="driverClass" value="com.mysql.jdbc.Driver"></property>
        <property name="jdbcUrl" value="jdbc:mysql://localhost:3306/test"></property>
        <property name="user" value="root"></property>
        <property name="password" value="123"></property>
    </bean>

    <!-- 2、dao  -->
    <bean id="accountDao" class="org.tx.dao.impl.AccountDaoImpl">
        <property name="dataSource" ref="dataSource"></property>
    </bean>

    <!-- 3、service -->
    <bean id="accountService" class="org.tx.service.impl.AccountServiceImpl">
        <property name="accountDao" ref="accountDao"></property>
    </bean>

    <!-- 4、事務管理器 -->
    <bean id="txManager" class="org.springframework.jdbc.datasource.DataSourceTransactionManager">
        <property name="dataSource" ref="dataSource"></property>
    </bean>

    <!-- 5、事務通知
        <tx:attributes> 用于配置事務詳情(事務屬性)
    -->
    <tx:advice id="txAdvice" transaction-manager="txManager">
        <tx:attributes>
            <tx:method name="transfer" propagation="REQUIRED" isolation="DEFAULT"/>
        </tx:attributes>
    </tx:advice>

    <!-- 6、AOP編程 -->
    <aop:config>
        <aop:advisor advice-ref="txAdvice" pointcut="execution(* org.tx.service.*.*(..))"/>
    </aop:config>
</beans>
(3)測試代碼
@Test
public void demo(){
    String xmlPath = "applicationContext.xml";
    ApplicationContext applicationContext = new ClassPathXmlApplicationContext(xmlPath);
    AccountService accountService =  (AccountService) applicationContext.getBean("accountService");
    accountService.transfer("jack", "rose", 1000);
}
AOP配置基于注解
(1)Service層
@Transactional(propagation = Propagation.REQUIRED, isolation = Isolation.DEFAULT)
public class AccountServiceImpl implements AccountService {

    private AccountDao accountDao;
    public void setAccountDao(AccountDao accountDao) {
        this.accountDao = accountDao;
    }

    public void transfer(String outer, String inner, Integer money) {
        accountDao.out(outer, money);
        //模擬故障
        int i = 1/0;
        accountDao.in(inner, money);
    }
}
(2)Spring配置文件
<beans>
        <!-- 1、datasource -->
        <bean id="dataSource" class="com.mchange.v2.c3p0.ComboPooledDataSource">
            <property name="driverClass" value="com.mysql.jdbc.Driver"></property>
            <property name="jdbcUrl" value="jdbc:mysql://localhost:3306/test"></property>
            <property name="user" value="root"></property>
            <property name="password" value="123"></property>
        </bean>

        <!-- 2、dao  -->
        <bean id="accountDao" class="org.tx.dao.impl.AccountDaoImpl">
            <property name="dataSource" ref="dataSource"></property>
        </bean>

        <!-- 3、service -->
        <bean id="accountService" class="org.tx.service.impl.AccountServiceImpl">
            <property name="accountDao" ref="accountDao"></property>
        </bean>

        <!-- 4、事務管理器 -->
        <bean id="txManager" class="org.springframework.jdbc.datasource.DataSourceTransactionManager">
            <property name="dataSource" ref="dataSource"></property>
        </bean>

        <!-- 5、將事務管理器交予Spring -->
        <tx:annotation-driven transaction-manager="txManager"/>
</beans>
(3)測試代碼
@Test
public void demo(){
    String xmlPath = "applicationContext.xml";
    ApplicationContext applicationContext = new ClassPathXmlApplicationContext(xmlPath);
    AccountService accountService =  (AccountService) applicationContext.getBean("accountService");
    accountService.transfer("jack", "rose", 1000);
}
智能推薦

freemarker + ItextRender 根據模板生成PDF文件
1. 制作模板 2. 獲取模板,并將所獲取的數據加載生成html文件 2. 生成PDF文件 其中由兩個地方需要注意,都是關于獲取文件路徑的問題,由于項目部署的時候是打包成jar包形式,所以在開發過程中時直接安照傳統的獲取方法沒有一點文件,但是當打包后部署,總是出錯。于是參考網上文章,先將文件讀出來到項目的臨時目錄下,然后再按正常方式加載該臨時文件; 還有一個問題至今沒有解決,就是關于生成PDF文件...
電腦空間不夠了?教你一個小秒招快速清理 Docker 占用的磁盤空間!
Docker 很占用空間,每當我們運行容器、拉取鏡像、部署應用、構建自己的鏡像時,我們的磁盤空間會被大量占用。 如果你也被這個問題所困擾,咱們就一起看一下 Docker 是如何使用磁盤空間的,以及如何回收。 docker 占用的空間可以通過下面的命令查看: TYPE 列出了docker 使用磁盤的 4 種類型: Images:所有鏡像占用的空間,包括拉取下來的鏡像,和本地構建的。 Con...

requests實現全自動PPT模板
http://www.1ppt.com/moban/ 可以免費的下載PPT模板,當然如果要人工一個個下,還是挺麻煩的,我們可以利用requests輕松下載 訪問這個主頁,我們可以看到下面的樣式 點每一個PPT模板的圖片,我們可以進入到詳細的信息頁面,翻到下面,我們可以看到對應的下載地址 點擊這個下載的按鈕,我們便可以下載對應的PPT壓縮包 那我們就開始做吧 首先,查看網頁的源代碼,我們可以看到每一...


Linux C系統編程-線程互斥鎖(四)
互斥鎖 互斥鎖也是屬于線程之間處理同步互斥方式,有上鎖/解鎖兩種狀態。 互斥鎖函數接口 1)初始化互斥鎖 pthread_mutex_init() man 3 pthread_mutex_init (找不到的情況下首先 sudo apt-get install glibc-doc sudo apt-get install manpages-posix-dev) 動態初始化 int pthread_...
猜你喜歡

統計學習方法 - 樸素貝葉斯
引入問題:一機器在良好狀態生產合格產品幾率是 90%,在故障狀態生產合格產品幾率是 30%,機器良好的概率是 75%。若一日第一件產品是合格品,那么此日機器良好的概率是多少。 貝葉斯模型 生成模型與判別模型 判別模型,即要判斷這個東西到底是哪一類,也就是要求y,那就用給定的x去預測。 生成模型,是要生成一個模型,那就是誰根據什么生成了模型,誰就是類別y,根據的內容就是x 以上述例子,判斷一個生產出...
styled-components —— React 中的 CSS 最佳實踐
https://zhuanlan.zhihu.com/p/29344146 Styled-components 是目前 React 樣式方案中最受關注的一種,它既具備了 css-in-js 的模塊化與參數化優點,又完全使用CSS的書寫習慣,不會引起額外的學習成本。本文是 styled-components 作者之一 Max Stoiber 所寫,首先總結了前端組件化樣式中的最佳實踐原則,然后在此基...
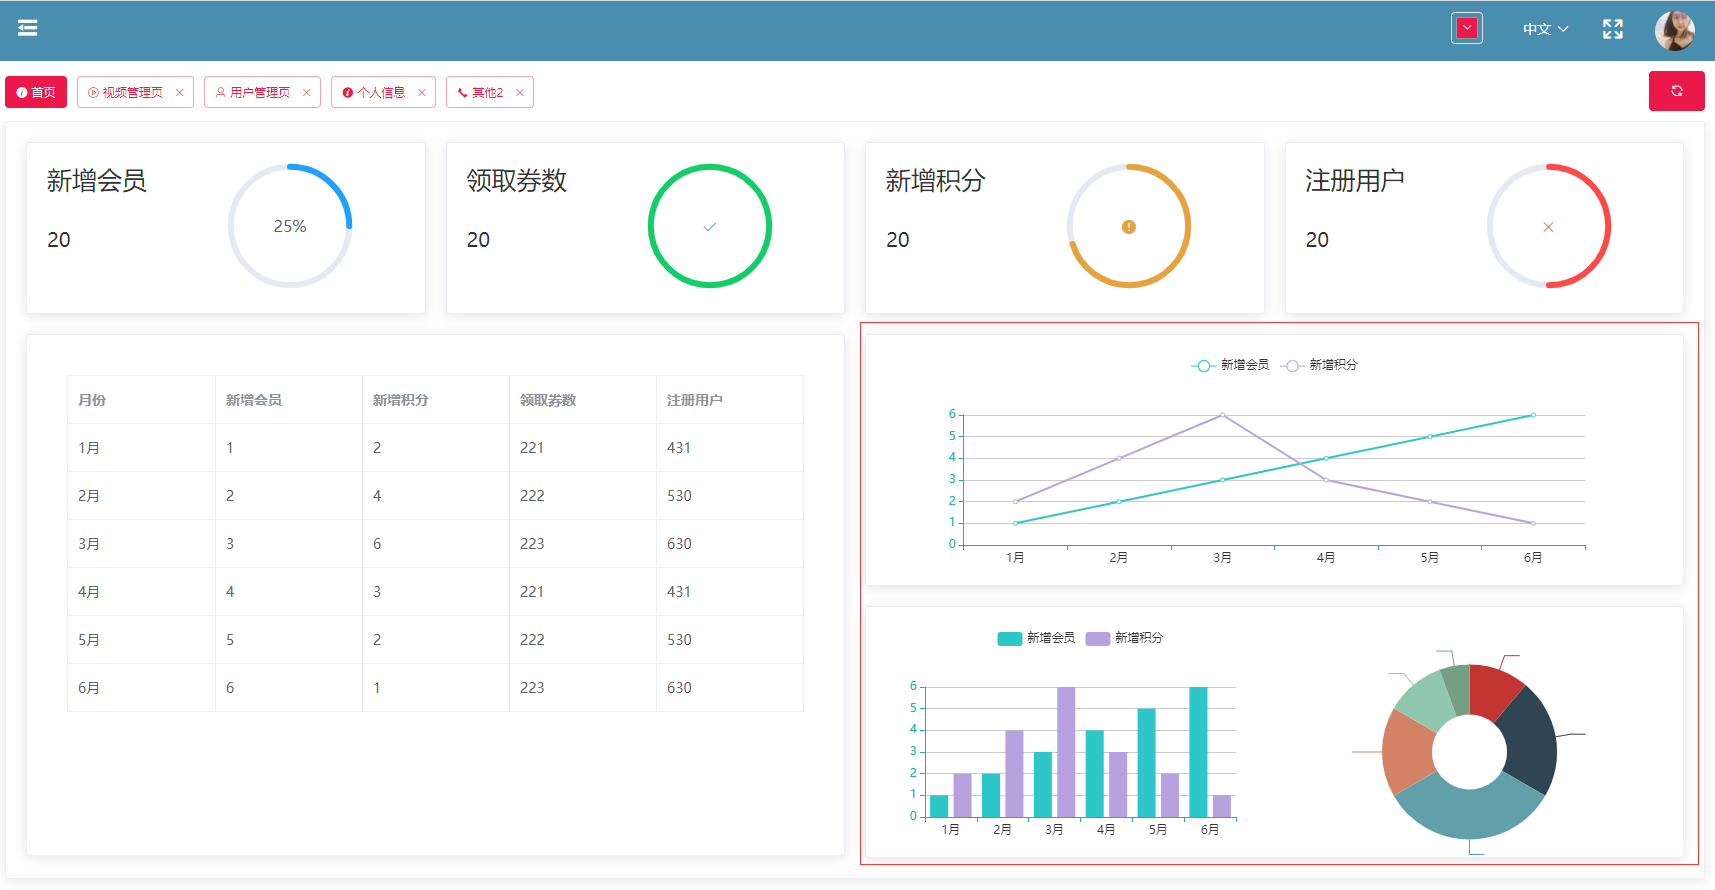
19.vue中封裝echarts組件
19.vue中封裝echarts組件 1.效果圖 2.echarts組件 3.使用組件 按照組件格式整理好數據格式 傳入組件 home.vue 4.接口返回數據格式...