OpenCV學習7——繪制形狀與文字
-
繪制圖形與文字需要用到的重要的類及函數:
①Point類
Point(x,y)表示平面上的一個點(x,y)
②Scalar類
Scalar(b,g,r,alpha)表示所繪制圖形的色彩向量,這其中有四個分向量。
③line()用于畫線
line()函數分析:
CV_EXPORTS_W void line(InputOutputArray img, Point pt1, Point pt2, const Scalar& color, int thickness = 1, int lineType = LINE_8);圖像參數所代表的含義易知。
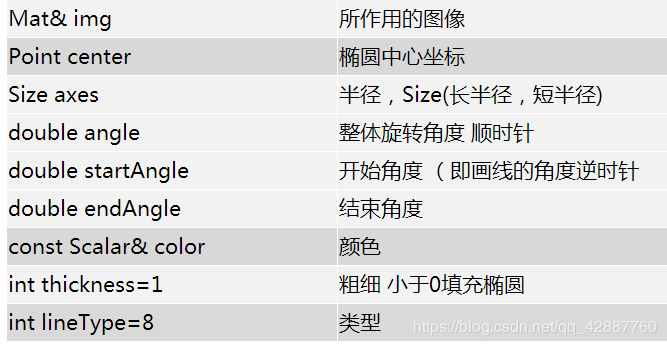
④ellipse()用于畫橢圓
ellipse()函數分析:CV_EXPORTS_W void ellipse(InputOutputArray img, Point center, Size axes, double angle, double startAngle, double endAngle, const Scalar& color, int thickness = 1, int lineType = LINE_8);Size axes()所代表的是橢圓長軸與短軸的距離,其余參數易理解。
圖像參數所代表的含義易知。⑤rectangle()用于畫矩形
rectangle()函數分析:CV_EXPORTS void rectangle(CV_IN_OUT Mat& img, Rect rec, const Scalar& color, int thickness = 1, int lineType = LINE_8, int shift = 0);Rect rec代表了所畫矩形的性質,包括起始點的左邊,矩形的長寬各為多少。
⑥circle()用于畫圓
circle()函數分析:CV_EXPORTS_W void circle(InputOutputArray img, Point center, int radius, const Scalar& color, int thickness = 1, int lineType = LINE_8);⑦fillPoly()用于填充
fillPoly()函數分析:見代碼中所分析的。
⑧RNG函數用于隨機畫線
RNG rng(int seed)以種子seed生成隨機數
生成高斯隨機數gaussian(double sigma)
生成正態分布隨機數uniform(int a,int b) -
實驗代碼及實驗效果
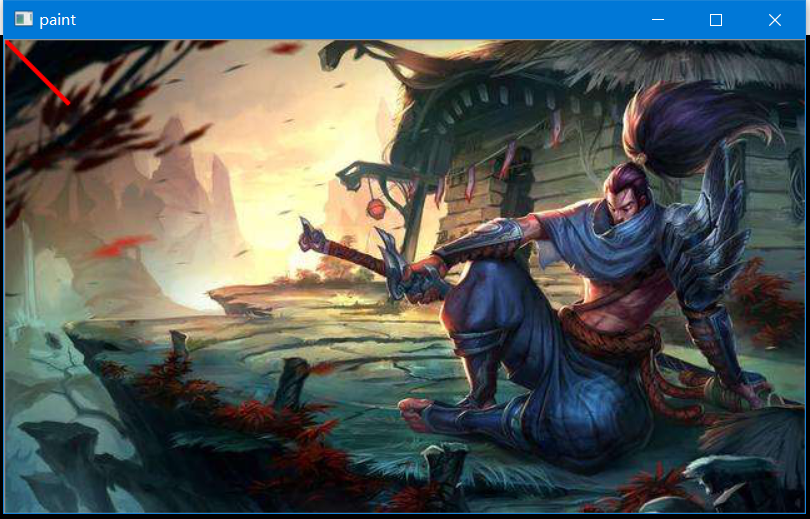
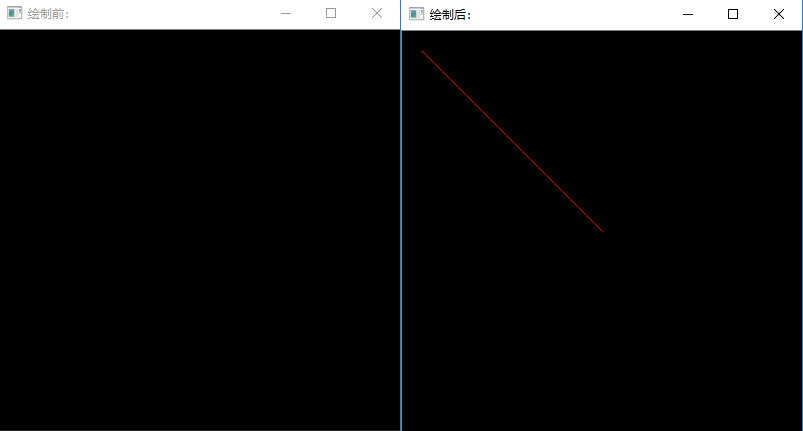
①畫線
#include<opencv2/opencv.hpp>
#include<iostream>

using namespace std;
using namespace cv;

Mat src;

void line_paint(int x1, int y1, int x2, int y2, int b, int g, int r);

int main()
{
	src = imread("C:/Users/he104/Desktop/timg.jpg");
	if (src.empty())
	{
		cout << "could not load the src..." << endl;
		return -1;
	}
	line_paint(0,0,50,50,0,0,255);
	namedWindow("paint", CV_WINDOW_AUTOSIZE);
	imshow("paint", src);
	waitKey(0);
	destroyAllWindows();
	return 0;
}

void line_paint(int x1, int y1, int x2, int y2,int b,int g,int r)
{
	Point p1 = Point(x1, y1);
	Point p2 = Point(x2, y2);
	Scalar color = Scalar(b, g, r);
	line(src, p1, p2, color, 2, LINE_8);
}
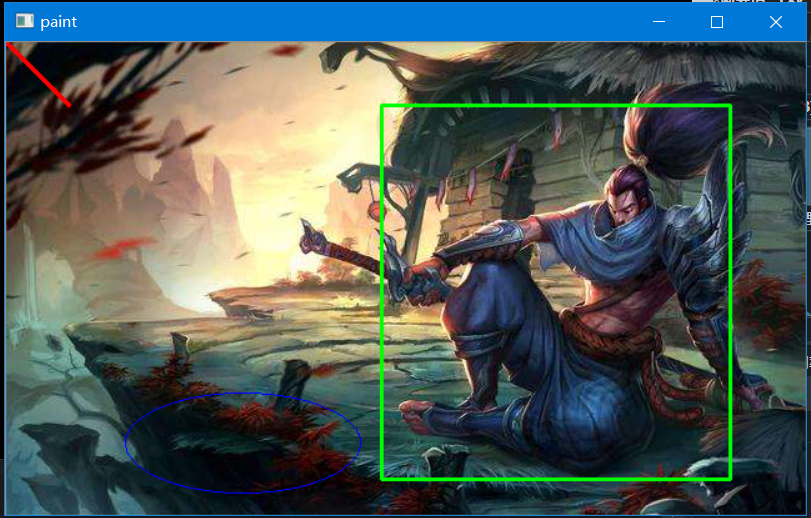
②畫矩形:
#include<opencv2/opencv.hpp>
#include<iostream>

using namespace std;
using namespace cv;

Mat src;

void line_paint(int x1, int y1, int x2, int y2, int b, int g, int r);

void rect_paint(int x, int y, int width, int height, int b, int g, int r);

int main()
{
	src = imread("C:/Users/he104/Desktop/timg.jpg");
	if (src.empty())
	{
		cout << "could not load the src..." << endl;
		return -1;
	}
	line_paint(0,0,50,50,0,0,255);
	rect_paint(300,50,280,300,0,255,0);
	namedWindow("paint", CV_WINDOW_AUTOSIZE);
	imshow("paint", src);
	waitKey(0);
	destroyAllWindows();
	return 0;
}

void line_paint(int x1, int y1, int x2, int y2,int b,int g,int r)
{
	Point p1 = Point(x1, y1);
	Point p2 = Point(x2, y2);
	Scalar color = Scalar(b, g, r);
	line(src, p1, p2, color, 2, LINE_8);
}

void rect_paint(int x, int y, int width, int height, int b, int g, int r)
{
	Rect rect = Rect(x, y, width, height);
	Scalar color = Scalar(b, g, r);
	rectangle(src, rect, color, 2, LINE_8);
}

③畫橢圓:
#include<opencv2/opencv.hpp>
#include<iostream>

using namespace std;
using namespace cv;

Mat src;

void line_paint(int x1, int y1, int x2, int y2, int b, int g, int r);
void rect_paint(int x, int y, int width, int height, int b, int g, int r);
void ellipse_paint();

int main()
{
	src = imread("C:/Users/he104/Desktop/timg.jpg");
	if (src.empty())
	{
		cout << "could not load the src..." << endl;
		return -1;
	}
	line_paint(0,0,50,50,0,0,255);
	rect_paint(300,50,280,300,0,255,0);
	ellipse_paint();
	namedWindow("paint", CV_WINDOW_AUTOSIZE);
	imshow("paint", src);
	waitKey(0);
	destroyAllWindows();
	return 0;
}

void line_paint(int x1, int y1, int x2, int y2,int b,int g,int r)
{
	Point p1 = Point(x1, y1);
	Point p2 = Point(x2, y2);
	Scalar color = Scalar(b, g, r);
	line(src, p1, p2, color, 2, LINE_8);
}

void rect_paint(int x, int y, int width, int height, int b, int g, int r)
{
	Rect rect = Rect(x, y, width, height);
	Scalar color = Scalar(b, g, r);
	rectangle(src, rect, color, 2, LINE_8);
}

void ellipse_paint()
{
	Scalar color = Scalar(255, 0, 0);
	ellipse(src, Point(src.rows / 2, src.cols / 2), Size(src.rows / 4, src.cols / 16), 0, 0, 360, color, 1, LINE_8);

}
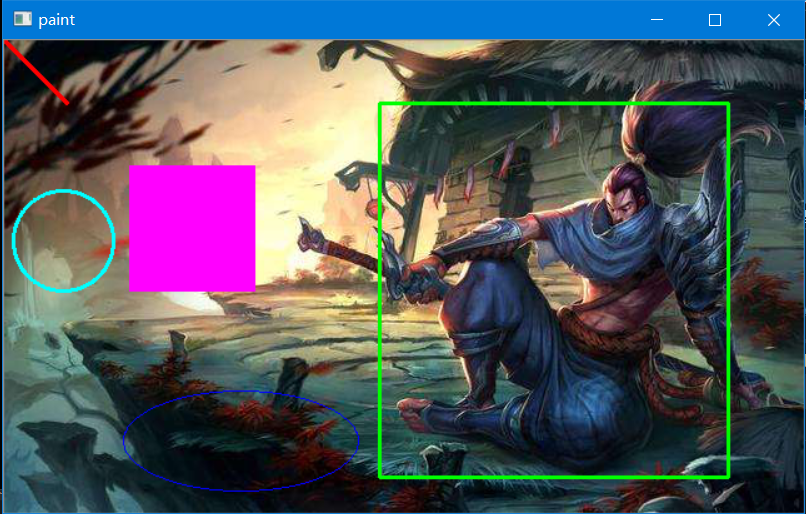
④畫圓
#include<opencv2/opencv.hpp>
#include<iostream>

using namespace std;
using namespace cv;

Mat src;

void line_paint(int x1, int y1, int x2, int y2, int b, int g, int r);
void rect_paint(int x, int y, int width, int height, int b, int g, int r);
void ellipse_paint();
void circle_paint();
int main()
{
	src = imread("C:/Users/he104/Desktop/timg.jpg");
	if (src.empty())
	{
		cout << "could not load the src..." << endl;
		return -1;
	}
	line_paint(0,0,50,50,0,0,255);
	rect_paint(300,50,280,300,0,255,0);
	ellipse_paint();
	circle_paint();
	namedWindow("paint", CV_WINDOW_AUTOSIZE);
	imshow("paint", src);
	waitKey(0);
	destroyAllWindows();
	return 0;
}

void line_paint(int x1, int y1, int x2, int y2,int b,int g,int r)
{
	Point p1 = Point(x1, y1);
	Point p2 = Point(x2, y2);
	Scalar color = Scalar(b, g, r);
	line(src, p1, p2, color, 2, LINE_8);
}

void rect_paint(int x, int y, int width, int height, int b, int g, int r)
{
	Rect rect = Rect(x, y, width, height);
	Scalar color = Scalar(b, g, r);
	rectangle(src, rect, color, 2, LINE_8);
}

void ellipse_paint()
{
	Scalar color = Scalar(255, 0, 0);
	ellipse(src, Point(src.rows / 2, src.cols / 2), Size(src.rows / 4, src.cols / 16), 0, 0, 360, color, 1, LINE_8);

}

void circle_paint()
{

	Scalar color = Scalar(255, 255, 0);
	circle(src,Point(src.rows/8,src.cols/4),40,color,2,LINE_8);
}

⑤填充一個多邊形:
#include<opencv2/opencv.hpp>
#include<iostream>

using namespace std;
using namespace cv;

Mat src;

void line_paint(int x1, int y1, int x2, int y2, int b, int g, int r);
void rect_paint(int x, int y, int width, int height, int b, int g, int r);
void ellipse_paint();
void circle_paint();
void fillPoly_paint();
int main()
{
	src = imread("C:/Users/he104/Desktop/timg.jpg");
	if (src.empty())
	{
		cout << "could not load the src..." << endl;
		return -1;
	}
	line_paint(0,0,50,50,0,0,255);
	rect_paint(300,50,280,300,0,255,0);
	ellipse_paint();
	circle_paint();
	fillPoly_paint();
	namedWindow("paint", CV_WINDOW_AUTOSIZE);
	imshow("paint", src);
	waitKey(0);
	destroyAllWindows();
	return 0;
}

void line_paint(int x1, int y1, int x2, int y2,int b,int g,int r)
{
	Point p1 = Point(x1, y1);
	Point p2 = Point(x2, y2);
	Scalar color = Scalar(b, g, r);
	line(src, p1, p2, color, 2, LINE_8);
}

void rect_paint(int x, int y, int width, int height, int b, int g, int r)
{
	Rect rect = Rect(x, y, width, height);
	Scalar color = Scalar(b, g, r);
	rectangle(src, rect, color, 2, LINE_8);
}

void ellipse_paint()
{
	Scalar color = Scalar(255, 0, 0);
	ellipse(src, Point(src.rows / 2, src.cols / 2), Size(src.rows / 4, src.cols / 16), 0, 0, 360, color, 1, LINE_8);

}

void circle_paint()
{

	Scalar color = Scalar(255, 255, 0);
	circle(src,Point(src.rows/8,src.cols/4),40,color,2,LINE_8);
}

void fillPoly_paint()
{
	Point pts[1][5];
	pts[0][0] = Point(100, 100);
	pts[0][1] = Point(100, 200);
	pts[0][2] = Point(200, 200);
	pts[0][3] = Point(200, 100);
	pts[0][4] = Point(100, 100);
	const Point *ppts[] = { pts[0] };
	int npt[] = { 5 };
	Scalar color = Scalar(255, 0, 255);
	fillPoly(src, ppts, npt, 1, color, LINE_8);
}
對于fillPoly()函數的參數問題:
參考于https://blog.csdn.net/yinkailin/article/details/12406975
fillPoly()函數原型為
void cvFillPoly(CvArr * img,
		        CvPoint ** pts,
				int * npts,
				int contours,
				CvScalar color,
				int line_type = 8);
主要討論參數
CvPoint ** pts,
int * npts,
int contours,
CvPoint **pts表示的是一個Point類型的二級指針,其也是一個數組,指向所要填充的多邊形的點,之所以是二級指針是因為我們定義的ppts[x][y]為二維數組,該二維數組的每一行即表示一個將要填充的多邊形,因而ppts又指向一個一維數組,該一維數組存儲著各個多邊形。
int *npts則與pts所對應,npts所指向的數組表示所要填充的多邊形內有幾個點,因此通過pts與npts這兩個指向一個一維數組的指針就唯一確定了所要填充的多邊形的個數以及所填充多邊形的點的數目,即此時所要填充的多邊形即唯一確定。
int contours,contours參數所表示的是對于pts指針所指向的多個多邊形,我們所填充的數目的問題
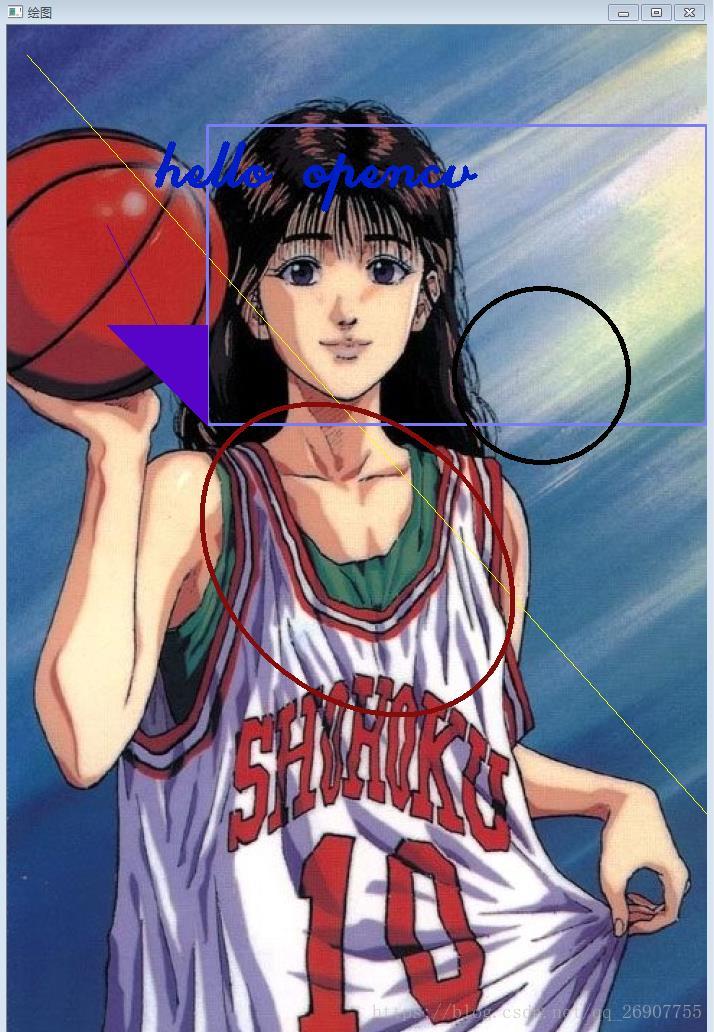
⑥圖像中文字的繪制(利用putText()函數來進行繪制)
#include<opencv2/opencv.hpp>
#include<iostream>

using namespace std;
using namespace cv;

Mat src;

void line_paint(int x1, int y1, int x2, int y2, int b, int g, int r);
void rect_paint(int x, int y, int width, int height, int b, int g, int r);
void ellipse_paint();
void circle_paint();
void fillPoly_paint();
int main()
{
	src = imread("C:/Users/he104/Desktop/timg.jpg");
	if (src.empty())
	{
		cout << "could not load the src..." << endl;
		return -1;
	}
	line_paint(0,0,50,50,0,0,255);
	rect_paint(300,50,280,300,0,255,0);
	ellipse_paint();
	circle_paint();
	fillPoly_paint();
	putText(src, "hello,opencv", Point(200, 200), CV_FONT_HERSHEY_COMPLEX, 1.0, Scalar(0, 0, 255), 1, LINE_8);
	namedWindow("paint", CV_WINDOW_AUTOSIZE);
	imshow("paint", src);
	waitKey(0);
	destroyAllWindows();
	return 0;
}

void line_paint(int x1, int y1, int x2, int y2,int b,int g,int r)
{
	Point p1 = Point(x1, y1);
	Point p2 = Point(x2, y2);
	Scalar color = Scalar(b, g, r);
	line(src, p1, p2, color, 2, LINE_8);
}

void rect_paint(int x, int y, int width, int height, int b, int g, int r)
{
	Rect rect = Rect(x, y, width, height);
	Scalar color = Scalar(b, g, r);
	rectangle(src, rect, color, 2, LINE_8);
}

void ellipse_paint()
{
	Scalar color = Scalar(255, 0, 0);
	ellipse(src, Point(src.rows / 2, src.cols / 2), Size(src.rows / 4, src.cols / 16), 0, 0, 360, color, 1, LINE_8);

}

void circle_paint()
{

	Scalar color = Scalar(255, 255, 0);
	circle(src,Point(src.rows/8,src.cols/4),40,color,2,LINE_8);
}

void fillPoly_paint()
{
	Point pts[1][5];
	pts[0][0] = Point(100, 100);
	pts[0][1] = Point(100, 200);
	pts[0][2] = Point(200, 200);
	pts[0][3] = Point(200, 100);
	pts[0][4] = Point(100, 100);
	const Point *ppts[] = { pts[0] };
	int npt[] = { 5 };
	Scalar color = Scalar(255, 0, 255);
	fillPoly(src, ppts, npt, 1, color, LINE_8);
}

putText()函數分析:
CV_EXPORTS_W void putText(  nputOutputArray img,
						    const String& text,
						    Point org,
                  			int fontFace,
                   	    	double fontScale,
                    		Scalar color,
             			    int thickness = 1,
                  			int lineType = LINE_8,);
第一個參數為所操作的圖像。
第二個參數為希望在圖像上繪制的文字。
第三個參數為開始繪制點的坐標。
第四個參數為字體的格式,筆者所學的教程中給筆者指出CV_FONT_HERSHEY_COMPLEX是一般情況下都能使程序正常進行的,筆者又測試了CV_FONT_BLACK發現也可正常運行,只不過是字體格式發生改變。
第五個參數為字體的顏色,通過Scalar()類來進行控制。
第六個參數為字體厚度。
第七個參數為字體劃線格式。
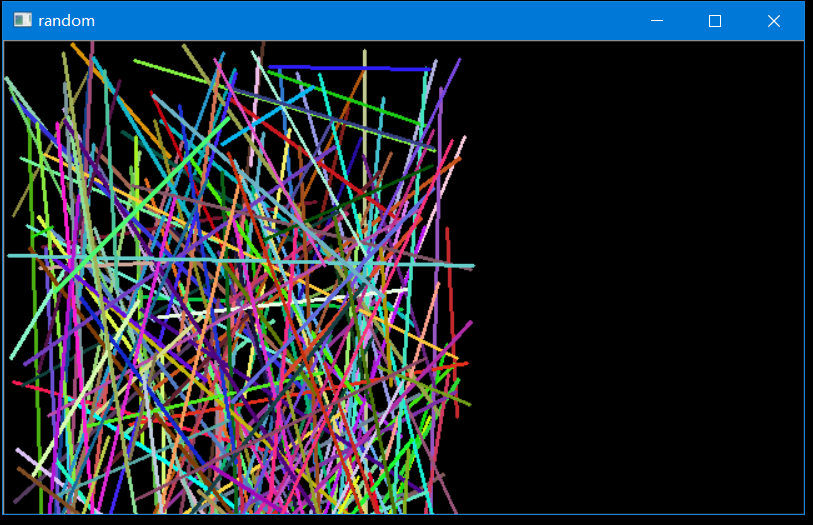
⑦隨機畫線(利用RNG函數)
#include<opencv2/opencv.hpp>
#include<iostream>

using namespace std;
using namespace cv;

Mat src;

int main()
{
	src = imread("C:/Users/he104/Desktop/timg.jpg");
	if (src.empty())
	{
		cout << "could not load the src..." << endl;
		return -1;
	}
	Mat dst;
	dst = Mat::zeros(src.size(), src.type());
	RNG rng(12345);
	for (int i = 0; i < 0xffff; i++)
	{
		Point p1 = Point((rng.uniform(0, src.rows)), (rng.uniform(0, src.cols)));
		Point p2 = Point((rng.uniform(0, src.rows)), (rng.uniform(0, src.cols)));
		Scalar color = Scalar(rng.uniform(0, 255), rng.uniform(0, 255), rng.uniform(0, 255));
		if (waitKey(50) > 0)break;
		line(dst, p1, p2, color, 2, LINE_8);
		namedWindow("random", CV_WINDOW_AUTOSIZE);
		imshow("random", dst);
	}
	waitKey(0);
	destroyAllWindows();
	return 0;
}
智能推薦
OpenCV學習筆記(四)——繪制簡形狀與文本
前言: 在圖像處理的過程中,我們有時需要在圖像或者視頻上畫上一些圖案或者繪上一些文字,在OpenCV中這非常的容易實現。OpenCV中提供了各種功能的繪圖函數,使用這些函數,我們可以在圖像上繪制直線、矩形、圓、橢圓、多邊形等等。 一、繪制直線 在OpenCV中提供了line(...
OpenCV圖像處理教程C++(八) 繪制形狀與文字
point表示2D平面上一個點x,y Point p p.x, p.y or p=Point(x,y) Scalar表示四個元素的向量 Scalar(a,b,c);a=blue,b=green,c=red 代碼: 結果:...
OpenCV圖像處理---繪制形狀、文字與隨機數生成
1. 畫線 cv::line (LINE_4\LINE_8\LINE_AA) lineType 描述畫出這個線所使用的算法,4連通和8連通線使用 Bresenham 直線算法 LINE_AA 抗鋸齒,即線看起來會比較平滑 2. 畫橢圓cv::ellipse 3. 畫矩形cv::rectangle 4. 畫圓cv::circle 5. 畫填充cv::fillPoly 6. 畫文字cv::putTex...

opencv學習八(繪制直線,矩形等幾何形狀,添加文字)line,rectangle,fillPoly
要點: LINE_4/LINE_8都有鋸齒,LINE_AA無鋸齒; 新建一個空白圖: Mat t1; t1.create(500, 500, CV_8UC3); t1 = Scalar(255, 255, 255); 或者Mat t1(500,500,CV_8UC3,Scalar(255,255,255); 新建直線: line(t1, p1, p2, color, 1, LINE_8); //背...

猜你喜歡

freemarker + ItextRender 根據模板生成PDF文件
1. 制作模板 2. 獲取模板,并將所獲取的數據加載生成html文件 2. 生成PDF文件 其中由兩個地方需要注意,都是關于獲取文件路徑的問題,由于項目部署的時候是打包成jar包形式,所以在開發過程中時直接安照傳統的獲取方法沒有一點文件,但是當打包后部署,總是出錯。于是參考網上文章,先將文件讀出來到項目的臨時目錄下,然后再按正常方式加載該臨時文件; 還有一個問題至今沒有解決,就是關于生成PDF文件...
電腦空間不夠了?教你一個小秒招快速清理 Docker 占用的磁盤空間!
Docker 很占用空間,每當我們運行容器、拉取鏡像、部署應用、構建自己的鏡像時,我們的磁盤空間會被大量占用。 如果你也被這個問題所困擾,咱們就一起看一下 Docker 是如何使用磁盤空間的,以及如何回收。 docker 占用的空間可以通過下面的命令查看: TYPE 列出了docker 使用磁盤的 4 種類型: Images:所有鏡像占用的空間,包括拉取下來的鏡像,和本地構建的。 Con...

requests實現全自動PPT模板
http://www.1ppt.com/moban/ 可以免費的下載PPT模板,當然如果要人工一個個下,還是挺麻煩的,我們可以利用requests輕松下載 訪問這個主頁,我們可以看到下面的樣式 點每一個PPT模板的圖片,我們可以進入到詳細的信息頁面,翻到下面,我們可以看到對應的下載地址 點擊這個下載的按鈕,我們便可以下載對應的PPT壓縮包 那我們就開始做吧 首先,查看網頁的源代碼,我們可以看到每一...


Linux C系統編程-線程互斥鎖(四)
互斥鎖 互斥鎖也是屬于線程之間處理同步互斥方式,有上鎖/解鎖兩種狀態。 互斥鎖函數接口 1)初始化互斥鎖 pthread_mutex_init() man 3 pthread_mutex_init (找不到的情況下首先 sudo apt-get install glibc-doc sudo apt-get install manpages-posix-dev) 動態初始化 int pthread_...