【Hexo搭建個人博客】:yilia主題配置(五) - 其他配置
本文主要講述 Hexo-yilia 主題對于文章持久化及天氣等插件的配置。
1.持久化URL
- 首先,安裝插件:
npm install hexo-abbrlink --save
- 在根目錄中打開
_config.yml文件,找到permalink項,修改:
# permalink: :year/:month/:day/:title/  # 原代碼, 分層較深
permalink: archives/:abbrlink.html
permalink_defaults:
abbrlink:
  alg: crc32  # 算法:crc16(default) and crc32
  rep: hex    # 進制:dec(default) and hex
- 分類和標簽預設
中英文映射:
# e.g.
category_map:
  網站: site
  小程序: miniprogram
  開發工具: tools
tag_map:
  標簽分類: kinds
  基礎: basic
  Web框架: web_frame
  數據庫操作: sql_action
  數據分析: data_analysis
  爬蟲: spider
  自動化測試: auto_test
參考:hexo持久化配置
2.文章圖片的導入
在hexo主題中,直接用markdown的語法:如 [外鏈圖片轉存失敗,源站可能有防盜鏈機制,建議將圖片保存下來直接上傳(img-DuuJ9ioE-1583932882800)(圖片地址)],是不生效的
方式一:上傳七牛云 入門詳情
使用: 獲取七牛云圖片鏈接
方式二:使用插件:
- 安裝插件
npm install hexo-asset-image --save
- 打開文件
node_modules/hexo-asset-image/index.js,替換內容為下面的代碼:
'use strict';
var cheerio = require('cheerio');

// http://stackoverflow.com/questions/14480345/how-to-get-the-nth-occurrence-in-a-string
function getPosition(str, m, i) {
  return str.split(m, i).join(m).length;
}

var version = String(hexo.version).split('.');
hexo.extend.filter.register('after_post_render', function(data){
  var config = hexo.config;
  if(config.post_asset_folder){
        var link = data.permalink;
    if(version.length > 0 && Number(version[0]) == 3)
       var beginPos = getPosition(link, '/', 1) + 1;
    else
       var beginPos = getPosition(link, '/', 3) + 1;
    // In hexo 3.1.1, the permalink of "about" page is like ".../about/index.html".
    var endPos = link.lastIndexOf('/') + 1;
    link = link.substring(beginPos, endPos);

    var toprocess = ['excerpt', 'more', 'content'];
    for(var i = 0; i < toprocess.length; i++){
      var key = toprocess[i];

      var $ = cheerio.load(data[key], {
        ignoreWhitespace: false,
        xmlMode: false,
        lowerCaseTags: false,
        decodeEntities: false
      });

      $('img').each(function(){
        if ($(this).attr('src')){
            // For windows style path, we replace '\' to '/'.
            var src = $(this).attr('src').replace('\\', '/');
            if(!/http[s]*.*|\/\/.*/.test(src) &&
               !/^\s*\//.test(src)) {
              // For "about" page, the first part of "src" can't be removed.
              // In addition, to support multi-level local directory.
              var linkArray = link.split('/').filter(function(elem){
                return elem != '';
              });
              var srcArray = src.split('/').filter(function(elem){
                return elem != '' && elem != '.';
              });
              if(srcArray.length > 1)
                srcArray.shift();
              src = srcArray.join('/');
              $(this).attr('src', config.root + link + src);
              console.info&&console.info("update link as:-->"+config.root + link + src);
            }
        }else{
            console.info&&console.info("no src attr, skipped...");
            console.info&&console.info($(this));
        }
      });
      data[key] = $.html();
    }
  }
});
- 打開根目錄配置文件
_config.yml,修改如下:
# 文章圖片路徑轉換
post_asset_folder: true
重新生成后,會在文章同級目錄建立一個同名文件夾,可以存放圖片。
- 使用:
{% asset_img example.jpg This is an example image %}
參考:圖片引用配置
方式三:存放到根目錄
- 引用:

<!-- e.g. -->

<!-- 使用樣式: -->
<img src="" width="50%" height="50%">
參考:知乎提問
3.Hexo網站運行時間
在文件 themes/yelee/layout/_partial/left-col.ejs 中,(具體位置可自選)加入如下代碼:
<span id="timeDate">載入天數...</span><span id="times">載入時分秒...</span>
<script>
    var now = new Date();
    function createtime() {
        var grt= new Date("11/23/2018 20:00:00");//此處修改你的建站時間或者網站上線時間
        now.setTime(now.getTime()+250);
        days = (now - grt ) / 1000 / 60 / 60 / 24; dnum = Math.floor(days);
        hours = (now - grt ) / 1000 / 60 / 60 - (24 * dnum); hnum = Math.floor(hours);
        if(String(hnum).length ==1 ){hnum = "0" + hnum;} minutes = (now - grt ) / 1000 /60 - (24 * 60 * dnum) - (60 * hnum);
        mnum = Math.floor(minutes); if(String(mnum).length ==1 ){mnum = "0" + mnum;}
        seconds = (now - grt ) / 1000 - (24 * 60 * 60 * dnum) - (60 * 60 * hnum) - (60 * mnum);
        snum = Math.round(seconds); if(String(snum).length ==1 ){snum = "0" + snum;}
        document.getElementById("timeDate").innerHTML = "本站已安全運行 "+dnum+" 天 ";
        document.getElementById("times").innerHTML = hnum + " 小時 " + mnum + " 分 " + snum + " 秒";
    }
    setInterval("createtime()",250);
</script>
日期格式: 月/日/年 時:分:秒。
4.添加心知天氣
4.1.注冊賬號,設置天氣樣式:
- 進入官網注冊,選擇樣式:
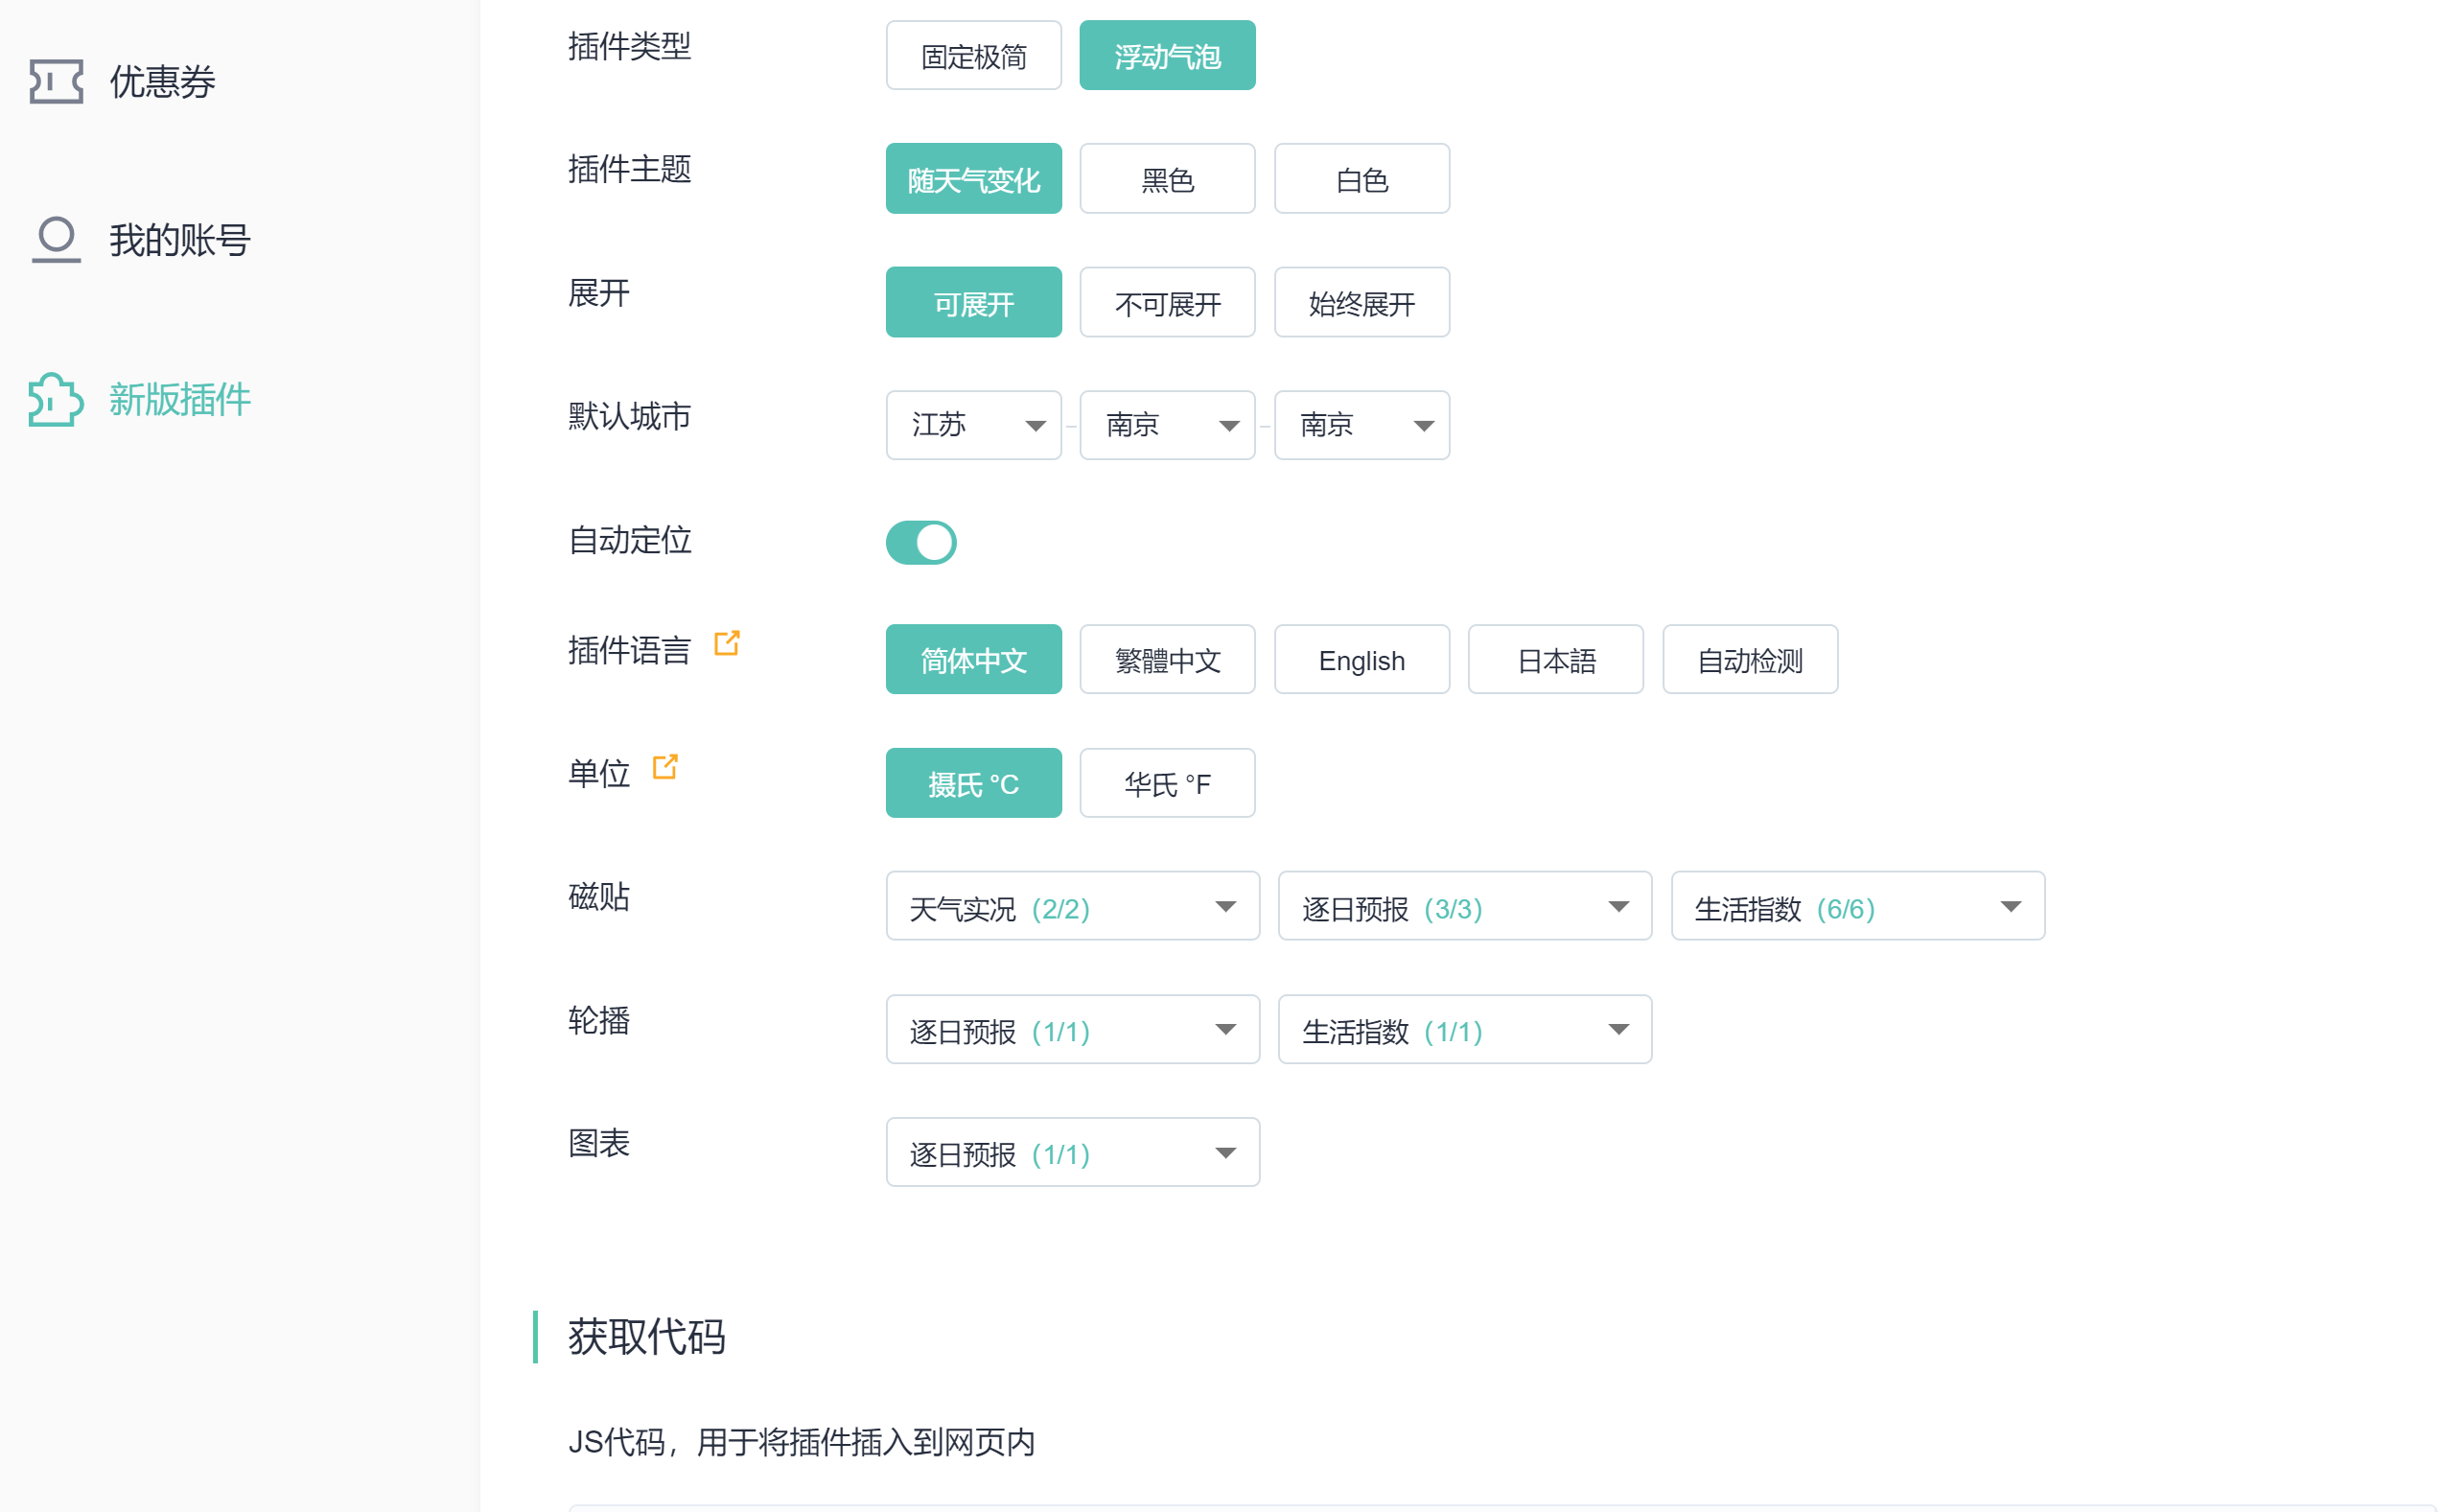
- 點擊生成代碼,復制代碼:
如:
<div id="tp-weather-widget"></div>
  <script>
    (function(a,h,g,f,e,d,c,b){b=function(){d=h.createElement(g);c=h.getElementsByTagName(g)[0];d.src=e;d.charset="utf-8";d.async=1;c.parentNode.insertBefore(d,c)};a["SeniverseWeatherWidgetObject"]=f;a[f]||(a[f]=function(){(a[f].q=a[f].q||[]).push(arguments)});a[f].l=+new Date();if(a.attachEvent){a.attachEvent("onload",b)}else{a.addEventListener("load",b,false)}}(window,document,"script","SeniverseWeatherWidget","//cdn.sencdn.com/widget2/static/js/bundle.js?t="+parseInt((new Date().getTime() / 100000000).toString(),10)));
    window.SeniverseWeatherWidget('show', {
      flavor: "bubble",
      location: "WTSQQYHVQ973",
      geolocation: true,
      language: "zh-Hans",
      unit: "c",
      theme: "auto",
      token: "31a8562e-ae28-47fe-860d-d4e01b0867c2",
      hover: "enabled",
      container: "tp-weather-widget"
    })
  </script>
4.2.添加配置
- 打開主題配置文件
_config.yml,添加:
# 心知天氣
xinzhi_weather: true
- 打開
themes/yilia-plus/layout/_partial/left-col.ejs文件,在合適位置添加:
<% if(theme.xinzhi_weather){ %>
  <!-- 這是剛剛生成的js代碼 -->
  <div id="tp-weather-widget"></div>
  <script>
    (function(a,h,g,f,e,d,c,b){b=function(){d=h.createElement(g);c=h.getElementsByTagName(g)[0];d.src=e;d.charset="utf-8";d.async=1;c.parentNode.insertBefore(d,c)};a["SeniverseWeatherWidgetObject"]=f;a[f]||(a[f]=function(){(a[f].q=a[f].q||[]).push(arguments)});a[f].l=+new Date();if(a.attachEvent){a.attachEvent("onload",b)}else{a.addEventListener("load",b,false)}}(window,document,"script","SeniverseWeatherWidget","//cdn.sencdn.com/widget2/static/js/bundle.js?t="+parseInt((new Date().getTime() / 100000000).toString(),10)));
    window.SeniverseWeatherWidget('show', {
      flavor: "bubble",
      location: "WTSQQYHVQ973",
      geolocation: true,
      language: "zh-Hans",
      unit: "c",
      theme: "auto",
      token: "31a8562e-ae28-47fe-860d-d4e01b0867c2",
      hover: "enabled",
      container: "tp-weather-widget"
    })
  </script>
<% } %>
參考:添加天氣
5.添加百度推送
5.1.新建 baidu-push.ejs 文件
在 yilia-plus/layout/_partial 下添加 baidu-push.ejs 文件,內容如下:
<% if (theme.baidu_push){ %>
<script>
(function(){
    var bp = document.createElement('script');
    var curProtocol = window.location.protocol.split(':')[0];
    if (curProtocol === 'https') {
        bp.src = 'https://zz.bdstatic.com/linksubmit/push.js';
    }
    else {
        bp.src = 'http://push.zhanzhang.baidu.com/push.js';
    }
    var s = document.getElementsByTagName("script")[0];
    s.parentNode.insertBefore(bp, s);
})();
</script>
<% } %>
5.2.引用 baidu-push.ejs
編輯 layout/_partial/head.ejs,添加:
<%- partial('baidu-push') %>
5.3. 添加 baidu_push 屬性
編輯 yilia/_config.yml ,添加:
# 百度推送
baidu_push: true
6.添加版權聲明
6.1.方式一:修改 aricle.ejs 文件
在 layout/_partial/aricle.ejs 中合適位置,添加:
<%
  var sUrl = url.replace(/index\.html$/, '');
  sUrl = /^(http:|https:)\/\//.test(sUrl) ? sUrl : 'https:' + sUrl;
%>

<%# "版權說明" %>
<% if (((theme.copyright.copyright_type === 2) || (theme.copyright.copyright_type === 1 && post.copyright)) && !index){ %>
<div class="declare">
  <ul class="post-copyright">
    <li>
      <strong>本文作者: </strong>
      <%= config.author%>
    </li>
    <li>
      <strong>本文鏈接: </strong>
      <%= sUrl%>
    </li>

    <% if (theme.copyright_text || theme.copyright_text == null){ %>
    <li>
      <span><strong>版權聲明: </strong></span>
      <% if (theme.copyright.copyright_text == null || theme.copyright.copyright_text == true){ %>
        <span>
          本博客所有文章除特別聲明外,均采用
          <a rel="license" href="<%= theme.copyright.licensee_url%>" title="<%= theme.copyright.licensee_alias %>"><%= theme.copyright.licensee_name%></a>
          進行許可。轉載請注明出處!
        </span>
        <% if(theme.copyright.licensee_img != undefined){ %>
          <span>
            <a rel="license" href="<%= theme.copyright.licensee_url%>">
              <img alt="知識共享許可協議" style="border-width:0" src="<%- config.root %><%= theme.copyright.licensee_img %>"/>
            </a>
          </span>
        <% } %>

      <% } else { %>
        <%= theme.copyright.copyright_text %>
      <% } %>
    </li>
    <% } %>
  </ul>

</div>
<% } else {%>
  <div class="declare" hidden="hidden"></div>
<% } %>
6.2.方式二:新建 declare.ejs 文件
-
在目錄
themes\yilia-plus\layout\_partial\post下,新建declare.ejs文件,存放上面的代碼 -
在
layout/_partial/aricle.ejs中合適位置,添加:
<%# "版權說明" %>
<% if (theme.copyright) {%>
  <%- partial('post/declare') %>
<% } %>
- 打開樣式文件
themes\yilia-plus\source\main.b8fa34.css,添加樣式:
.post-copyright{
    margin: 0em 0em 0em 0em;
    padding: 0.5em 1em;
    border-left:3px solid #ff1700;
    background-color: #f9f9f9;
    list-style: none;
    font-size: 14px;
}
6.3.添加 copyright 屬性
打開主題配置文件 _config.yml,添加:
# 版權聲明
# 版權聲明type設定:0-關閉版權聲明; 1-文章對應的md文件里有copyright: true屬性,才有版權聲明; 2-所有文章均有版權聲明
copyright:
  copyright_type: 2
  licensee_url: https://creativecommons.org/licenses/by-nc-sa/4.0/        #當前應用的版權協議地址。
  licensee_name: 'CC BY-NC-SA 4.0'                                        #版權協議的名稱
  licensee_alias: '知識共享署名-非商業性使用-相同方式共享 4.0 國際許可協議'       # alias別名
  # https://i.creativecommons.org/l/by-nc-sa/4.0/88x31.png
  licensee_img: /images/copyright.png                            #版權協議的Logo (/images/copyright.png)
  # 版權聲明自定義文本(關閉請設置為false)
  copyright_text:
7.添加在線聊天
7.1.注冊

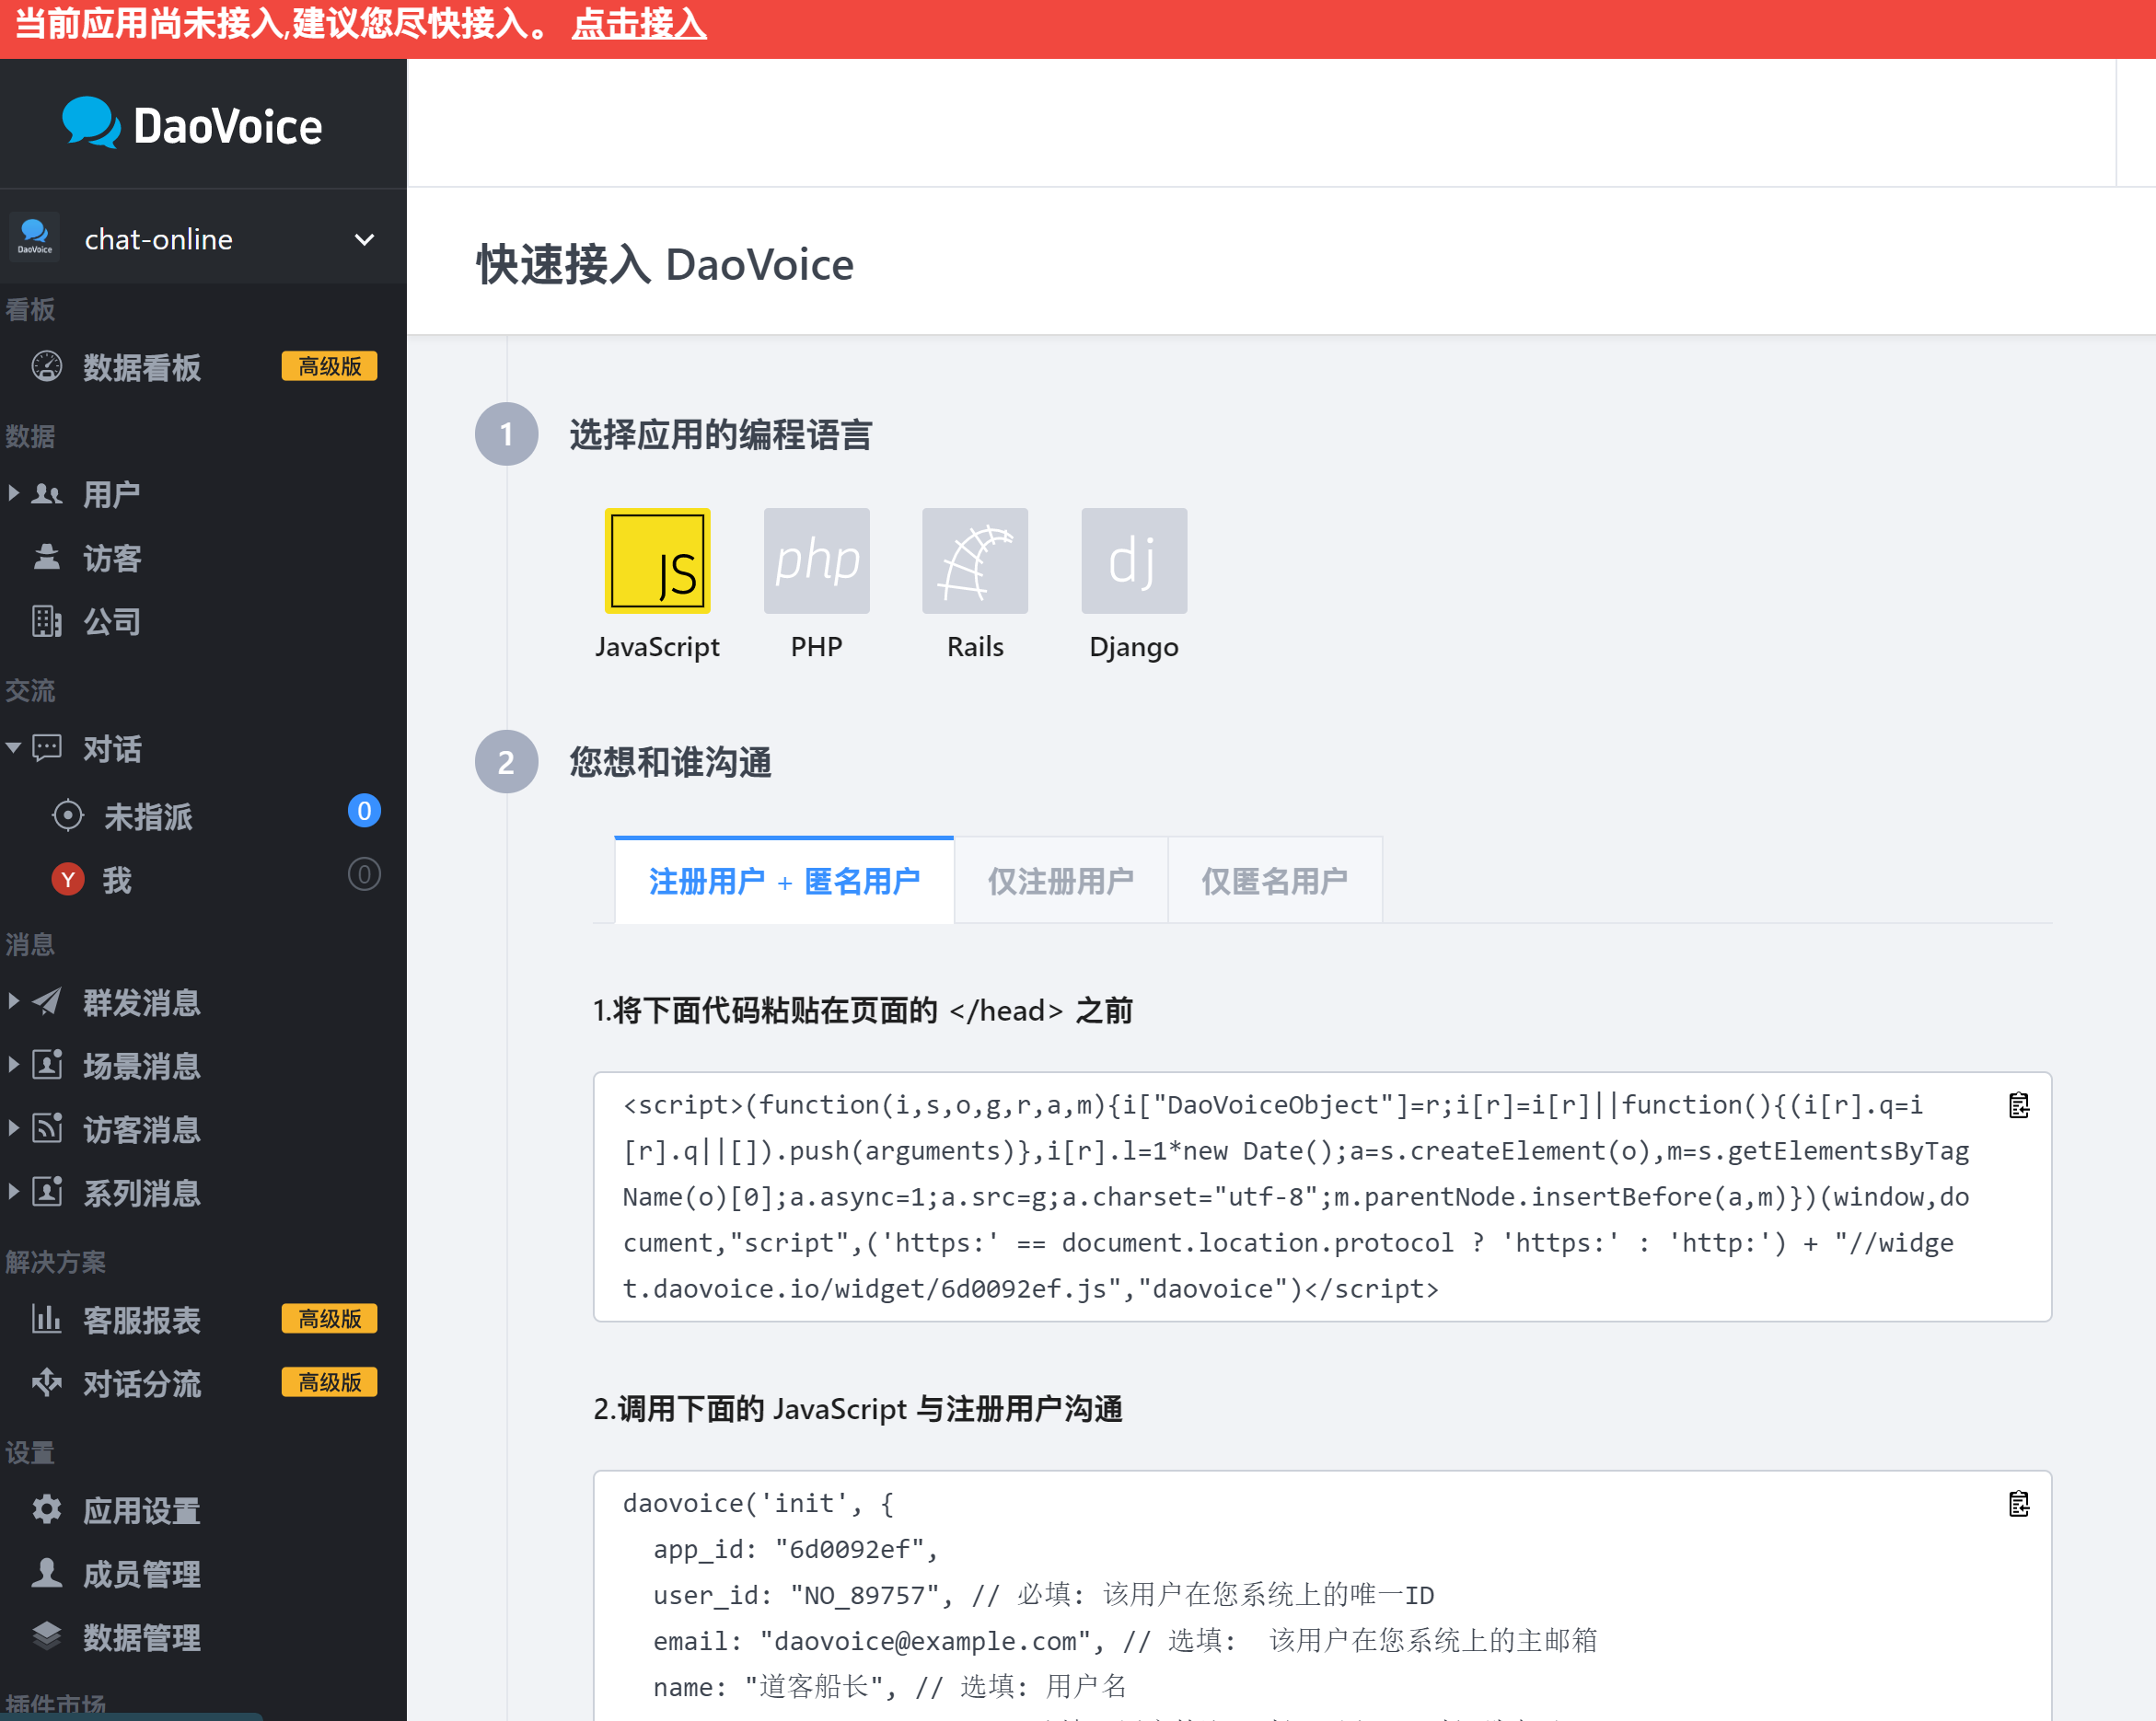
可以通過點擊 點擊接入 ,或路徑 [應用設置] -> [安裝到網站] 找到。
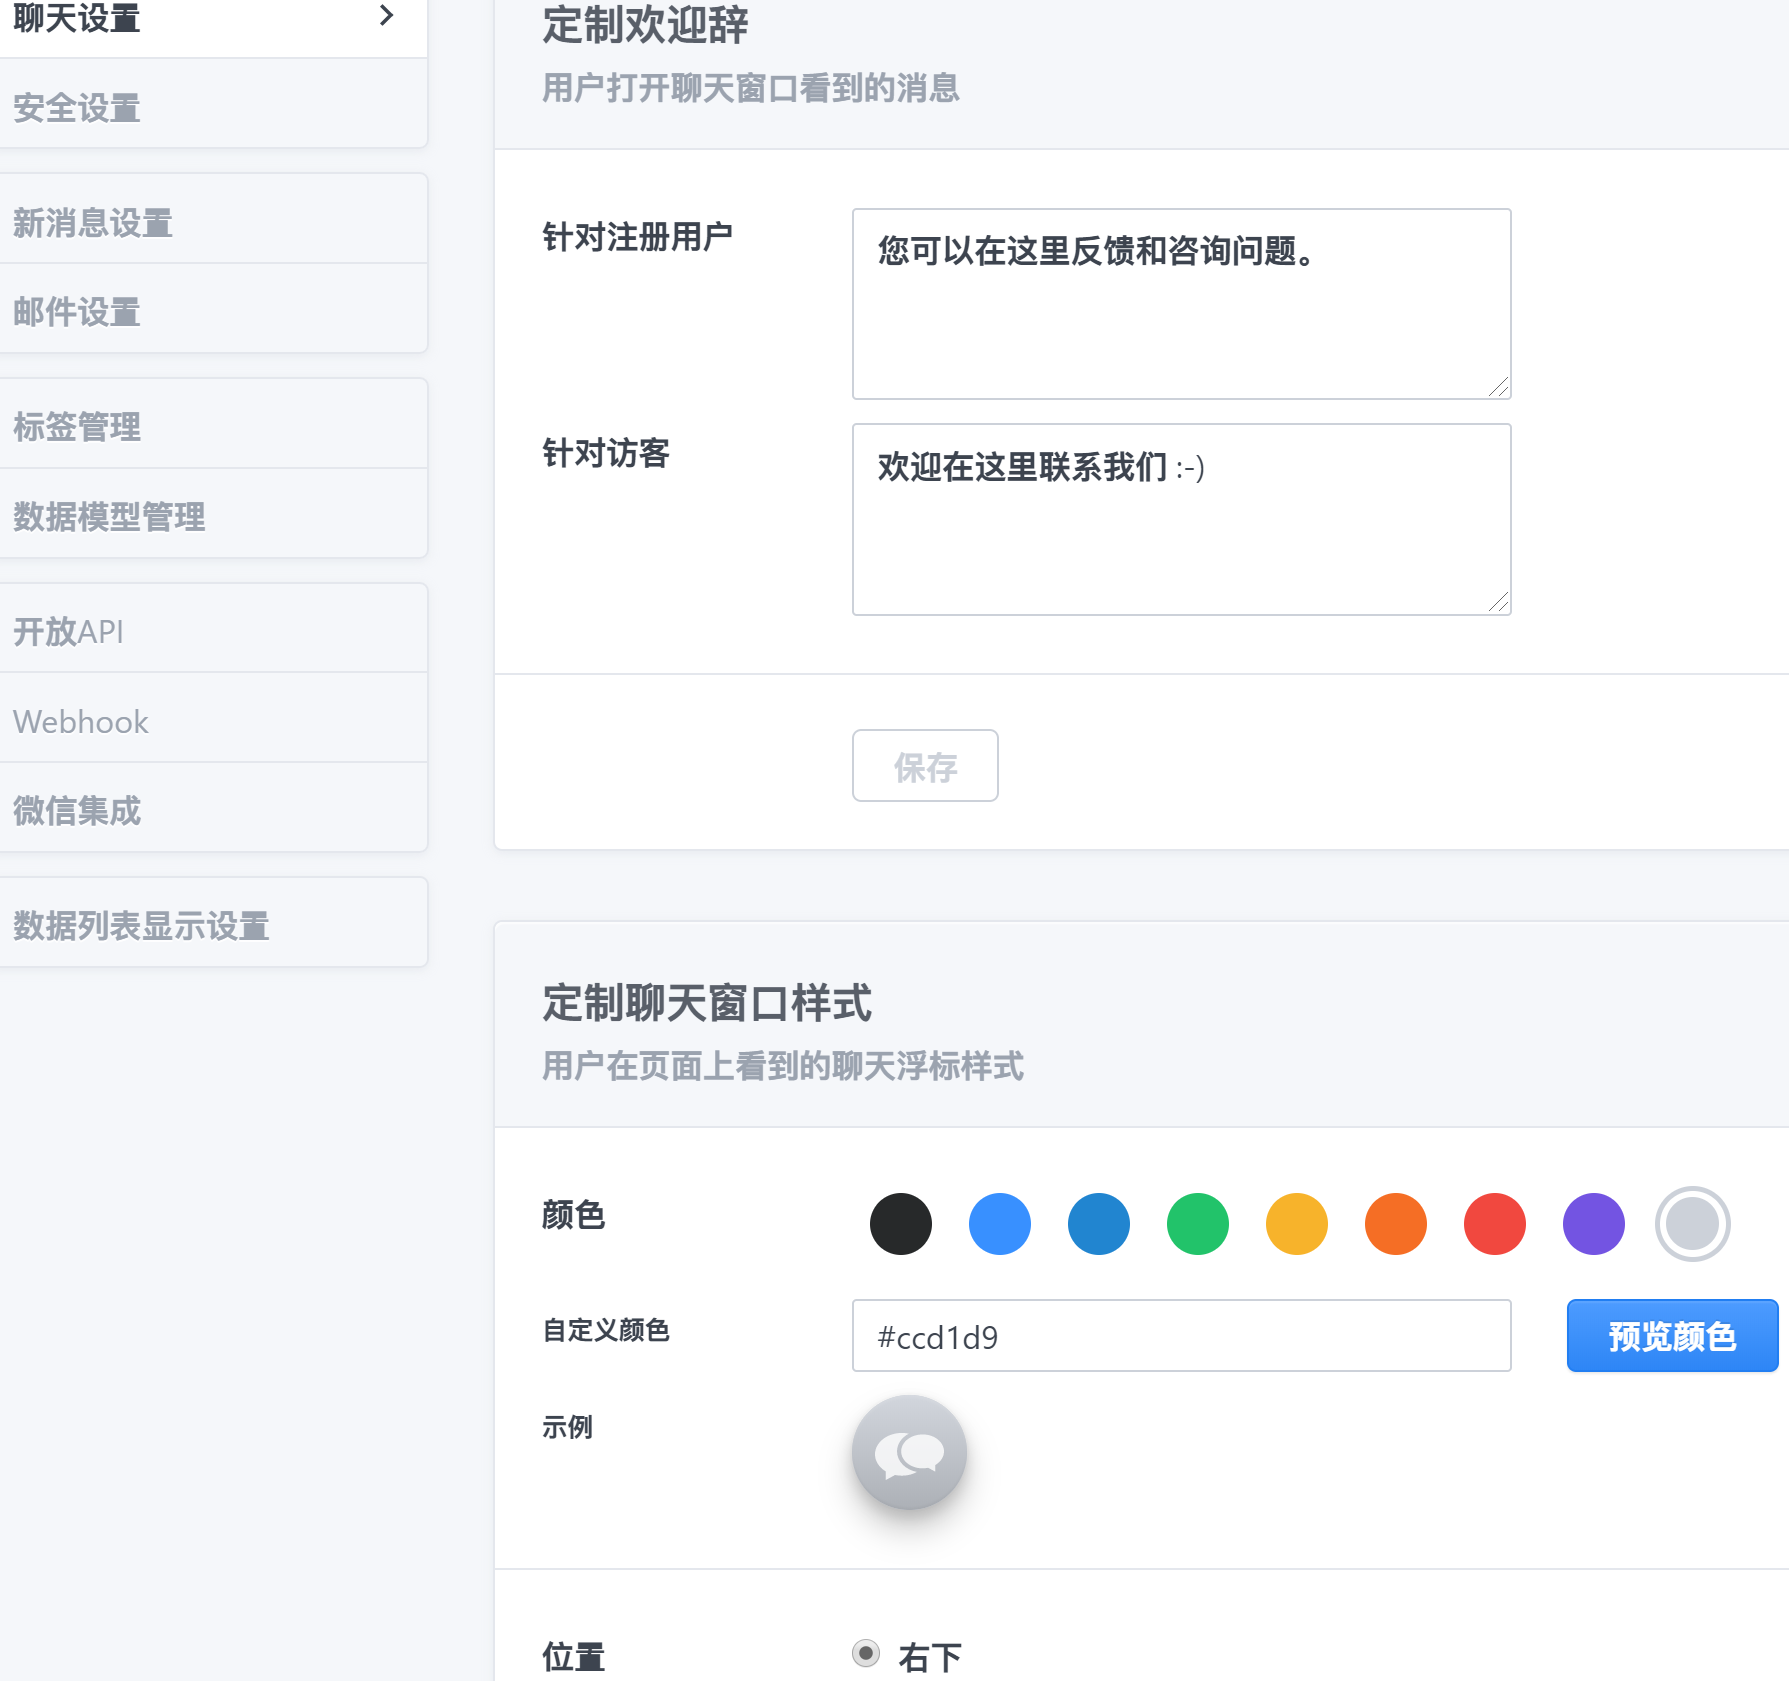
- 可以修改喜歡的樣式
找到 [應用設置] -> [聊天設置],修改 :
接下來有提示,復制框1、3中的代碼到head文件中,放在 </head> 標簽之前。
7.2.在文件 head.ejs 中添加配置
打開文件 themes\yilia-plus\layout\_partial\head.ejs,添加:
<%# "在線聊天" %>
<% if (theme.daovoice) { %>
  <script>
    (function(i,s,o,g,r,a,m){i["DaoVoiceObject"]=r;i[r]=i[r]||function(){(i[r].q=i[r].q||[]).push(arguments)},i[r].l=1*new Date();a=s.createElement(o),m=s.getElementsByTagName(o)[0];a.async=1;a.src=g;a.charset="utf-8";m.parentNode.insertBefore(a,m)})(window,document,"script",('https:' == document.location.protocol ? 'https:' : 'http:') + "//widget.daovoice.io/widget/<%= theme.daovoice_app_id %>.js","daovoice")

    daovoice('init', {
      app_id: "<%= theme.daovoice_app_id %>"
    });
    daovoice('update');

  </script>
<% } %>
7.3.配置參數
在主題配置文件 _config.yml 中,添加:
# Daovoice DaoCloud 在線溝通
daovoice: true
daovoice_app_id: ""   # 填你的id
智能推薦

IDEA 詳細配置,Maven,插件,其他
一、配置 1、編碼格式 2、類、枚舉、接口 注釋模板 3、自動導入包 4、隱藏.idea文件夾和.iml等文件 5、右下顯示內存 二、插件 名稱 作用 JRebel 熱加載插件 Lombok 提供了一組有用的注釋,用來消除Java類中的大量樣板代碼 CodeGlance 右側縮略圖插件 Translation 翻譯插件 GenerateSerialVersionUID 自動生成序列化ID...
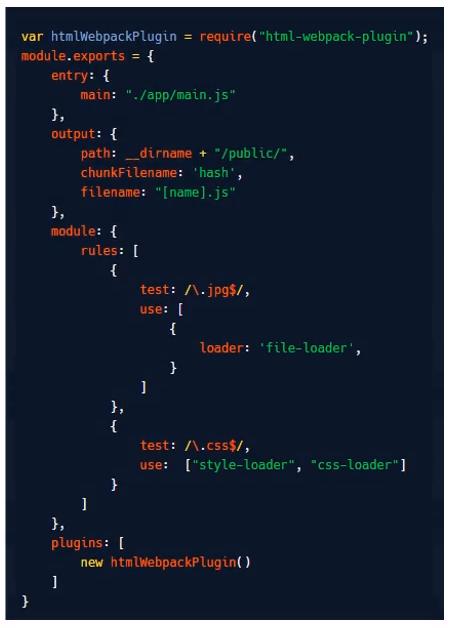
初識 Webpack (七) 其他配置
目錄 ◆ 打包圖片處理 ◆ 代理服務器 ◆ webpack其他屬性(跨域) ◆ devtool配置(定位異常) ◆ clean-webpack-plugin(插件) ? 不添加CleanWebpackPlugin([hash].js) ◆ 加載字體圖標 ? 圖標處理打包總結 ◆ 打包圖片處理 1 打包樣式中的圖片,需要安裝loader,style-loade...
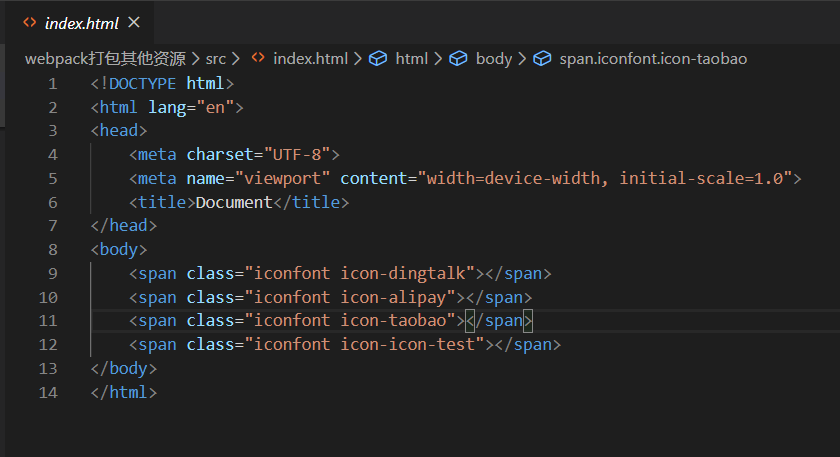
webpack基本配置---其他資源打包
之前,已經打包了html,css,圖片這些。其他的資源例如icon圖標怎么打包呢?那么接下來直接上代碼~~ 下述代碼是打包其他資源配置: 如果想要測試的話,可以在阿里圖標庫里面下載完之放到自己測試項目里,具體目錄如下: index.html測試內容: 記得將iconfont圖標css樣式引入到index.js入口文件里: index.js 下篇將介紹如何自編譯,自動打開瀏覽器,自動刷新瀏覽器。也就...
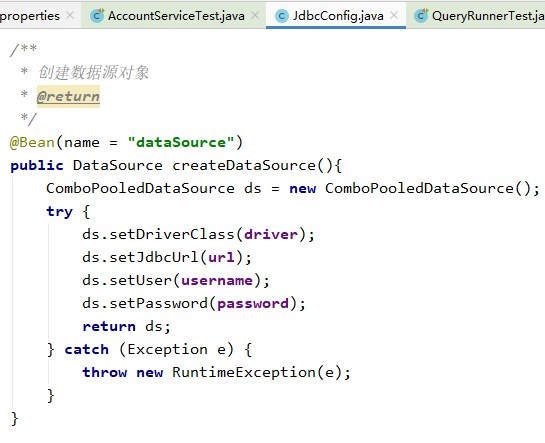
Spring框架——其他注解的配置
首先定義一個類——SpringConfiguration。 該類是一個配置類,它的作用和bean.xml是一樣的。配置該類省去了對bean.xml的配置。 Spring中的新注解: **編寫一個配置類 SpringConfiguration ** 編寫一個和spring連接數據庫相關的配置類 配置一個jdbcConfig.properties的文件...
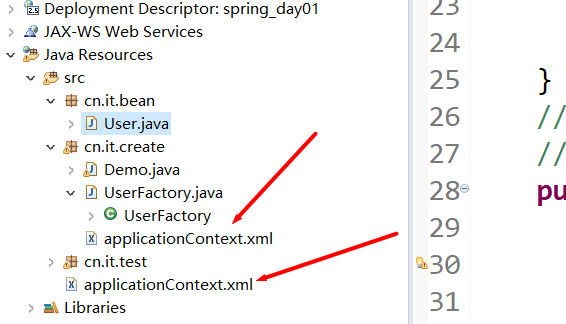
導入其他spring模塊配置
列如下圖中有兩個spring的配置文件,我們想把上面的配置文件導入到下面的文件中去,該如何操作: 打開下面的配置文件,配置屬性import,在import的resource配置上面配置文件的路徑就可以了,如下: 記得要把src和src前面的路徑刪除...
猜你喜歡


freemarker + ItextRender 根據模板生成PDF文件
1. 制作模板 2. 獲取模板,并將所獲取的數據加載生成html文件 2. 生成PDF文件 其中由兩個地方需要注意,都是關于獲取文件路徑的問題,由于項目部署的時候是打包成jar包形式,所以在開發過程中時直接安照傳統的獲取方法沒有一點文件,但是當打包后部署,總是出錯。于是參考網上文章,先將文件讀出來到項目的臨時目錄下,然后再按正常方式加載該臨時文件; 還有一個問題至今沒有解決,就是關于生成PDF文件...
電腦空間不夠了?教你一個小秒招快速清理 Docker 占用的磁盤空間!
Docker 很占用空間,每當我們運行容器、拉取鏡像、部署應用、構建自己的鏡像時,我們的磁盤空間會被大量占用。 如果你也被這個問題所困擾,咱們就一起看一下 Docker 是如何使用磁盤空間的,以及如何回收。 docker 占用的空間可以通過下面的命令查看: TYPE 列出了docker 使用磁盤的 4 種類型: Images:所有鏡像占用的空間,包括拉取下來的鏡像,和本地構建的。 Con...

requests實現全自動PPT模板
http://www.1ppt.com/moban/ 可以免費的下載PPT模板,當然如果要人工一個個下,還是挺麻煩的,我們可以利用requests輕松下載 訪問這個主頁,我們可以看到下面的樣式 點每一個PPT模板的圖片,我們可以進入到詳細的信息頁面,翻到下面,我們可以看到對應的下載地址 點擊這個下載的按鈕,我們便可以下載對應的PPT壓縮包 那我們就開始做吧 首先,查看網頁的源代碼,我們可以看到每一...
