使用Freemarker來生成pdf文件
2022-09-02
今天接到一個生成pdf的任務,并且web端要能下載;在網上也找了許多的工具如:itext等,感覺挺復雜的沒那么好用,然后想起了之前使用Freemarker來生成world文檔,挺好用的,然后調查發現也能生成pdf,就是有一點區別如果Freemarker來生成world是使用world文檔來當模板,而pdf相對于簡單,直接使用html文件來制作模板,只不過最后要將文件后綴改成ftl的文件。
這個博主寫的挺好的,可以直接去看這個博主的文章,我只是當筆記記錄一下,參考的文章鏈接
 https://blog.csdn.net/weixin_39806100/article/details/86616041
代碼如下:
-
maven依賴:
<dependency>
    <groupId>org.freemarker</groupId>
    <artifactId>freemarker</artifactId>
    <version>2.3.29</version>
</dependency>

<dependency>
    <groupId>org.xhtmlrenderer</groupId>
    <artifactId>flying-saucer-pdf</artifactId>
    <version>9.1.18</version>
</dependency>-
service層:
public void exportPdf(HttpServletResponse response, Integer id, Integer type) throws Exception {
        ByteArrayOutputStream baos = null;
        OutputStream out = null;
        FileOutputStream fileOutputStream = null;
        try {
            //獲取提貨單數據,根據提貨單id
            TakeOrder takeOrder = this.getTakeById(id);
            //翻譯提貨單狀態
            String[] stateName = {"待備貨","備貨中","已備貨","已出庫","裝車中","已裝車","已進廠","已出廠"};
            takeOrder.setStateName(takeOrder.getState() == null ? "" : stateName[takeOrder.getState() - 1]);
            //翻譯提貨單提貨狀態
            String[] orderStateName = {"待提貨","已提貨","作廢"};
            takeOrder.setOrderStateName(orderStateName[takeOrder.getOrderState() - 1]);

            // 模板中的數據,實際運用從數據庫中查詢
            Map<String,Object> data = new HashMap<>();
            data.put("takeOrder", takeOrder);
            data.put("fileName", type == 1 ? "備貨聯" : "承運聯");

            //因為我自己的需求有兩套模板,所以我讓模板名稱動態化了,如果不用直接刪除這個type參數,正常填文件名稱就可以,記得帶上后綴
            baos = PDFTemplateUtil.createPDF(data, "modezs"+type+".ftl");
            // 設置響應消息頭,告訴瀏覽器當前響應是一個下載文件
            response.setContentType( "application/x-msdownload");
            // 告訴瀏覽器,當前響應數據要求用戶干預保存到文件中,以及文件名是什么 如果文件名有中文,必須URL編碼
            String fileName = URLEncoder.encode("月度報告.pdf", "UTF-8");
            response.setHeader( "Content-Disposition", "attachment;filename=" + fileName);
            out = response.getOutputStream();
            baos.writeTo(out);
            baos.close();
            //下載到本地位置
//            fileOutputStream = new FileOutputStream("D:\\zscProject\\zsc.pdf");
            //生成pdf完成記錄行為記錄
            this.addActionLog(takeOrder.getTakeOrderNo(),1);
        } catch (Exception e) {
            e.printStackTrace();
            throw new Exception("導出失敗:" + e.getMessage());
        } finally{
            if(baos != null){
                baos.close();
            }
            if(out != null){
                out.close();
            }
            if (fileOutputStream != null){
                fileOutputStream.close();
            }
        }
    }
ps:
1. 在使用工具類時,傳文件名稱的參數

2. 在如果不需要web端的方式下載pdf,可以使用文件輸出流直接下載到本地

-
工具類:
可以直接拿來使用
public class PDFTemplateUtil {

	/**
	 * 通過模板導出pdf文件
	 * @param data 數據
	 * @param templateFileName 模板文件名
	 * @throws Exception
	 */
    public static ByteArrayOutputStream createPDF(Map<String,Object> data, String templateFileName) throws Exception {
        // 創建一個FreeMarker實例, 負責管理FreeMarker模板的Configuration實例
        Configuration cfg = new Configuration(Configuration.DEFAULT_INCOMPATIBLE_IMPROVEMENTS);
        // 指定FreeMarker模板文件的位置
        cfg.setClassForTemplateLoading(PDFTemplateUtil.class,"/templates");
        ITextRenderer renderer = new ITextRenderer();
        OutputStream out = new ByteArrayOutputStream();
        try {
            // 設置 css中 的字體樣式(暫時僅支持宋體和黑體) 必須,不然中文不顯示
            renderer.getFontResolver().addFont("/templates/font/simsun.ttc", BaseFont.IDENTITY_H, BaseFont.NOT_EMBEDDED);
            // 設置模板的編碼格式
            cfg.setEncoding(Locale.CHINA, "UTF-8");
            // 獲取模板文件
            Template template = cfg.getTemplate(templateFileName, "UTF-8");
            StringWriter writer = new StringWriter();

            // 將數據輸出到html中
            template.process(data, writer);
            writer.flush();

            String html = writer.toString();
            // 把html代碼傳入渲染器中
            renderer.setDocumentFromString(html);

             // 設置模板中的圖片路徑 (這里的images在resources目錄下) 模板中img標簽src路徑需要相對路徑加圖片名 如<img src="images/xh.jpg"/>
//            URI images = PDFTemplateUtil.class.getClassLoader().getResource("images").toURI();
//            if (images != null) {
//                String url = images.toString();
//                renderer.getSharedContext().setBaseURL(url);
//            }
            renderer.layout();

            renderer.createPDF(out, false);
            renderer.finishPDF();
            out.flush();
            return (ByteArrayOutputStream)out;
        } finally {
        	if(out != null){
        		 out.close();
        	}
        }
    }
}
ps:
我導出pdf里面是含有圖片的,但是我的圖片是base64的字節碼(建議使用這種方式),不是本地的方式填充數據的,如果只能使用本地的圖片,將工具類中的這段代碼解開,然后自己改進一下

-
模板文件:
<!DOCTYPE html>
<html>

<head>
	<meta charset="utf-8" />
	<title></title>
	<style>
		* {
			margin: 0;
			padding: 0;
			box-sizing: border-box;
		}

		body {
			font-family: SimSun;
			padding: 30px 20px 0;
		}

		section {
			display: block;
			/* margin: 20px 10px; */
		}

		.title {
			text-align: center;
			margin-bottom: 20px;
		}

		.preface p {
			line-height: 30px;
			display: inline-block;
		}

		.preface p.content {
			text-indent: 2em;
		}

		section>table {
			border-collapse: collapse;
			table-layout: fixed;
			width: 100%;
			font-size: 13px;
			/* margin: 20px 0px; */
			text-align: center;
			word-wrap: break-word;
		}

		section table td {
			padding: 5px 0px;
		}
		.topTitle section{
			width: 30%;
			font-size: 13px;
			display: inline-block;
			margin-top: 20px;
		}
		.topTitle{
		}
		.outTitle{
		}
		.outTitle section{
			font-size: 13px;
			display: inline-block;
		}
		.detail{
			margin-top: 20px;
		}
		.outTable{
			margin-bottom: 20px;
		}
		.box1{
		}
		.box2{
			width: 80%;
			display: inline-block;
		}
		.box3{
			display: inline-block;
			width: 18%;
			/* min-width: 180px; */
		}
		.box3 img{
			width: 100%;
		}
		.box3 p{
			font-size: 12px;
		}
	</style>
</head>

<body>
<h3>${(fileName)!''}</h3>
<div class="box1">
	<section class="title">
		<h2>XXXXXXXXXXXXXX有限公司</h2>
		<h2>提貨單</h2>
	</section>
	<div class="box2">
		<!-- 標題 start -->
		<!-- 標題 end -->

		<!-- 前言 start -->
		<div class="topTitle">
			<section class="preface">
				<p>提貨單號:</p>
				<p>${(takeOrder.takeOrderNo)!''}</p>
			</section>
			<section class="preface">
				<p>提貨日期:</p>
				<p>${(takeOrder.takeDate)!''}</p>
			</section>
			<section class="preface">
				<p>提貨狀態:</p>
				<p>${(takeOrder.orderStateName)!''}</p>
			</section>
			<section class="preface">
				<p>狀態:</p>
				<p>${(takeOrder.stateName)!''}</p>
			</section>
<#--			<section class="preface">-->
<#--				<p>承運商:</p>-->
<#--				<p>${(takeOrder.takeOrderNo)!''}</p>-->
<#--			</section>-->
<#--			<section class="preface">-->
<#--				<p>車輛:</p>-->
<#--				<p>${(takeOrder.takeOrderNo)!''}</p>-->
<#--			</section>-->
			<section class="preface">
				<p>司機:</p>
				<p>${(takeOrder.driver)!''}</p>
			</section>
			<section class="preface">
				<p>發運方式:</p>
				<p>${(takeOrder.shippingMethod)!''}</p>
			</section>
		</div>
	</div>
	<div class="box3">
		<img src="${(takeOrder.qrCode)!''}"></img>
		<p>憑此二維碼進出廠區</p>

	</div>
</div>
<!-- 前言 end -->


<!-- 產品列表 start -->
<#if takeOrder.outOrderProducts ??>
<section class="detail">
	<table border="1" cellspacing="0" cellpadding="0">
		<tr>
			<td width="15%">品名編號</td>
			<td width="12%">品名</td>
			<td width="12%">規格型號</td>
			<td width="12%">銷售型號</td>
			<td width="12%">包裝規格</td>
			<td width="12%">批號</td>
			<td width="12%">數量</td>
			<td width="12%">單位</td>
			<td width="12%">倉庫編號</td>
			<td width="12%">倉庫名稱</td>
		</tr>
		<#list takeOrder.outOrderProducts as ad>
			<tr>
				<td>${(ad.productCode)!''}</td>
				<td>${(ad.productName)!''}</td>
				<td>${(ad.typeNum)!''}</td>
				<td>${(ad.saleType)!''}</td>
				<td>${(ad.packSize)!''}</td>
				<td>${(ad.batchNumber)!''}</td>
				<td>${(ad.num)!''}</td>
				<td>${(ad.uint)!''}</td>
				<td>${(ad.stockNo)!''}</td>
				<td>${(ad.stockName)!''}</td>
			</tr>
		</#list>
	</table>
</section>
</#if>
<!-- 產品列表 end -->

<!-- 出庫單 start -->
<#if takeOrder.outOrders ??>
<section class="detail">
	<h3>出庫單信息:</h3>
	<#list takeOrder.outOrders as add>
	<div class="outTitle" >
		<section class="preface">
			<p>出庫單號:</p>
			<p>${(add.outOrderNo)!''}</p>
		</section>
		<section class="preface">
			<p>發貨單號:</p>
			<p>${(add.sendOrderNo)!''}</p>
		</section>
		<section class="preface">
			<p>出庫日期:</p>
			<p>${(add.outDate)!''}</p>
		</section>
		<section class="preface">
			<p>裝車號:</p>
			<p>${(add.loadingNumber)!''}</p>
		</section>
		<section class="preface">
			<p>客戶名稱:</p>
			<p>${(add.customerName)!''}</p>
		</section>
	</div>
	<!--出庫的單產品列表-->
	<#if add.outOrderProducts ??>
	<table class="outTable" border="1" cellspacing="0" cellpadding="0">
		<tr>
			<td width="15%">品名編號</td>
			<td width="12%">品名</td>
			<td width="12%">規格型號</td>
			<td width="12%">客戶銷售型號</td>
			<td width="12%">包裝規格</td>
			<td width="12%">批號</td>
			<td width="12%">數量</td>
			<td width="12%">內部備注</td>
			<td width="12%">備注</td>
		</tr>
		<#list add.outOrderProducts as ad>
			<tr>
				<td>${(ad.productCode)!''}</td>
				<td>${(ad.productName)!''}</td>
				<td>${(ad.typeNum)!''}</td>
				<td>${(ad.saleType)!''}</td>
				<td>${(ad.packSize)!''}</td>
				<td>${(ad.batchNumber)!''}</td>
				<td>${(ad.num)!''}</td>
				<td>${(ad.innerRemark)!''}</td>
				<td>${(ad.remark)!''}</td>
			</tr>
		</#list>
	</table>
	</#if>
	</#list>
</section>
</#if>
<!-- 出庫單 end -->
</body>

</html>
ps:
1.這里面的樣式是按照html的樣式來的,自己設計的要自己調整樣式,只支持定位和浮動,不支持自適應,建議在class里寫樣式,而不是style里寫樣式
2.像<#if takeOrder.outOrderProducts ??>,<#list takeOrder.outOrderProducts as ad>和${(fileName)!''}這個都是ftl文件的語法,不懂的可以搜一下
占位符可以看下圖


-
字體文件:
在windows10系統中的 C:\Windows\Fonts 這個路徑中,進入后搜索宋體(ps:一定要搜索宋體,不要按照simsun這個名字去搜索,反正就是注意文件的后綴是.ttc的,而不是.ttf的)


-
前端:
1.請求方法js:(ps:注意里面的responseType: 'arraybuffer'這個參數,因為后臺使用的字節數組流的方式寫入的,所以如果直接使用responseType: 'blob',會導致封裝的blob對象是有問題的,下載出來的pdf文件損壞,本文鏈接:
export function exportPdf(parameter) {
  return request({
    url: 'XXXXXXXXXXXXXXX/export/pdf',
    method: 'get',
    params:parameter,
    responseType: 'arraybuffer',

  })
}
2.封裝blob對象,下載pdf的js方法:
exportPdf(type) {
      this['loading'+type] = true
      exportPdf({ id: this.pageList.id, type: type }).then((res) => {
        if (!res) {
          alert('數據為空')
          return
        }
        const content = res
        const blob = new Blob([content], { type: 'application/pdf' })
        // const fileName = titName?titName: ''
        let fileName = this.pageList.takeOrderNo
        if ('download' in document.createElement('a')) {
          // 非IE下載
          const elink = document.createElement('a')
          elink.download = fileName
          elink.style.display = 'none'
          elink.href = URL.createObjectURL(blob)
          document.body.appendChild(elink)
          elink.click()
          URL.revokeObjectURL(elink.href) // 釋放URL 對象
          document.body.removeChild(elink)
          this['loading'+type] = false
        } else {
          // IE10+下載
          navigator.msSaveBlob(blob, fileName)
        }
      })
},智能推薦


freemarker + ItextRender 根據模板生成PDF文件
1. 制作模板 2. 獲取模板,并將所獲取的數據加載生成html文件 2. 生成PDF文件 其中由兩個地方需要注意,都是關于獲取文件路徑的問題,由于項目部署的時候是打包成jar包形式,所以在開發過程中時直接安照傳統的獲取方法沒有一點文件,但是當打包后部署,總是出錯。于是參考網上文章,先將文件讀出來到項目的臨時目錄下,然后再按正常方式加載該臨時文件; 還有一個問題至今沒有解決,就是關于生成PDF文件...
電腦空間不夠了?教你一個小秒招快速清理 Docker 占用的磁盤空間!
Docker 很占用空間,每當我們運行容器、拉取鏡像、部署應用、構建自己的鏡像時,我們的磁盤空間會被大量占用。 如果你也被這個問題所困擾,咱們就一起看一下 Docker 是如何使用磁盤空間的,以及如何回收。 docker 占用的空間可以通過下面的命令查看: TYPE 列出了docker 使用磁盤的 4 種類型: Images:所有鏡像占用的空間,包括拉取下來的鏡像,和本地構建的。 Con...

requests實現全自動PPT模板
http://www.1ppt.com/moban/ 可以免費的下載PPT模板,當然如果要人工一個個下,還是挺麻煩的,我們可以利用requests輕松下載 訪問這個主頁,我們可以看到下面的樣式 點每一個PPT模板的圖片,我們可以進入到詳細的信息頁面,翻到下面,我們可以看到對應的下載地址 點擊這個下載的按鈕,我們便可以下載對應的PPT壓縮包 那我們就開始做吧 首先,查看網頁的源代碼,我們可以看到每一...

猜你喜歡

Linux C系統編程-線程互斥鎖(四)
互斥鎖 互斥鎖也是屬于線程之間處理同步互斥方式,有上鎖/解鎖兩種狀態。 互斥鎖函數接口 1)初始化互斥鎖 pthread_mutex_init() man 3 pthread_mutex_init (找不到的情況下首先 sudo apt-get install glibc-doc sudo apt-get install manpages-posix-dev) 動態初始化 int pthread_...

統計學習方法 - 樸素貝葉斯
引入問題:一機器在良好狀態生產合格產品幾率是 90%,在故障狀態生產合格產品幾率是 30%,機器良好的概率是 75%。若一日第一件產品是合格品,那么此日機器良好的概率是多少。 貝葉斯模型 生成模型與判別模型 判別模型,即要判斷這個東西到底是哪一類,也就是要求y,那就用給定的x去預測。 生成模型,是要生成一個模型,那就是誰根據什么生成了模型,誰就是類別y,根據的內容就是x 以上述例子,判斷一個生產出...
styled-components —— React 中的 CSS 最佳實踐
https://zhuanlan.zhihu.com/p/29344146 Styled-components 是目前 React 樣式方案中最受關注的一種,它既具備了 css-in-js 的模塊化與參數化優點,又完全使用CSS的書寫習慣,不會引起額外的學習成本。本文是 styled-components 作者之一 Max Stoiber 所寫,首先總結了前端組件化樣式中的最佳實踐原則,然后在此基...
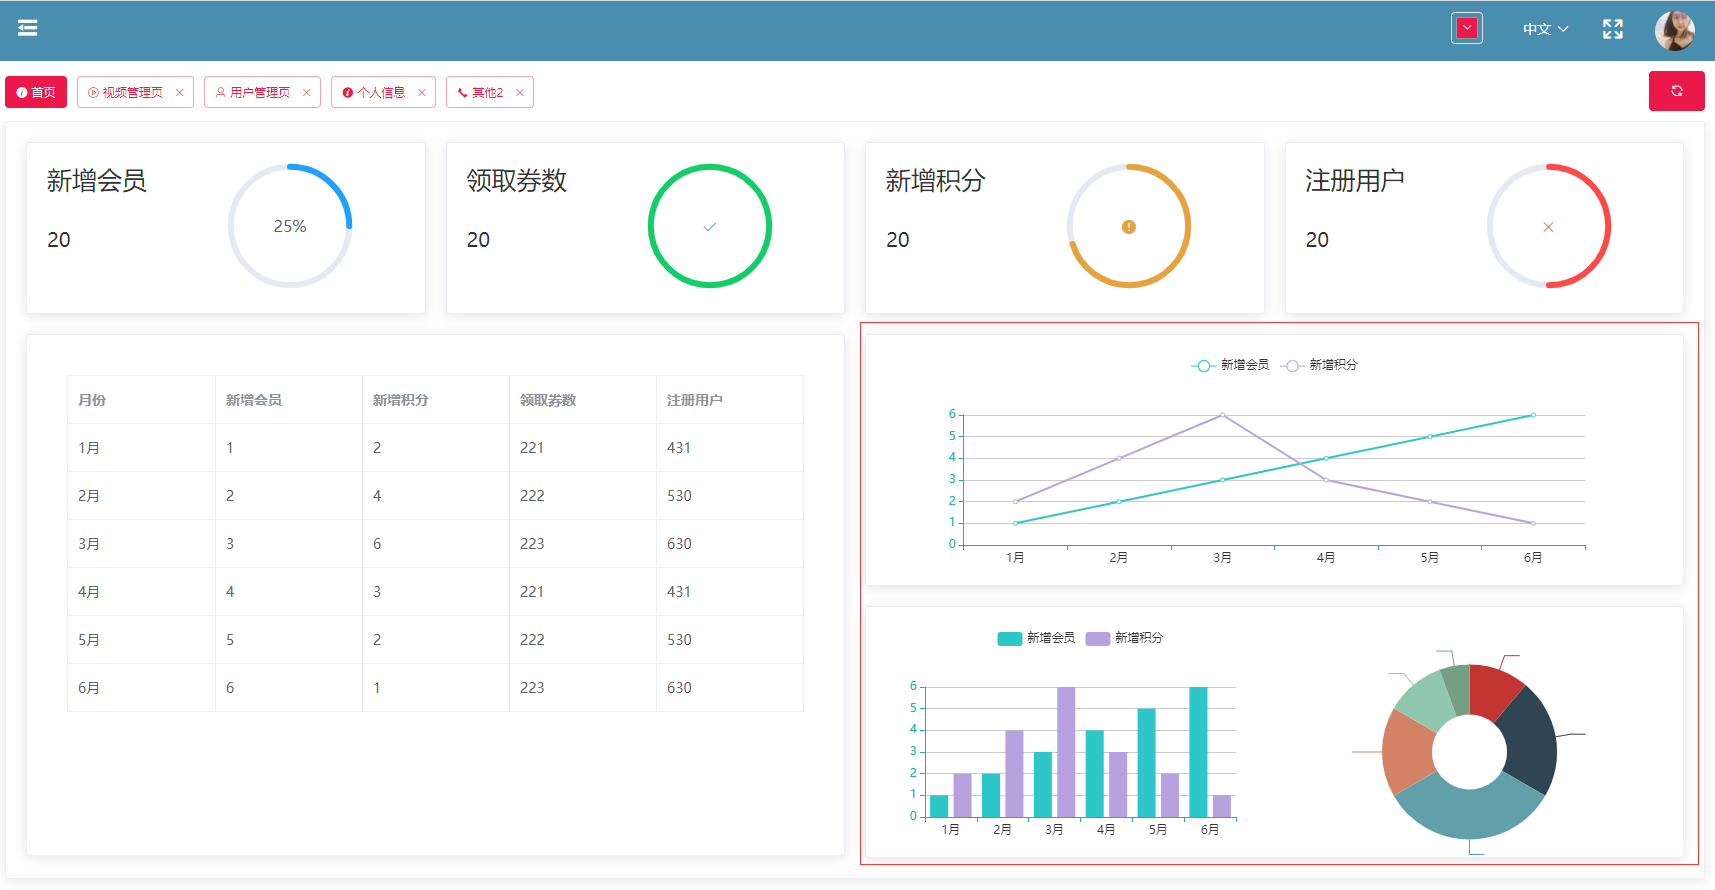
19.vue中封裝echarts組件
19.vue中封裝echarts組件 1.效果圖 2.echarts組件 3.使用組件 按照組件格式整理好數據格式 傳入組件 home.vue 4.接口返回數據格式...