SpringMVC框架簡介①
首先, 建項目之后引包:
鏈接:https://pan.baidu.com/s/1ekU8ga_GjSWyTmRRcVoCgw 密碼:xhxd
配置中央轉發器(dispatchservlet), web.xml
<?xml version="1.0" encoding="UTF-8"?>
<web-app xmlns:xsi="http://www.w3.org/2001/XMLSchema-instance" xmlns="http://java.sun.com/xml/ns/javaee" xsi:schemaLocation="http://java.sun.com/xml/ns/javaee http://java.sun.com/xml/ns/javaee/web-app_2_5.xsd" id="WebApp_ID" version="2.5">

    <servlet>
        <servlet-name>springmvc</servlet-name>
        <servlet-class>org.springframework.web.servlet.DispatcherServlet</servlet-class>
    </servlet>
    <servlet-mapping>
        <servlet-name>springmvc</servlet-name>
        <!-- 不能使用/* -->
        <url-pattern>*.do</url-pattern>
    </servlet-mapping>
</web-app>
SpringMVC的配置文件的頭信息:
<?xml version="1.0" encoding="UTF-8"?>
					<beans xmlns="http://www.springframework.org/schema/beans"
					xmlns:xsi="http://www.w3.org/2001/XMLSchema-instance"
					xmlns:mvc="http://www.springframework.org/schema/mvc"
					xmlns:context="http://www.springframework.org/schema/context"
					xmlns:aop="http://www.springframework.org/schema/aop"
					xmlns:tx="http://www.springframework.org/schema/tx"
					xsi:schemaLocation="http://www.springframework.org/schema/beans
					http://www.springframework.org/schema/beans/spring-beans-3.0.xsd
					http://www.springframework.org/schema/mvc
					http://www.springframework.org/schema/mvc/spring-mvc-3.0.xsd
					http://www.springframework.org/schema/context
					http://www.springframework.org/schema/context/spring-context-3.0.xsd
					http://www.springframework.org/schema/aop
					http://www.springframework.org/schema/aop/spring-aop-3.0.xsd
					http://www.springframework.org/schema/tx
					http://www.springframework.org/schema/tx/spring-tx-3.0.xsd ">

</beans>
該配置文件名稱有一定的規范, 默認是按照在web.xml配置的"<servlet-name>springmvc</servlet-name>"+".servlet.xml"
下面先介紹一下配置文件的方式, 后續重點介紹注解的使用
第一個例子:
TestController.java:
package com.rl.controller;

import javax.servlet.http.HttpServletRequest;
import javax.servlet.http.HttpServletResponse;

import org.springframework.web.servlet.ModelAndView;
import org.springframework.web.servlet.mvc.AbstractController;

public class TestController extends AbstractController {

    @Override
    protected ModelAndView handleRequestInternal
                (HttpServletRequest arg0, HttpServletResponse arg1) throws Exception {


        //返回值里面是路徑為非文件名
        return new ModelAndView("index");
    }
}
將配置文件完善后啟動tomcat
<?xml version="1.0" encoding="UTF-8"?>
					<beans xmlns="http://www.springframework.org/schema/beans"
					xmlns:xsi="http://www.w3.org/2001/XMLSchema-instance"
					xmlns:mvc="http://www.springframework.org/schema/mvc"
					xmlns:context="http://www.springframework.org/schema/context"
					xmlns:aop="http://www.springframework.org/schema/aop"
					xmlns:tx="http://www.springframework.org/schema/tx"
					xsi:schemaLocation="http://www.springframework.org/schema/beans
					http://www.springframework.org/schema/beans/spring-beans-3.0.xsd
					http://www.springframework.org/schema/mvc
					http://www.springframework.org/schema/mvc/spring-mvc-3.0.xsd
					http://www.springframework.org/schema/context
					http://www.springframework.org/schema/context/spring-context-3.0.xsd
					http://www.springframework.org/schema/aop
					http://www.springframework.org/schema/aop/spring-aop-3.0.xsd
					http://www.springframework.org/schema/tx
					http://www.springframework.org/schema/tx/spring-tx-3.0.xsd ">

        <!-- 配置TestController的bean
            默認當輸入"/hello.do"請求時, 將直接指向當前配置的TestController.java并訪問"handleRequestInternal"方法
         -->
        <bean name="/hello.do" class="com.rl.controller.TestController"/>

        <!-- 配置視圖解析器 -->
        <bean class="org.springframework.web.servlet.view.InternalResourceViewResolver">
            <!-- 配置前綴 -->
            <property name="prefix" value="/WEB-INF/jsp/"></property>
            <!-- 配置后綴 -->
            <property name="suffix" value=".jsp"></property>
        </bean>
</beans>
項目結構圖:

在頁面訪問"http://localhost:8080/springmvc-1/hello.do"
結果如下:

還有其他兩種方法, 不直接舉例 下面貼配置信息
另外如果想要直接訪問一個頁面而不需要其他邏輯處理, 可以使用springmvc為我們提供的一種自動創建Controller的方式, 如下配置信息:
控制器有三種, 以下不詳細介紹, 只貼出代碼, 都有詳細注釋:
<?xml version="1.0" encoding="UTF-8"?>
					<beans xmlns="http://www.springframework.org/schema/beans"
					xmlns:xsi="http://www.w3.org/2001/XMLSchema-instance"
					xmlns:mvc="http://www.springframework.org/schema/mvc"
					xmlns:context="http://www.springframework.org/schema/context"
					xmlns:aop="http://www.springframework.org/schema/aop"
					xmlns:tx="http://www.springframework.org/schema/tx"
					xsi:schemaLocation="http://www.springframework.org/schema/beans
					http://www.springframework.org/schema/beans/spring-beans-3.0.xsd
					http://www.springframework.org/schema/mvc
					http://www.springframework.org/schema/mvc/spring-mvc-3.0.xsd
					http://www.springframework.org/schema/context
					http://www.springframework.org/schema/context/spring-context-3.0.xsd
					http://www.springframework.org/schema/aop
					http://www.springframework.org/schema/aop/spring-aop-3.0.xsd
					http://www.springframework.org/schema/tx
					http://www.springframework.org/schema/tx/spring-tx-3.0.xsd ">

        <!-- 配置TestController的bean
                            默認當輸入"/hello.do"請求時, 將直接指向當前配置的TestController.java并訪問"handleRequestInternal"方法
         -->
        <bean id="TestController" name="/hello.do" class="com.rl.controller.TestController"/>

       <!-- =================================映射處理器================================== -->
        <!-- 配置視圖解析器 -->
        <bean class="org.springframework.web.servlet.view.InternalResourceViewResolver">
            <!-- 配置前綴 -->
            <property name="prefix" value="/WEB-INF/jsp/"></property>
            <!-- 配置后綴 -->
            <property name="suffix" value=".jsp"></property>
        </bean>

        <!-- 默認采用這種方式配置 -->
        <bean class="org.springframework.web.servlet.handler.BeanNameUrlHandlerMapping"></bean>

        <!-- 第二種映射的配置方式 -->
        <bean class="org.springframework.web.servlet.handler.SimpleUrlHandlerMapping">
            <property name="mappings">
                <props>
                    <!-- 根據id來映射具體的Controller -->
                    <prop key="/hello1.do">TestController</prop>
                </props>
            </property>
        </bean>

        <!-- 第三種映射的配置方式
                        訪問路徑為: http://localhost:8080/springmvc-1/testController.do
            testController.do首字符必須小寫
         -->
        <bean class="org.springframework.web.servlet.mvc.support.ControllerClassNameHandlerMapping"></bean>


        <!-- =================================三種控制器================================== -->
        <!--
                        需求: 只需要跳轉一個頁面, 不需要其他邏輯, 可以使用springmvc為我們提供的這個方式, 免去自己創建Controller
            springmvc自動創建的一個Controller, 直接轉發
         -->
        <bean name="/toIndex.do" class="org.springframework.web.servlet.mvc.ParameterizableViewController">
            <property name="viewName" value="index"></property>
        </bean>

        <!-- 接收get方式提交的參數類型 -->
        <bean name="/comm.do" class="com.rl.controller.CommController">
            <property name="commandClass" value="com.rl.model.Person"></property>
        </bean>

        <!-- 接收表單post方式提交的參數類型 -->
        <bean name="/form.do" class="com.rl.controller.FormController">
        <!-- 指定commandClass屬性對應的實體類是Person -->
            <property name="commandClass" value="com.rl.model.Person"></property>
            <!-- 跳轉頁面為form, 前綴跟后綴參照視圖解析器的規則 -->
            <property name="formView" value="form"></property>
            <!-- 提交成功之后的跳轉頁面 -->
            <property name="successView" value="success"></property>
        </bean>
</beans>
項目結構:

CommController.java:
package com.rl.controller;

import javax.servlet.http.HttpServletRequest;
import javax.servlet.http.HttpServletResponse;

import org.springframework.validation.BindException;
import org.springframework.web.servlet.ModelAndView;
import org.springframework.web.servlet.mvc.AbstractCommandController;

public class CommController extends AbstractCommandController {

    @Override
    protected ModelAndView handle
                    (HttpServletRequest arg0, HttpServletResponse arg1, Object obj, BindException arg3)
            throws Exception {

        System.out.println(obj);
        return new ModelAndView("index");
    }
}
FormController.java
package com.rl.controller;

import java.text.SimpleDateFormat;
import java.util.Date;

import javax.servlet.http.HttpServletRequest;

import org.springframework.beans.propertyeditors.CustomDateEditor;
import org.springframework.web.bind.ServletRequestDataBinder;
import org.springframework.web.servlet.mvc.SimpleFormController;

public class FormController extends SimpleFormController {


    @Override
    protected void doSubmitAction(Object obj) throws Exception {
        System.out.println(obj);
    }

    /**
     * 自定義屬性編輯器
     * 將日期的輸入格式從xxxx/xx/xx轉成xxxx-xx-xx
     */
    @Override
    protected void initBinder(HttpServletRequest request, ServletRequestDataBinder binder) throws Exception {
        binder.registerCustomEditor(Date.class, new CustomDateEditor(new SimpleDateFormat("yyyy-MM-dd"), true));
    }
}
表單就不貼出來了, 自己設置數據, 提交試試即可.
下面詳解注解形式的springmvc開發:
配置文件:
<?xml version="1.0" encoding="UTF-8"?>
					<beans xmlns="http://www.springframework.org/schema/beans"
					xmlns:xsi="http://www.w3.org/2001/XMLSchema-instance"
					xmlns:mvc="http://www.springframework.org/schema/mvc"
					xmlns:context="http://www.springframework.org/schema/context"
					xmlns:aop="http://www.springframework.org/schema/aop"
					xmlns:tx="http://www.springframework.org/schema/tx"
					xsi:schemaLocation="http://www.springframework.org/schema/beans
					http://www.springframework.org/schema/beans/spring-beans-3.0.xsd
					http://www.springframework.org/schema/mvc
					http://www.springframework.org/schema/mvc/spring-mvc-3.0.xsd
					http://www.springframework.org/schema/context
					http://www.springframework.org/schema/context/spring-context-3.0.xsd
					http://www.springframework.org/schema/aop
					http://www.springframework.org/schema/aop/spring-aop-3.0.xsd
					http://www.springframework.org/schema/tx
					http://www.springframework.org/schema/tx/spring-tx-3.0.xsd ">

        <!-- 配置注解掃描器 -->
        <context:component-scan base-package="com.rl.controller"/>

        <!-- 配置視圖解析器 -->
        <bean class="org.springframework.web.servlet.view.InternalResourceViewResolver">
            <!-- 配置前綴 -->
            <property name="prefix" value="/WEB-INF/jsp/"></property>
            <!-- 配置后綴 -->
            <property name="suffix" value=".jsp"></property>
        </bean>

</beans>
注解開發第一個例子:
package com.rl.controller;

import org.springframework.stereotype.Controller;
import org.springframework.web.bind.annotation.RequestMapping;

@Controller//Controller注解
@RequestMapping("/test")//防止出現相同方法名的情況
public class TestController {

    @RequestMapping("/hello.do")//映射方法
    public String hello() {
        return "index";//返回modelandview的路徑
    }
}
最原始的接收參數的方法:
package com.rl.controller;

import javax.servlet.http.HttpServletRequest;

import org.springframework.stereotype.Controller;
import org.springframework.web.bind.annotation.RequestMapping;

@Controller//Controller注解
@RequestMapping("/test")//防止出現相同方法名的情況
public class TestController {


    /**
     * 最原始的接收參數的方法
     * @return
     */
    @RequestMapping("/revParam.do")
    public String revParam(HttpServletRequest request) {
        String name = request.getParameter("name");
        System.out.println(name);
        return "index";
    }
}

控制臺輸出: zs
第二種:
package com.rl.controller;

import javax.servlet.http.HttpServletRequest;

import org.springframework.stereotype.Controller;
import org.springframework.web.bind.annotation.RequestMapping;

@Controller//Controller注解
@RequestMapping("/test")//防止出現相同方法名的情況
public class TestController {


    /**
     * 第二種接收的方式
     * @return
     */
    @RequestMapping("/revParam1.do")
    public String revParam1(String name) {
        System.out.println(name);
        return "index";
    }
}
輸出同上
第三種:
package com.rl.controller;

import java.io.IOException;
import java.text.SimpleDateFormat;
import java.util.Date;

import javax.servlet.http.HttpServletRequest;
import javax.servlet.http.HttpServletResponse;

import org.springframework.beans.propertyeditors.CustomDateEditor;
import org.springframework.stereotype.Controller;
import org.springframework.web.bind.ServletRequestDataBinder;
import org.springframework.web.bind.annotation.InitBinder;
import org.springframework.web.bind.annotation.RequestMapping;

@Controller//Controller注解
@RequestMapping("/test")//防止出現相同方法名的情況
public class TestController {


    /**
     * 第三種: 可傳多個參數
     * @param name
     * @return
     * @throws IOException
     */
    @RequestMapping("/revParam2.do")
    public String revParam2(String name, Integer id, String address, Date birthday,
            HttpServletRequest request, HttpServletResponse response) {
        System.out.println(name);
        System.out.println(id);
        System.out.println(address);
        System.err.println(birthday);//默認輸入格式是xxxx/xx/xx
        return "index";
    }

    @InitBinder//該注解綁定屬性編輯器
    public void initBinder(ServletRequestDataBinder binder) {
        binder.registerCustomEditor(Date.class,
                                    new CustomDateEditor(new SimpleDateFormat("yyyy-MM-dd"), true));
    }
}
第四種:
package com.rl.controller;

import java.io.IOException;
import java.text.SimpleDateFormat;
import java.util.Date;

import javax.servlet.http.HttpServletRequest;
import javax.servlet.http.HttpServletResponse;

import org.springframework.beans.propertyeditors.CustomDateEditor;
import org.springframework.stereotype.Controller;
import org.springframework.web.bind.ServletRequestDataBinder;
import org.springframework.web.bind.annotation.InitBinder;
import org.springframework.web.bind.annotation.RequestMapping;

@Controller//Controller注解
@RequestMapping("/test")//防止出現相同方法名的情況
public class TestController {


    /**
     * 第四種: 多選傳參
     */
    @RequestMapping("/revParam3.do")
    public String revParam3(String[] fav) {
        for(String fa: fav) {
            System.out.println(fa);
        }
        return "success";
    }

    /**
     * 跳轉表單
     * @return
     */
    @RequestMapping("/toForm.do")
    public String toForm() {
        return "form";
    }
}
form.jsp:
<%@ page language="java" contentType="text/html; charset=UTF-8"
    pageEncoding="UTF-8"%>

<%
String path = request.getContextPath();
String basePath = request.getScheme()+"://"+request.getServerName()+":"+request.getServerPort()+path+"/";
%>
<!DOCTYPE html PUBLIC "-//W3C//DTD HTML 4.01 Transitional//EN" "http://www.w3.org/TR/html4/loose.dtd">
<html>
<head>
<meta http-equiv="Content-Type" content="text/html; charset=UTF-8">


<base href="<%=basePath%>">
</head>
<body>

    <form action="test/revParam3.do" method="post">
        愛好:<input name="fav" type="checkbox" value="1">籃球
        <input name="fav" type="checkbox" value="2">排球
        <input name="fav" type="checkbox" value="3">棒球
        <input type="submit" value="提交">
    </form>
</body>
</html>
也可以用對象來接收, 就不貼代碼了.
第五種: 結果集返回視圖
package com.rl.controller;

import java.io.IOException;
import java.text.SimpleDateFormat;
import java.util.Date;
import java.util.HashMap;
import java.util.Map;

import javax.servlet.http.HttpServletRequest;
import javax.servlet.http.HttpServletResponse;

import org.springframework.beans.propertyeditors.CustomDateEditor;
import org.springframework.stereotype.Controller;
import org.springframework.web.bind.ServletRequestDataBinder;
import org.springframework.web.bind.annotation.InitBinder;
import org.springframework.web.bind.annotation.RequestMapping;
import org.springframework.web.servlet.ModelAndView;

import com.rl.model.Person;

@Controller//Controller注解
@RequestMapping("/test")//防止出現相同方法名的情況
public class TestController {

    /**
     * 結果集返回視圖(不建議使用)
     * @return
     */
    @RequestMapping("/returnResult.do")
    public ModelAndView returnResult() {
        Person person = new Person();
        person.setAddress("北京");
        person.setBirthday(new Date());
        person.setGender(1);
        person.setName("zhangsan");
        Map<String, Person> map = new HashMap<String, Person>();
        map.put("person", person);
        return new ModelAndView("returnPage", map);
    }
}
頁面:
<%@ page language="java" contentType="text/html; charset=UTF-8"
    pageEncoding="UTF-8"%>
<%@taglib uri="http://java.sun.com/jsp/jstl/fmt" prefix="fmt" %>
<!DOCTYPE html PUBLIC "-//W3C//DTD HTML 4.01 Transitional//EN" "http://www.w3.org/TR/html4/loose.dtd">
<html>
<head>
<meta http-equiv="Content-Type" content="text/html; charset=UTF-8">

</head>
<body>

    <h4>${person.name }</h4>
    <h4>${person.gender }</h4>
    <h4>${person.address }</h4>
    <h4><fmt:formatDate value="${person.birthday }" pattern="yyyy-MM-dd HH:mm:ss"/></h4>
</body>
</html>
第六種:
package com.rl.controller;

import java.io.IOException;
import java.text.SimpleDateFormat;
import java.util.Date;
import java.util.HashMap;
import java.util.Map;

import javax.servlet.http.HttpServletRequest;
import javax.servlet.http.HttpServletResponse;

import org.springframework.beans.propertyeditors.CustomDateEditor;
import org.springframework.stereotype.Controller;
import org.springframework.web.bind.ServletRequestDataBinder;
import org.springframework.web.bind.annotation.InitBinder;
import org.springframework.web.bind.annotation.RequestMapping;
import org.springframework.web.servlet.ModelAndView;

import com.rl.model.Person;

@Controller//Controller注解
@RequestMapping("/test")//防止出現相同方法名的情況
public class TestController {


    /**
     * 第六種: 簡化一點(還是比較少用的, 不建議使用)
     * 注意: map在參數列表中不是用于接收參數的, 只用于返回頁面
     */
    @RequestMapping("/returnResult1.do")
    public String returnResult1(Map<String, Object> map) {
        Person person = new Person();
        person.setAddress("北京");
        person.setBirthday(new Date());
        person.setGender(1);
        person.setName("zhangsan");
        map.put("person", person);
        return "returnPage";
    }
}
效果同上
第七種:
package com.rl.controller;

import java.io.IOException;
import java.text.SimpleDateFormat;
import java.util.Date;
import java.util.HashMap;
import java.util.Map;

import javax.servlet.http.HttpServletRequest;
import javax.servlet.http.HttpServletResponse;

import org.springframework.beans.propertyeditors.CustomDateEditor;
import org.springframework.stereotype.Controller;
import org.springframework.ui.Model;
import org.springframework.web.bind.ServletRequestDataBinder;
import org.springframework.web.bind.annotation.InitBinder;
import org.springframework.web.bind.annotation.RequestMapping;
import org.springframework.web.servlet.ModelAndView;

import com.rl.model.Person;

@Controller//Controller注解
@RequestMapping("/test")//防止出現相同方法名的情況
public class TestController {


    /**
     * 再簡化, 使用Model(最常用, 建議使用)
     */
    @RequestMapping("/returnResult2.do")
    public String returnResult2(Model model) {
        Person person = new Person();
        person.setAddress("北京");
        person.setBirthday(new Date());
        person.setGender(1);
        person.setName("zhangsan");
        model.addAttribute("person", person);
        return "returnPage";
    }
}
效果同上
ajax調用springmvc的方法:
package com.rl.controller;

import java.io.IOException;
import java.text.SimpleDateFormat;
import java.util.Date;
import java.util.HashMap;
import java.util.Map;

import javax.servlet.http.HttpServletRequest;
import javax.servlet.http.HttpServletResponse;

import org.springframework.beans.propertyeditors.CustomDateEditor;
import org.springframework.stereotype.Controller;
import org.springframework.ui.Model;
import org.springframework.web.bind.ServletRequestDataBinder;
import org.springframework.web.bind.annotation.InitBinder;
import org.springframework.web.bind.annotation.RequestMapping;
import org.springframework.web.servlet.ModelAndView;

import com.rl.model.Person;

@Controller//Controller注解
@RequestMapping("/test")//防止出現相同方法名的情況
public class TestController {


    /**
     * ajax調用
     */
    @RequestMapping("/ajax.do")
    public void ajax(String name, HttpServletResponse response) {
        String result = "hello "+name;
        try {
            response.getWriter().write(result);
        } catch (IOException e) {
            e.printStackTrace();
        }
    }

    /**
     * 跳轉ajax
     */
    @RequestMapping("/toAjax.do")
    public String toAjax() {
        return "ajax";
    }
}
頁面:
<%@ page language="java" contentType="text/html; charset=UTF-8"
    pageEncoding="UTF-8"%>
<%
String path = request.getContextPath();
String basePath = request.getScheme()+"://"+request.getServerName()+":"+request.getServerPort()+path+"/";
%>
<!DOCTYPE html PUBLIC "-//W3C//DTD HTML 4.01 Transitional//EN" "http://www.w3.org/TR/html4/loose.dtd">
<html>
<head>
<base href="<%=basePath%>">
<meta http-equiv="Content-Type" content="text/html; charset=UTF-8">
<script type="text/javascript" src="js/jquery.js"></script>


<script type="text/javascript">
$(function(){
    $("#myButton").click(function(){
        var mytext = $("#mytext").val();
        $.ajax({
            url:"test/ajax.do",
            type:"post",
            dataType:"text",
            data:{
                name:mytext
            },
            success:function(responseText){
                alert(responseText);
            },
            error:function(){
                alert("system error");
            }
        });
    });
});
</script>
</head>
<body>
    <input type="text" id="mytext">
    <input type="button" id="myButton" value="click">
</body>
</html>
SpringMVC的重定向:
同一Controller中的重定向:
package com.rl.controller;

import java.io.IOException;
import java.io.PrintWriter;
import java.text.SimpleDateFormat;
import java.util.Date;
import java.util.HashMap;
import java.util.Map;

import javax.servlet.http.HttpServletRequest;
import javax.servlet.http.HttpServletResponse;

import org.springframework.beans.propertyeditors.CustomDateEditor;
import org.springframework.stereotype.Controller;
import org.springframework.ui.Model;
import org.springframework.web.bind.ServletRequestDataBinder;
import org.springframework.web.bind.annotation.InitBinder;
import org.springframework.web.bind.annotation.RequestMapping;
import org.springframework.web.servlet.ModelAndView;

import com.rl.model.Person;

@Controller//Controller注解
@RequestMapping("/test")//防止出現相同方法名的情況
public class TestController {


    /**
     * 跳轉表單
     * @return
     */
    @RequestMapping("/toForm.do")
    public String toForm() {
        return "form";
    }


    /**
     * 同一Controller之內的重定向
     */
    @RequestMapping("/redirectForm.do")
    public String redirectForm() {
        return "redirect:toForm.do";//路徑會更改
    }
}
不同Controller之間的重定向:
package com.rl.controller;

import java.io.IOException;
import java.io.PrintWriter;
import java.text.SimpleDateFormat;
import java.util.Date;
import java.util.HashMap;
import java.util.Map;

import javax.servlet.http.HttpServletRequest;
import javax.servlet.http.HttpServletResponse;

import org.springframework.beans.propertyeditors.CustomDateEditor;
import org.springframework.stereotype.Controller;
import org.springframework.ui.Model;
import org.springframework.web.bind.ServletRequestDataBinder;
import org.springframework.web.bind.annotation.InitBinder;
import org.springframework.web.bind.annotation.RequestMapping;
import org.springframework.web.servlet.ModelAndView;

import com.rl.model.Person;

@Controller//Controller注解
@RequestMapping("/test")//防止出現相同方法名的情況
public class TestController {


    /**
     * 不同Controller之間的重定向
     */
    @RequestMapping("/redirectForm1.do")
    public String redirectForm1() {
        return "redirect:/test1/toForm.do";//test1前面的'/'代表從根目錄上的test1/toForm.do
    }
}
package com.rl.controller;

import org.springframework.stereotype.Controller;
import org.springframework.web.bind.annotation.RequestMapping;

@Controller//Controller注解
@RequestMapping("/test1")//防止出現相同方法名的情況
public class Test1Controller {

    /**
     * 跳轉表單
     * @return
     */
    @RequestMapping("/toForm.do")
    public String toForm() {
        return "form";
    }
}
文件上傳:
<?xml version="1.0" encoding="UTF-8"?>
					<beans xmlns="http://www.springframework.org/schema/beans"
					xmlns:xsi="http://www.w3.org/2001/XMLSchema-instance"
					xmlns:mvc="http://www.springframework.org/schema/mvc"
					xmlns:context="http://www.springframework.org/schema/context"
					xmlns:aop="http://www.springframework.org/schema/aop"
					xmlns:tx="http://www.springframework.org/schema/tx"
					xsi:schemaLocation="http://www.springframework.org/schema/beans
					http://www.springframework.org/schema/beans/spring-beans-3.0.xsd
					http://www.springframework.org/schema/mvc
					http://www.springframework.org/schema/mvc/spring-mvc-3.0.xsd
					http://www.springframework.org/schema/context
					http://www.springframework.org/schema/context/spring-context-3.0.xsd
					http://www.springframework.org/schema/aop
					http://www.springframework.org/schema/aop/spring-aop-3.0.xsd
					http://www.springframework.org/schema/tx
					http://www.springframework.org/schema/tx/spring-tx-3.0.xsd ">

        <!-- 配置注解掃描器 -->
        <context:component-scan base-package="com.rl.controller"/>

        <!-- 配置視圖解析器 -->
        <bean class="org.springframework.web.servlet.view.InternalResourceViewResolver">
            <!-- 配置前綴 -->
            <property name="prefix" value="/WEB-INF/jsp/"></property>
            <!-- 配置后綴 -->
            <property name="suffix" value=".jsp"></property>
        </bean>

        <!-- 文件上傳
            復雜類型的表單視圖解析器
         -->
        <!--
			bean的id是multipartResolver,不能隨便定義
		 -->
        <bean id="multipartResolver" class="org.springframework.web.multipart.commons.CommonsMultipartResolver">
            <!--
                             以字節為單位
             -->
            <property name="maxUploadSize" value="1024000"></property>
        </bean>
</beans>
頁面:
<%@ page language="java" contentType="text/html; charset=UTF-8"
    pageEncoding="UTF-8"%>
<%
String path = request.getContextPath();
String basePath = request.getScheme()+"://"+request.getServerName()+":"+request.getServerPort()+path+"/";
%>
<!DOCTYPE html PUBLIC "-//W3C//DTD HTML 4.01 Transitional//EN" "http://www.w3.org/TR/html4/loose.dtd">
<html>
<head>
<base href="<%=basePath%>">
<meta http-equiv="Content-Type" content="text/html; charset=UTF-8">
<script type="text/javascript" src="js/jquery.js"></script>
</head>
<body>
    <form action="upload/uploadPic.do" method="post" enctype="multipart/form-data">
        <input type="file" name="pic">
        <input type="submit" value="提交">
    </form>
</body>
</html>
package com.rl.controller;
import java.io.File;
import java.io.FileOutputStream;
import java.io.OutputStream;
import java.text.SimpleDateFormat;
import java.util.Date;
import java.util.Random;
import javax.servlet.http.HttpServletRequest;
import org.springframework.stereotype.Controller;
import org.springframework.web.bind.annotation.RequestMapping;
import org.springframework.web.multipart.MultipartFile;
import org.springframework.web.multipart.MultipartHttpServletRequest;
@Controller
@RequestMapping("/upload")
public class UploadController {
@RequestMapping("/uploadPic.do")
public String uploadPic(HttpServletRequest request) throws Exception {
//轉換request
MultipartHttpServletRequest mr = (MultipartHttpServletRequest) request;
//獲得文件
MultipartFile file = mr.getFile("pic");
//獲得文件的字節數組
byte[] fbyte = file.getBytes();
//獲得當前時間的最小精度,精確到三位毫秒
String fileName = new SimpleDateFormat("yyyyMMddHHmmssSSS").format(new Date());
//再加三位隨機數
Random random = new Random();
for(int i = 0; i < 3; i++){
fileName = fileName + random.nextInt(10);
}
//獲得文件的原始文件名
String oriFileName = file.getOriginalFilename();
//后綴
String suffix = oriFileName.substring(oriFileName.lastIndexOf("."));
//獲得項目的部署路徑
String realPath = request.getSession().getServletContext().getRealPath("/");
//組裝圖片的全路徑
String picPath = realPath + "\\upload\\"+fileName+suffix;
//定義輸出流
OutputStream out = new FileOutputStream(new File(picPath));
out.write(fbyte);
out.flush();
out.close();
return "success";
}
}
記得實現一定要先建立一個upload文件夾:

攔截器:
配置文件:
<?xml version="1.0" encoding="UTF-8"?>
					<beans xmlns="http://www.springframework.org/schema/beans"
					xmlns:xsi="http://www.w3.org/2001/XMLSchema-instance"
					xmlns:mvc="http://www.springframework.org/schema/mvc"
					xmlns:context="http://www.springframework.org/schema/context"
					xmlns:aop="http://www.springframework.org/schema/aop"
					xmlns:tx="http://www.springframework.org/schema/tx"
					xsi:schemaLocation="http://www.springframework.org/schema/beans
					http://www.springframework.org/schema/beans/spring-beans-3.0.xsd
					http://www.springframework.org/schema/mvc
					http://www.springframework.org/schema/mvc/spring-mvc-3.0.xsd
					http://www.springframework.org/schema/context
					http://www.springframework.org/schema/context/spring-context-3.0.xsd
					http://www.springframework.org/schema/aop
					http://www.springframework.org/schema/aop/spring-aop-3.0.xsd
					http://www.springframework.org/schema/tx
					http://www.springframework.org/schema/tx/spring-tx-3.0.xsd ">

        <!-- 配置注解掃描器 -->
        <context:component-scan base-package="com.rl.controller"/>

        <!-- 配置視圖解析器 -->
        <bean class="org.springframework.web.servlet.view.InternalResourceViewResolver">
            <!-- 配置前綴 -->
            <property name="prefix" value="/WEB-INF/jsp/"></property>
            <!-- 配置后綴 -->
            <property name="suffix" value=".jsp"></property>
        </bean>

        <!-- 文件上傳
                            復雜類型的表單視圖解析器
         -->
        <bean id="multipartResolver" class="org.springframework.web.multipart.commons.CommonsMultipartResolver">
            <!--
                             以字節為單位
             -->
            <property name="maxUploadSize" value="1024000"></property>
        </bean>

        <!-- 配置攔截器
            mvc:mapping: 配置攔截范圍, 跟bean標簽有上下的順序
         -->
        <mvc:interceptors>
            <mvc:interceptor>
                <mvc:mapping path="/test/**"/>
                <bean class="com.rl.interceptor.MyInterceptor"></bean>
            </mvc:interceptor>
        </mvc:interceptors>
</beans>
攔截器實現:
package com.rl.interceptor;

import java.util.Map;

import javax.servlet.http.HttpServletRequest;
import javax.servlet.http.HttpServletResponse;

import org.springframework.web.servlet.HandlerInterceptor;
import org.springframework.web.servlet.ModelAndView;

public class MyInterceptor implements HandlerInterceptor {

    /**
     * 最終攔截: 在頁面生成之后執行
     *          可以做頁面的一些監控, arg3可以收集一些異常信息
     */
    @Override
    public void afterCompletion(HttpServletRequest arg0, HttpServletResponse arg1, Object arg2, Exception arg3)
            throws Exception {
        System.out.println("執行最終攔截...");
        String message = arg3.getMessage();//可以獲取一些異常信息
    }

    /**
     * 后置攔截: 在Controller之后執行, 視圖解析之前(還沒生成頁面)
     *          可以對未生成的頁面做一些修改
     */
    @Override
    public void postHandle(HttpServletRequest arg0, HttpServletResponse arg1, Object arg2, ModelAndView arg3)
            throws Exception {
        System.out.println("執行后置攔截...");
        Map<String, Object> map = arg3.getModel();
        //此時map可以追加一些東西
    }

    /**
     * 前置攔截, 在Controller前執行
     * return false表示攔截, true表示放行
     * arg2: 當前攔截到的Controller的實例
     */
    @Override
    public boolean preHandle(HttpServletRequest arg0, HttpServletResponse arg1, Object arg2) throws Exception {
        System.out.println("執行前置攔截...");
        return true;
    }
}
智能推薦


freemarker + ItextRender 根據模板生成PDF文件
1. 制作模板 2. 獲取模板,并將所獲取的數據加載生成html文件 2. 生成PDF文件 其中由兩個地方需要注意,都是關于獲取文件路徑的問題,由于項目部署的時候是打包成jar包形式,所以在開發過程中時直接安照傳統的獲取方法沒有一點文件,但是當打包后部署,總是出錯。于是參考網上文章,先將文件讀出來到項目的臨時目錄下,然后再按正常方式加載該臨時文件; 還有一個問題至今沒有解決,就是關于生成PDF文件...
電腦空間不夠了?教你一個小秒招快速清理 Docker 占用的磁盤空間!
Docker 很占用空間,每當我們運行容器、拉取鏡像、部署應用、構建自己的鏡像時,我們的磁盤空間會被大量占用。 如果你也被這個問題所困擾,咱們就一起看一下 Docker 是如何使用磁盤空間的,以及如何回收。 docker 占用的空間可以通過下面的命令查看: TYPE 列出了docker 使用磁盤的 4 種類型: Images:所有鏡像占用的空間,包括拉取下來的鏡像,和本地構建的。 Con...

requests實現全自動PPT模板
http://www.1ppt.com/moban/ 可以免費的下載PPT模板,當然如果要人工一個個下,還是挺麻煩的,我們可以利用requests輕松下載 訪問這個主頁,我們可以看到下面的樣式 點每一個PPT模板的圖片,我們可以進入到詳細的信息頁面,翻到下面,我們可以看到對應的下載地址 點擊這個下載的按鈕,我們便可以下載對應的PPT壓縮包 那我們就開始做吧 首先,查看網頁的源代碼,我們可以看到每一...

猜你喜歡

Linux C系統編程-線程互斥鎖(四)
互斥鎖 互斥鎖也是屬于線程之間處理同步互斥方式,有上鎖/解鎖兩種狀態。 互斥鎖函數接口 1)初始化互斥鎖 pthread_mutex_init() man 3 pthread_mutex_init (找不到的情況下首先 sudo apt-get install glibc-doc sudo apt-get install manpages-posix-dev) 動態初始化 int pthread_...

統計學習方法 - 樸素貝葉斯
引入問題:一機器在良好狀態生產合格產品幾率是 90%,在故障狀態生產合格產品幾率是 30%,機器良好的概率是 75%。若一日第一件產品是合格品,那么此日機器良好的概率是多少。 貝葉斯模型 生成模型與判別模型 判別模型,即要判斷這個東西到底是哪一類,也就是要求y,那就用給定的x去預測。 生成模型,是要生成一個模型,那就是誰根據什么生成了模型,誰就是類別y,根據的內容就是x 以上述例子,判斷一個生產出...
styled-components —— React 中的 CSS 最佳實踐
https://zhuanlan.zhihu.com/p/29344146 Styled-components 是目前 React 樣式方案中最受關注的一種,它既具備了 css-in-js 的模塊化與參數化優點,又完全使用CSS的書寫習慣,不會引起額外的學習成本。本文是 styled-components 作者之一 Max Stoiber 所寫,首先總結了前端組件化樣式中的最佳實踐原則,然后在此基...
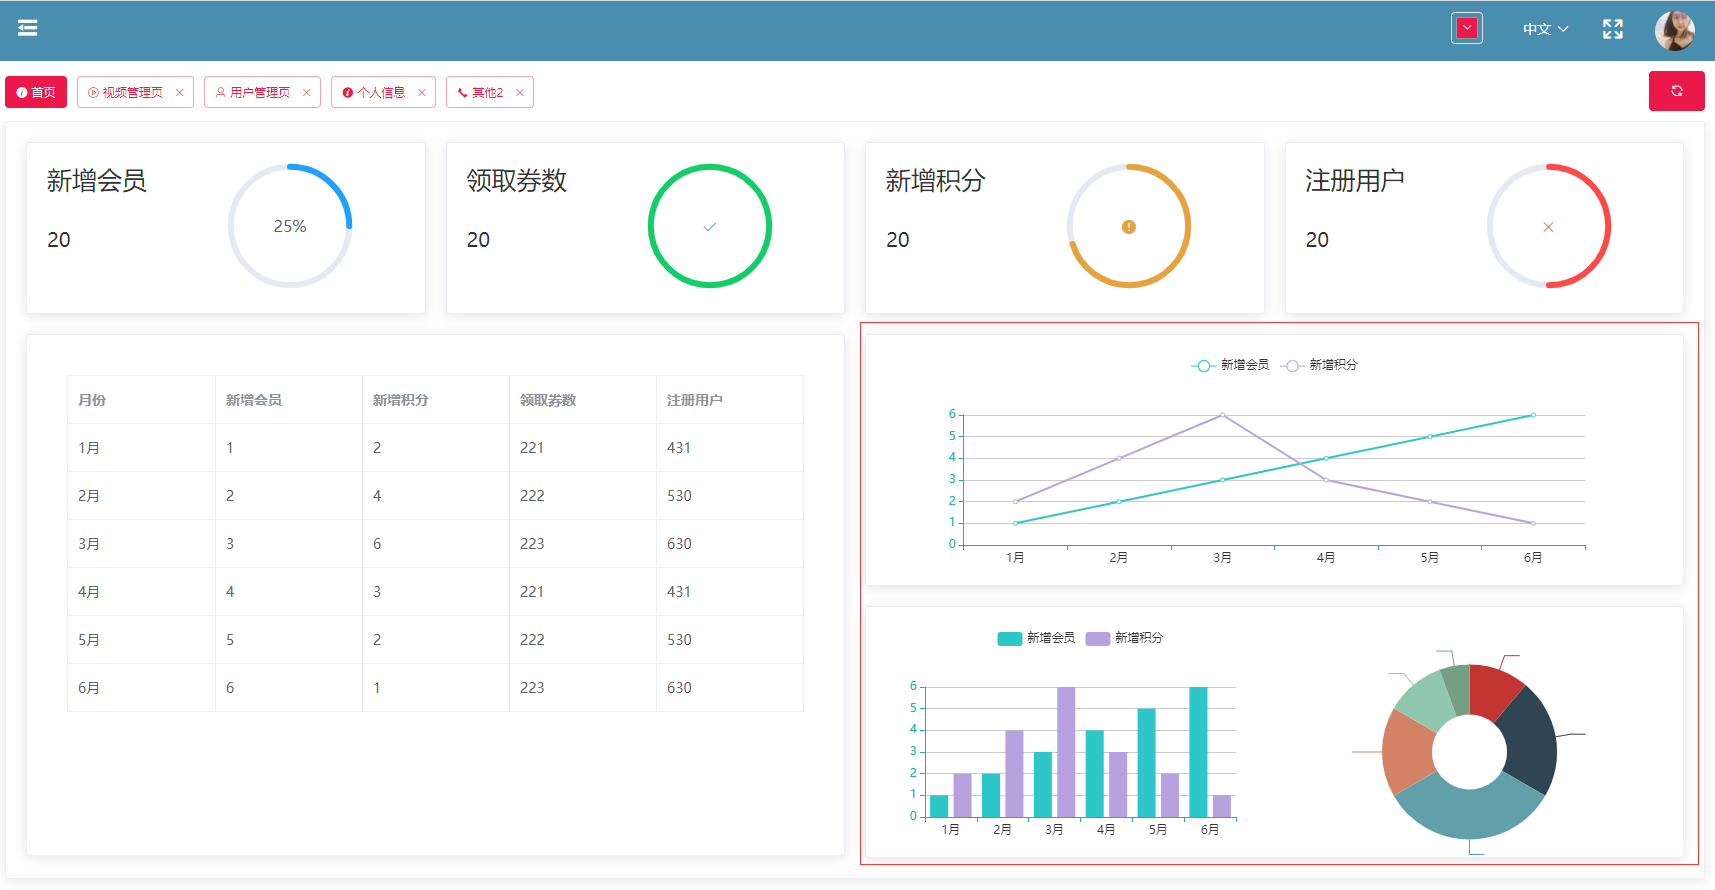
19.vue中封裝echarts組件
19.vue中封裝echarts組件 1.效果圖 2.echarts組件 3.使用組件 按照組件格式整理好數據格式 傳入組件 home.vue 4.接口返回數據格式...