【Android學習筆記】Fragment的用法
介紹
碎片(Fragment)是一種可以嵌入在活動之間的UI片段,它可以讓程序更加合理和充分地利用大屏幕的空間,由于它和活動非常相似,也可以將它簡單地理解成一個迷你的活動。
基本用法
新建一個FragmentTestProject工程,創建一個左側布局文件left_fragment.xml,內容如下:
<?xml version="1.0" encoding="utf-8"?>
<LinearLayout xmlns:android="http://schemas.android.com/apk/res/android"
    android:orientation="vertical"
    android:layout_width="match_parent"
    android:layout_height="match_parent">

    <Button
        android:id="@+id/button"
        android:layout_width="wrap_content"
        android:layout_height="wrap_content"
        android:layout_gravity="center_horizontal"
        android:text="Button"/>

</LinearLayout>
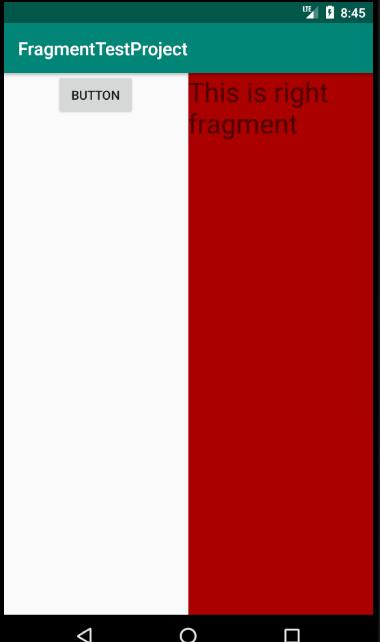
然后新建右側碎片布局文件right_fragment.xml,背景色設為紅色并為其添加一個TextView,內容如下:
<?xml version="1.0" encoding="utf-8"?>
<LinearLayout xmlns:android="http://schemas.android.com/apk/res/android"
    android:background="#aa0000"
    android:orientation="vertical"
    android:layout_width="match_parent"
    android:layout_height="match_parent">

    <TextView
        android:layout_width="wrap_content"
        android:layout_height="wrap_content"
        android:layout_gravity="center_horizontal"
        android:textSize="30sp"
        android:text="This is right fragment"/>

</LinearLayout>
接著創建一個LeftFragment類,重寫onCreateView()方法,動態加載left_fragment碎片:
package com.example.fragmenttestproject;

import android.os.Bundle;
import android.view.LayoutInflater;
import android.view.View;
import android.view.ViewGroup;

import androidx.annotation.NonNull;
import androidx.annotation.Nullable;
import androidx.fragment.app.Fragment;

public class LeftFragment extends Fragment {

    @Nullable
    @Override
    public View onCreateView(@NonNull LayoutInflater inflater, @Nullable ViewGroup container, @Nullable Bundle savedInstanceState) {
        //通過LayoutInflater實例的inflate()方法將剛才定義的left_fragment布局文件動態加載進來
        View view = inflater.inflate(R.layout.left_fragment,container,false);
        return view;
    }
}
再創建一個RightFragment類,動態加載right_fragment碎片:
package com.example.fragmenttestproject;

import android.os.Bundle;
import android.view.LayoutInflater;
import android.view.View;
import android.view.ViewGroup;

import androidx.annotation.NonNull;
import androidx.annotation.Nullable;
import androidx.fragment.app.Fragment;

public class RightFragment extends Fragment {

    @Nullable
    @Override
    public View onCreateView(@NonNull LayoutInflater inflater, @Nullable ViewGroup container, @Nullable Bundle savedInstanceState) {
        //通過LayoutInflater實例的inflate()方法將剛才定義的right_fragment布局文件動態加載進來
        View view = inflater.inflate(R.layout.right_fragment,container,false);
        return view;

    }
}
最后編寫activity_main.xml代碼,將兩個碎片放置進主活動布局中,內容如下:
<?xml version="1.0" encoding="utf-8"?>
<LinearLayout xmlns:android="http://schemas.android.com/apk/res/android"
android:layout_width="match_parent"
android:layout_height="match_parent">
<fragment
android:id="@+id/left_fragment"
android:name="com.example.fragmenttestproject.LeftFragment"
android:layout_width="0dp"
android:layout_height="match_parent"
android:layout_weight="1"/>
<fragment
android:id="@+id/right_fragment"
android:name="com.example.fragmenttestproject.RightFragment"
android:layout_width="0dp"
android:layout_height="match_parent"
android:layout_weight="1"/>
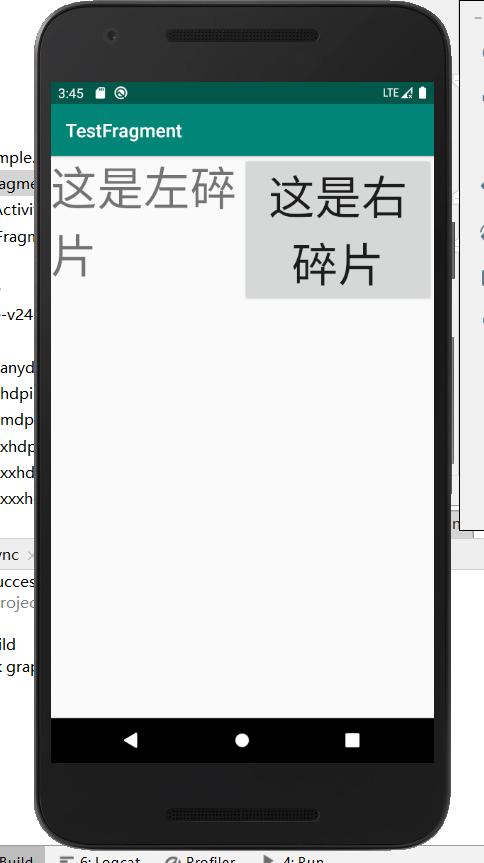
</LinearLayout>需要注意的是,這里還需要通過android:name屬性來顯式指明要添加的碎片類名。
運行APP,效果如下:
動態加載碎片
碎片的真正強大之處在于它可以在程序運行時動態添加到活動當中,根據具體情況來動態添加碎片,可以將程序界面定制得更加多樣化。
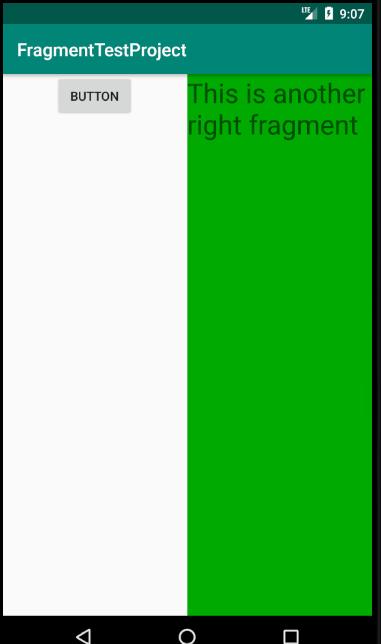
新建another_right_fragment.xml,代碼和right_fragment.xml相似,設置背景色為綠色,代碼如下:
<?xml version="1.0" encoding="utf-8"?>
<LinearLayout xmlns:android="http://schemas.android.com/apk/res/android"
    android:orientation="vertical"
    android:background="#00aa00"
    android:layout_width="match_parent"
    android:layout_height="match_parent">

    <TextView
        android:layout_width="wrap_content"
        android:layout_height="wrap_content"
        android:layout_gravity="center_horizontal"
        android:textSize="30sp"
        android:text="This is another right fragment"/>

</LinearLayout>
然后新建AnotherRightFragment類,內部動態加載另一個右側碎片:
package com.example.fragmenttestproject;

import android.os.Bundle;
import android.view.LayoutInflater;
import android.view.View;
import android.view.ViewGroup;

import androidx.annotation.NonNull;
import androidx.annotation.Nullable;
import androidx.fragment.app.Fragment;

public class AnotherRightFragment extends Fragment {

    @Nullable
    @Override
    public View onCreateView(@NonNull LayoutInflater inflater, @Nullable ViewGroup container, @Nullable Bundle savedInstanceState) {
        //通過LayoutInflater實例的inflate()方法將剛才定義的another_right_fragment布局文件動態加載進來
        View view = inflater.inflate(R.layout.another_right_fragment,container,false);
        return view;

    }

}
接著修改activity_main.xml,將右側碎片替換為一個幀布局:
<?xml version="1.0" encoding="utf-8"?>
<LinearLayout xmlns:android="http://schemas.android.com/apk/res/android"
    android:layout_width="match_parent"
    android:layout_height="match_parent">

    <fragment
        android:id="@+id/left_fragment"
        android:name="com.example.fragmenttestproject.LeftFragment"
        android:layout_width="0dp"
        android:layout_height="match_parent"
        android:layout_weight="1"/>

    <FrameLayout
        android:id="@+id/right_layout"
        android:layout_width="0dp"
        android:layout_height="match_parent"
        android:layout_weight="1"/>

</LinearLayout>
最后修改MainActivity中的代碼,向FrameLayout里添加內容,從而實現動態添加碎片的功能:
package com.example.fragmenttestproject;

import androidx.appcompat.app.AppCompatActivity;
import androidx.fragment.app.Fragment;
import androidx.fragment.app.FragmentManager;
import androidx.fragment.app.FragmentTransaction;

import android.os.Bundle;
import android.view.View;
import android.widget.Button;

public class MainActivity extends AppCompatActivity implements View.OnClickListener{

    boolean flag = true;

    @Override
    protected void onCreate(Bundle savedInstanceState) {
        super.onCreate(savedInstanceState);
        setContentView(R.layout.activity_main);
        Button button = findViewById(R.id.button);
        button.setOnClickListener(this);
    }

    @Override
    public void onClick(View view) {
        switch (view.getId()){
            case R.id.button:
                //為true加載right碎片,為false加載another_right碎片
                if(flag){
                    replaceFragment(new RightFragment());
                }else{
                    replaceFragment(new AnotherRightFragment());
                }
                flag=!flag;
                break;
            default:
                break;
        }
    }

    private  void replaceFragment(Fragment fragment){
        //通過getSupportFragmentManager()獲取FragmentManager
        FragmentManager fragmentManager = getSupportFragmentManager();
        //開啟事務
        FragmentTransaction transaction = fragmentManager.beginTransaction();
        //替換容器內的碎片
        transaction.replace(R.id.right_layout,fragment);
        //提交事務
        transaction.commit();
    }
}
單擊按鈕,如果flag為true,加載右側碎片,否則加載左側碎片。
運行APP,效果如下:
在碎片中模擬返回棧
在剛實現的動態加載碎片實例中,如果點擊了按鈕,按下back鍵會直接退出程序。
如果想實現類似返回棧的效果,按下back鍵回到上一個碎片,需要使用到FragmentTransaction中的addToBackStack()方法,它可以將事務添加到返回棧中,修改MainActivity中的代碼如下:
package com.example.fragmenttestproject;

import androidx.appcompat.app.AppCompatActivity;
import androidx.fragment.app.Fragment;
import androidx.fragment.app.FragmentManager;
import androidx.fragment.app.FragmentTransaction;

import android.os.Bundle;
import android.view.View;
import android.widget.Button;

public class MainActivity extends AppCompatActivity implements View.OnClickListener{

    boolean flag = true;

    @Override
    protected void onCreate(Bundle savedInstanceState) {
        super.onCreate(savedInstanceState);
        setContentView(R.layout.activity_main);
        Button button = findViewById(R.id.button);
        button.setOnClickListener(this);
    }

    @Override
    public void onClick(View view) {
        switch (view.getId()){
            case R.id.button:
                //為true加載right碎片,為false加載another_right碎片
                if(flag){
                    replaceFragment(new RightFragment());
                }else{
                    replaceFragment(new AnotherRightFragment());
                }
                flag=!flag;
                break;
            default:
                break;
        }
    }

    private  void replaceFragment(Fragment fragment){
        //通過getSupportFragmentManager()獲取FragmentManager
        FragmentManager fragmentManager = getSupportFragmentManager();
        //開啟事務
        FragmentTransaction transaction = fragmentManager.beginTransaction();
        //替換容器內的碎片
        transaction.replace(R.id.right_layout,fragment);
        //將事務添加到返回棧中,接收的參數用來描述返回棧的狀態,一般傳入null即可
        transaction.addToBackStack(null);
        //提交事務
        transaction.commit();
    }
}
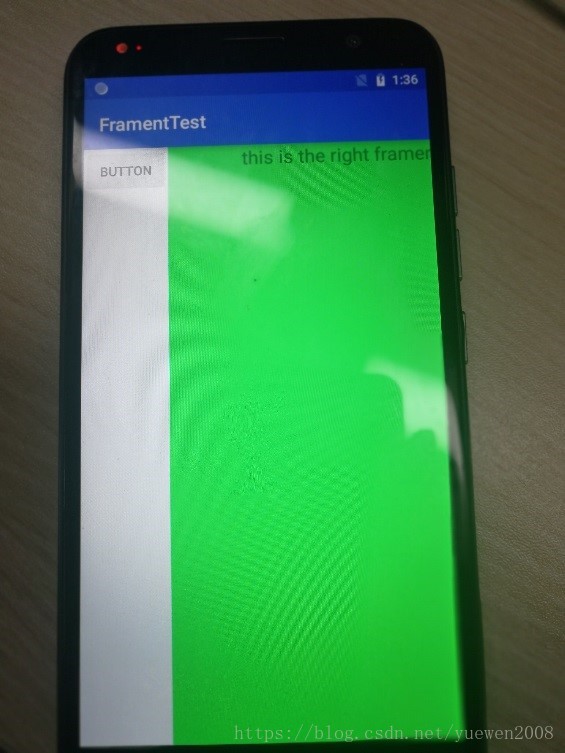
運行APP后,發現效果已實現。
碎片與活動之間進行通信
1.在活動中調用碎片的方法:
先通過getSupportFragmentManager()獲取到FragmentManager實例,再調用它的findFragmentById()就可以獲取到碎片實例了:
        FragmentManager fragmentManager = getSupportFragmentManager();
        LeftFragment leftFragment = (LeftFragment) fragmentManager.findFragmentById(R.id.left_fragment);
2.在碎片中調用活動的方法:
可以在每個碎片中調用getActivity()方法來得到和當前碎片相關聯的活動實例,如下:
MainActivity activity = (MainActivity) getActivity();
補充:
智能推薦
【android筆記】Fragment
Frament是什么 碎片frament是一種可以嵌入在活動中的UI片段,它能讓程序更加合理和充分的利用大屏幕的空間,因而在平板上應用廣泛。碎片frament和活動activity很像,也可以包含布局,也有自己的生命周期。 如何使用碎片frament才能最大限度的利用平板屏幕的空間呢?如果要開發一個新聞應用app,其中一個界面使用listview展示一組新聞標題,當點擊了其中的一個標題,就打開另一...
Android筆記 —— Fragment
0x00 前言 之前我們學過的知識。 0x01 知識點 1.什么是Fragment Fragment是一種嵌入在活動當中的UI片段。 2.如何創建簡單的Fragment 1.創建Fragment布局 左邊 右邊 2.創建fragment 左邊 右邊 3.布局添加 4.效果展示 3.動態添加Fragment 3.1.創建碎片實例 界面布局 fragment實例 3.2.獲取FragmentManag...
Android fragment筆記
1 fragment Fragment 表示 Activity 中的行為或用戶界面部分。您可以將多個片段組合在一個 Activity 中來構建多窗格 UI,以及在多個 Activity 中重復使用某個片段。 不過,片段并非必須成為 Activity 布局的一部分(比如retainInstancefragment);您還可以將沒有自己 UI 的片段用作 Activity 的不可見工作線程。 2 創建...
安卓學習之路-Fragment的簡單用法
開篇嘮嗑 昨天下午接到了字節跳動的面試電話,是客戶端研發崗位的,瞬間心慌啊,再去看了下面筋,發現問的問題廣而精,怪不得人家都說字節的面試很難,對技術的要求很高,我想了想自己,就學習了那么可憐的一點知識就要上戰場了,頓時憂從中來。舍友也鼓勵我說:“沒事,就當一次經驗。”確實,能夠幾次面試就成功拿到offer的人畢竟不多吧。我尋思我可能就是不喜歡那種,你問我問題我回答不上來的感...
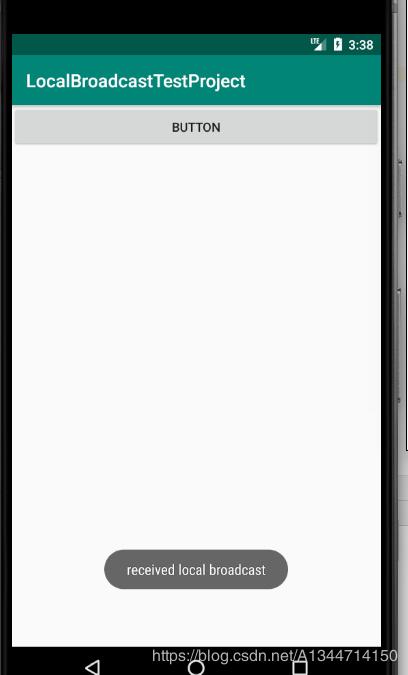
【Android學習筆記】本地廣播的用法
介紹 為了解決廣播的安全性問題,Android引入了一套本地廣播機制,使用這個機制發出的廣播只能在應用程序的內部進行傳遞,并且廣播接收器也只能接收來自本應用程序發出的廣播,這樣所有的安全性問題就不復存在了。 基本使用 先創建工程LocalBroadcastTestProject,編寫MainActivity的界面布局文件: 然后編寫本地廣播接收器代碼,實現onReceiver()方法: 最后編寫M...
猜你喜歡
Android學習(五)——Fragment
Fragment fragment本來設計的初中是為了適應大屏幕的平板電腦,現在我們普通的手機開發也會加入這個Fragment,我們可以把他理解為小型的Activity,但是他還是必須嵌套在Activity里使用的,所以我們可以按照直譯去理解他——Activity的一個“碎片”。雖然fragment有自己的生命周期,但是還是會受到宿主Activity...

Android學習(三)fragment
Android學習(三)fragment fragment fragment基本使用 碎片的生命周期 碎片的狀態 生命周期圖 fragment fragment稱為碎片,提供了重用性,減少了activity的代碼量。 fragment基本使用 使用流程基本和activity一致 創建布局文件,新建fragment類 創建布局文件 新建TestFragment基礎Fragment,重寫onCreat...

Android學習之fragment
概念 Fragment (碎片) Fragment是Android3.0新增的,它與Activity十分相似,可以說成是微小版的activity,但不能等同于。用來在一個Activity中描述一些行為或一部分用戶界面。使用多個Fragment可以在一個單獨的Activity中建立多個UI面板,也可以在多個Activity中使用Fr...


freemarker + ItextRender 根據模板生成PDF文件
1. 制作模板 2. 獲取模板,并將所獲取的數據加載生成html文件 2. 生成PDF文件 其中由兩個地方需要注意,都是關于獲取文件路徑的問題,由于項目部署的時候是打包成jar包形式,所以在開發過程中時直接安照傳統的獲取方法沒有一點文件,但是當打包后部署,總是出錯。于是參考網上文章,先將文件讀出來到項目的臨時目錄下,然后再按正常方式加載該臨時文件; 還有一個問題至今沒有解決,就是關于生成PDF文件...